Listen
Every listening event starts the same way. You pick how you want to build it, give it a name, and save it. From there your event waits as a draft, and you can build the rest now or later.
This article covers Point-In-Time and Lifecycle events. You can start from a Perceptyx template, copy an event you already have, or start with a blank page. Whichever you pick, you end up on the Overview page, and filling that in is what actually creates your event.
Building a Crowdsource event instead? Those have their own steps in Create a New Listening Event | Crowdsource.
Who can create what
Administrators and Creators can both create Point-In-Time events. Only Administrators can create Lifecycle events, so if you are a Creator you will not see Lifecycle as an option.
This article walks through
Access the Event Builder
You start every new event from the Listen page. Before the Event Builder opens, the platform asks you three quick questions: what you are trying to improve, what type of event you want, and how you want to build it.
- In the navigation bar, click Listen.
- Click Create New Listening Event in the top right. The Business and Talent Priority page opens.
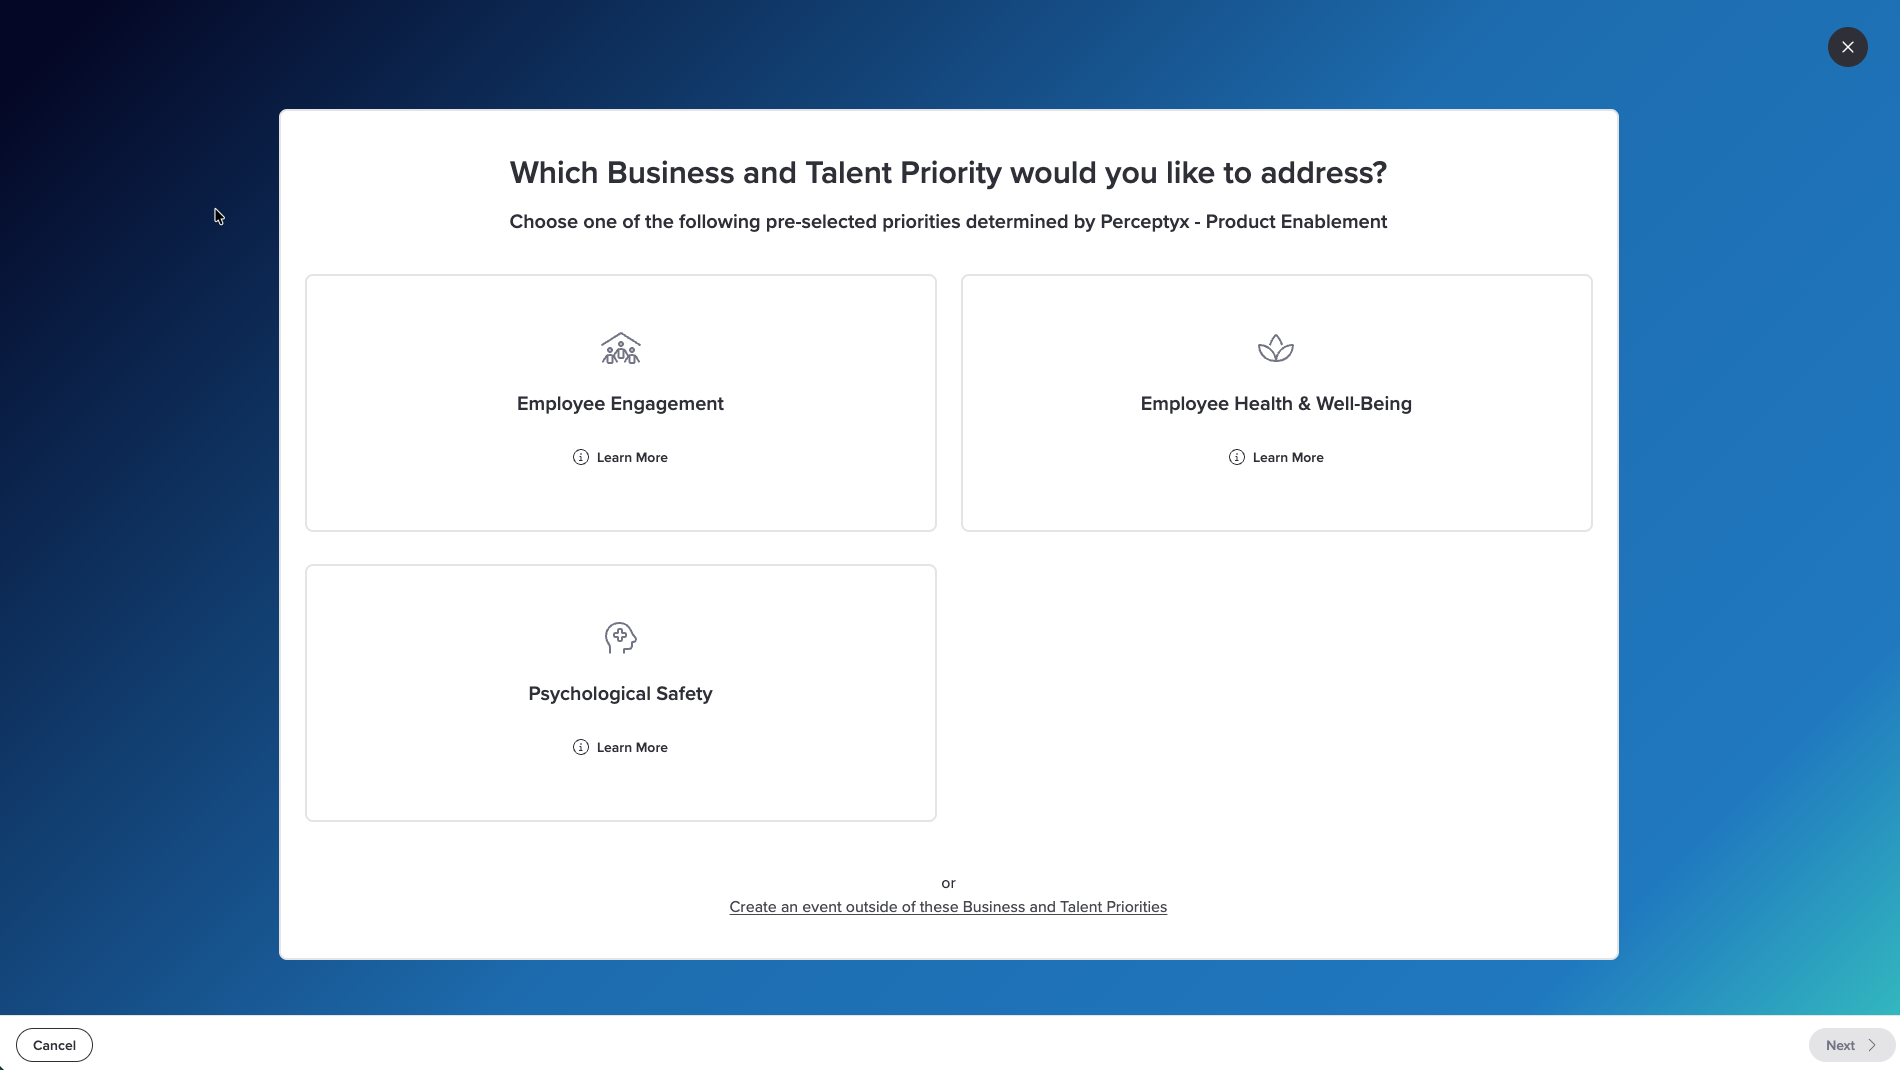
- Click the priority you want this event to focus on, then click Next. If none of them fit, click Create an event outside of these Business and Talent Priorities at the bottom of the page instead. The Listening Type page opens.
- Click Point-In-Time or Lifecycle, then click Start Building in the bottom right. You only see the event types your organization has.
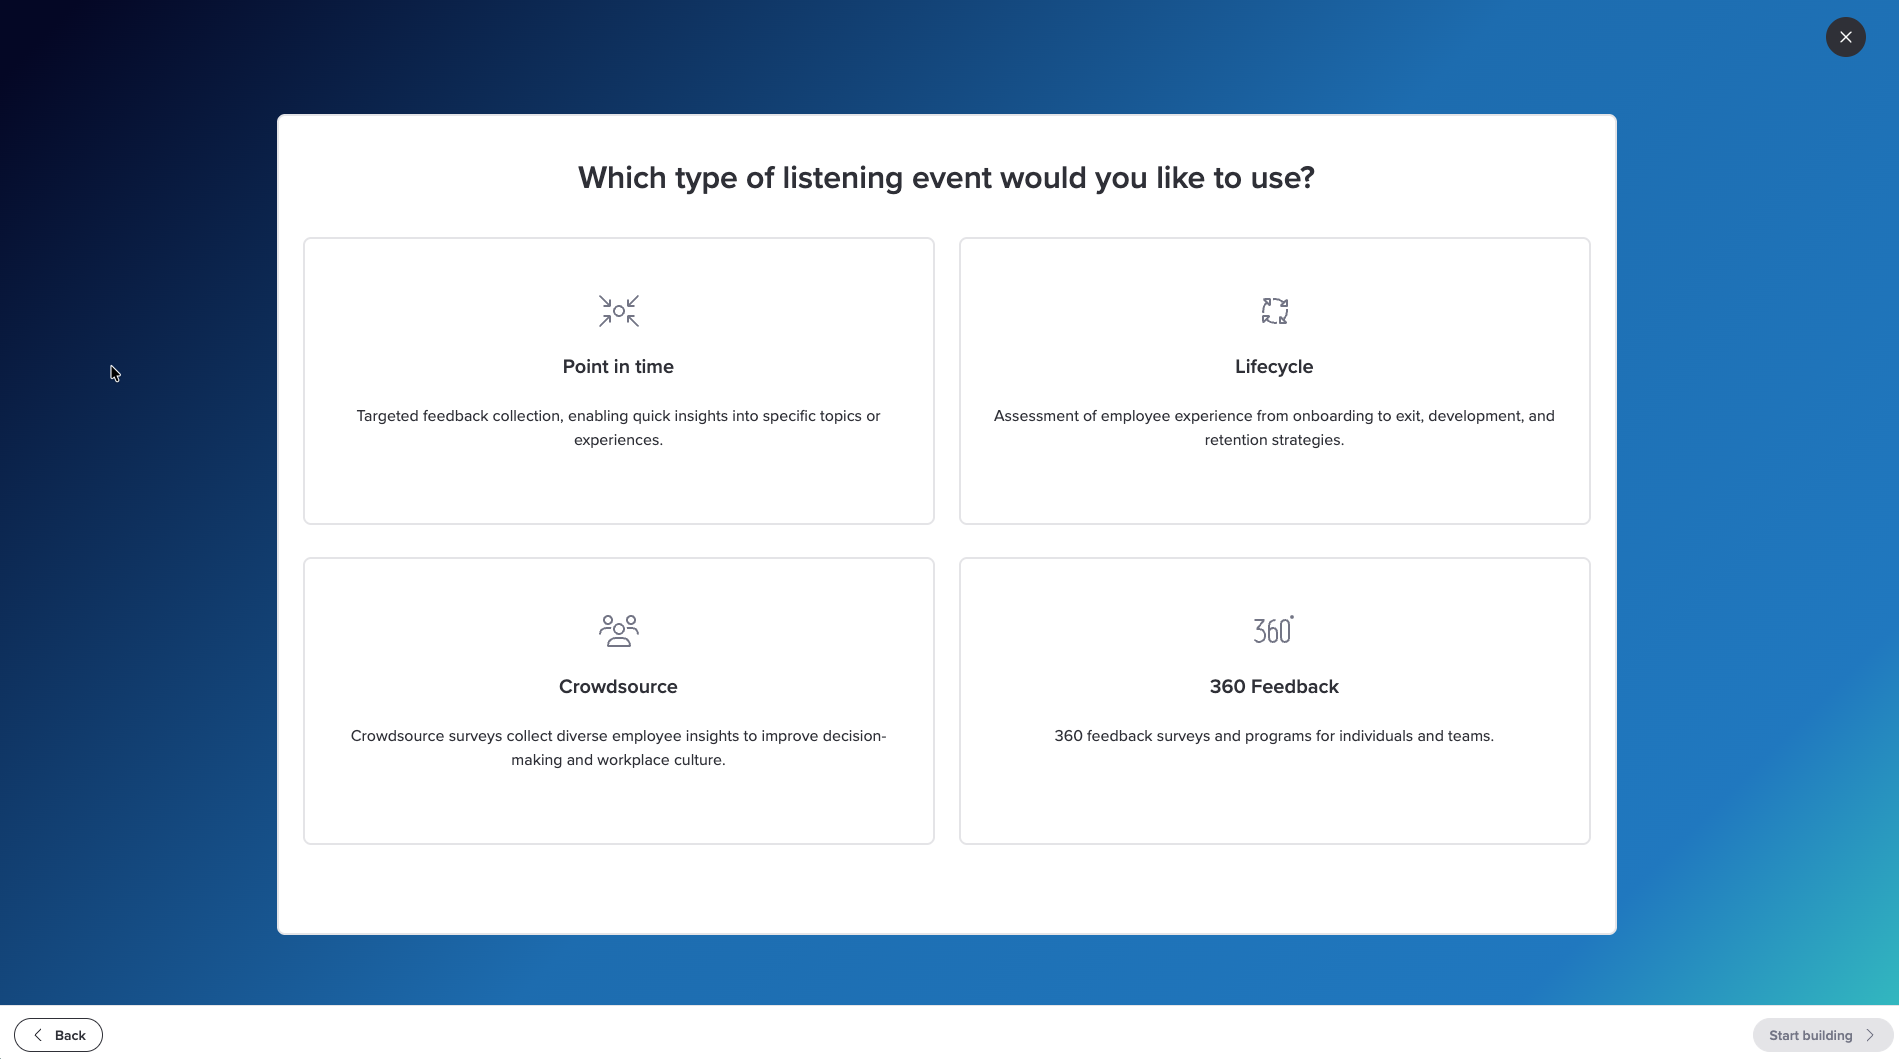
A window opens asking how you want to start.
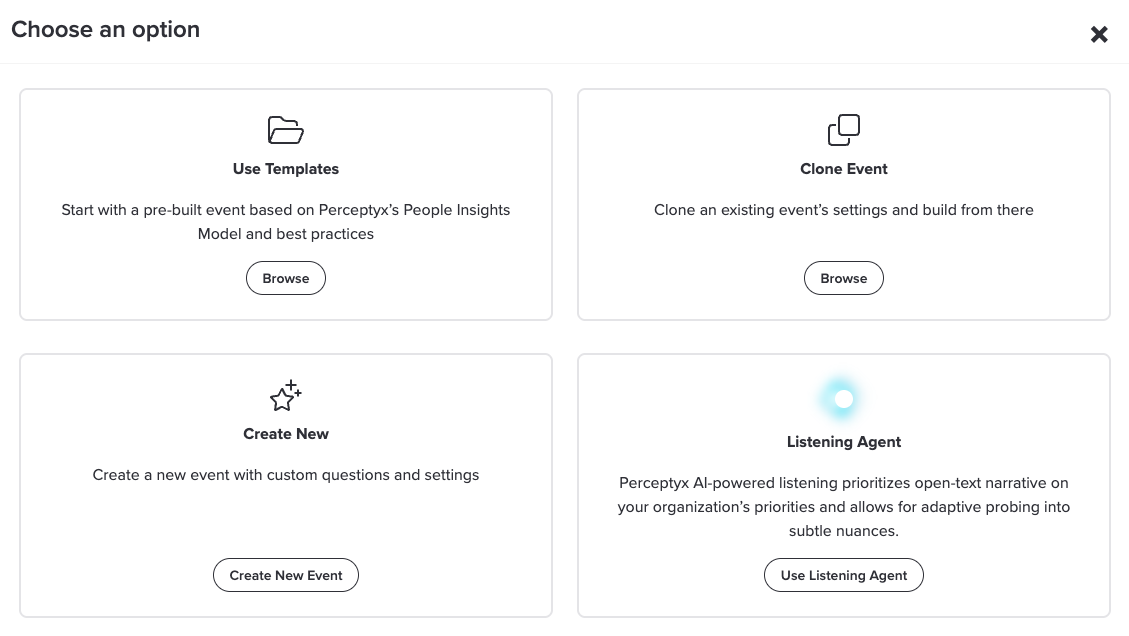
Pick how you want to start
- Use Templates. Start from a ready-made event with the questions and settings already in place. See Create an event from a template.
- Clone Event. Copy an event you already have and build from there. See Create a new event from an existing event.
- Create New. Start with a blank page and add your own questions and settings. See Create a new event from scratch.
- Listening Agent. A different kind of survey. Instead of a fixed list of questions, an AI agent holds an open-ended conversation with each participant about your organization's priorities and follows up on what they say. Listening Agent events are set up with help from Perceptyx, so they are not covered here. If you would like to run one, reach out to your Workforce Transformation Consultant.
Why the priority matters
The priority you pick decides which Perceptyx templates you see. If you want to browse every template, skip the priority step.
Create an Event from a Template
A template is the fastest way to get going. It comes with pages, questions, categories, response scales, and settings already set up, and you can change any of it once you reach the Content phase.
You will see two kinds of templates: ones Perceptyx provides, built on the Perceptyx People Insights Model and best practices, and ones your Administrator has created for your organization.
- Follow the steps in Access the Event Builder until the Choose an option window opens.
- On the Use Templates card, click Browse. A list of templates opens, filtered by the priority you picked.
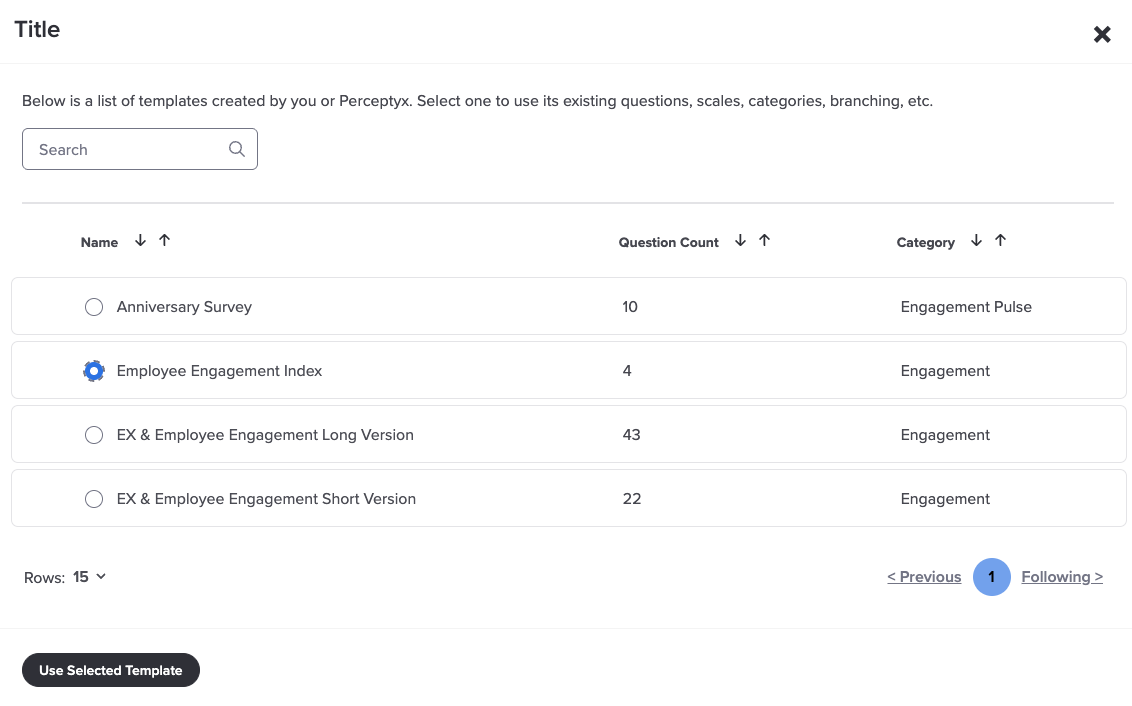
- Click the name of the template you want, or the radio button next to it, then click Use Selected Template in the bottom right. The Overview page opens.
- Fill in the Overview page. See Complete the Overview page.
Create a New Event from an Existing Event
Cloning makes a brand new event with the same settings, questions, and setup as one you already have. It is a good fit when you run the same survey every year, or when a past event is close to what you need. The original event is not changed.
You can clone self-led events, and Perceptyx-led events that are available to your organization in the list.
- Follow the steps in Access the Event Builder until the Choose an option window opens.
- On the Clone Event card, click Browse. A list of events you can clone opens.
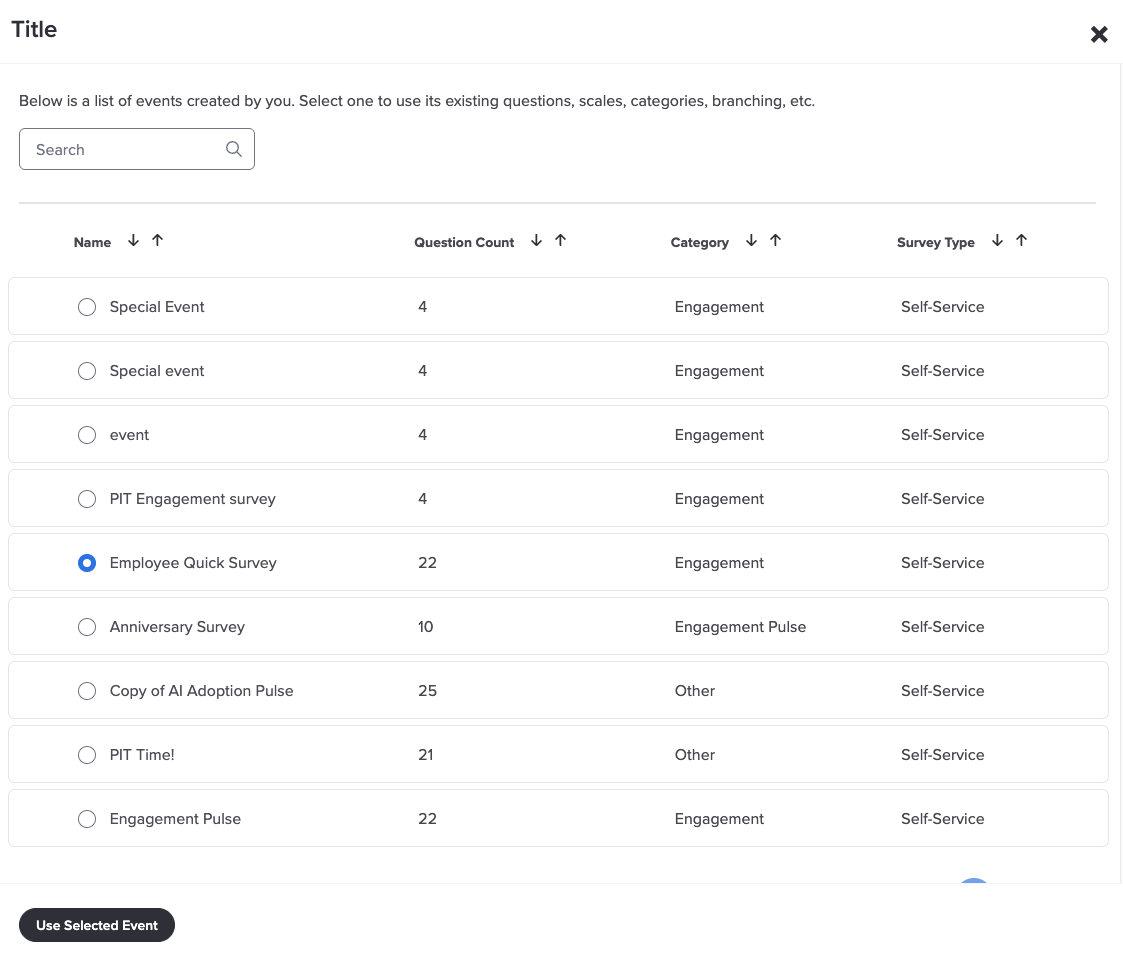
- Click the name of the event you want to copy, or the radio button next to it, then click Use Selected Event in the bottom right. The Overview page opens.
- Fill in the Overview page. See Complete the Overview page.
Create a New Event from Scratch
Starting from scratch gives you a completely blank event. There are no pages, questions, colors, or formatting yet. You add all of that in the phases that follow.
- Follow the steps in Access the Event Builder until the Choose an option window opens.
- On the Create New card, click Create New Event. The Overview page opens.
- Fill in the Overview page. See Complete the Overview page.
Complete the Overview Page
However you started, you end up here. Nothing is saved until you finish this page, so this is the step that actually creates your event.
At the top of the page you will see the priority and the template you picked, each with a Change button. Neither choice is locked in. If you picked the wrong template, you can swap it here or later without starting over.
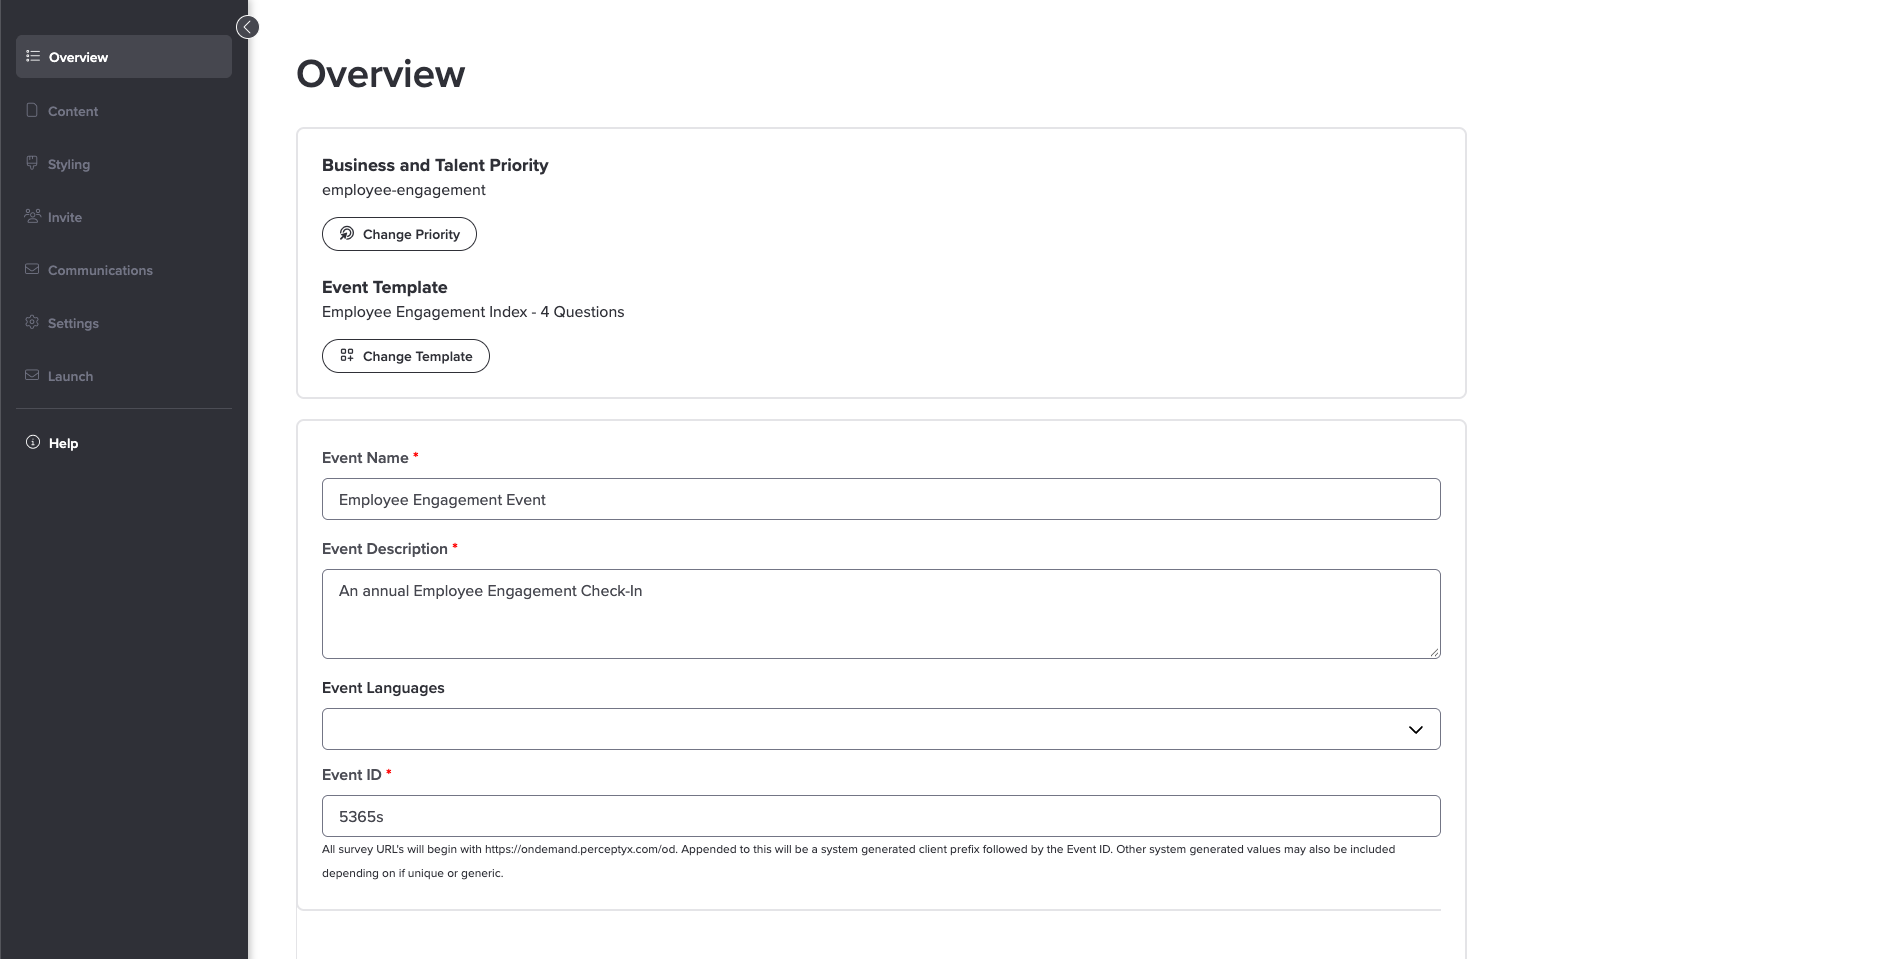
Fill in the fields
Fields marked with an asterisk (*) are required.
- Event Name*. The name of your event.
- Event Description*. Notes about the event for you and your team. Participants do not see this.
- Event Languages. English is already included. Only fill this in if you want your event available in other languages too.
- Event ID*. A unique name for your event that becomes part of its survey link. Read the note below before you fill this one in.
Choose your Event ID carefully
Your Event ID cannot be changed after the event is created, and it shows up in the survey link, so pick something short and clear.
It cannot contain uppercase letters, spaces, or special characters, and it has to be different from every other event your organization has. The platform also adds a short code for your organization to the front of it, and that code counts toward the 30 character limit, so you will have fewer than 30 characters to work with.
Create the event
- Click Next: Content in the bottom right. A confirmation message appears.
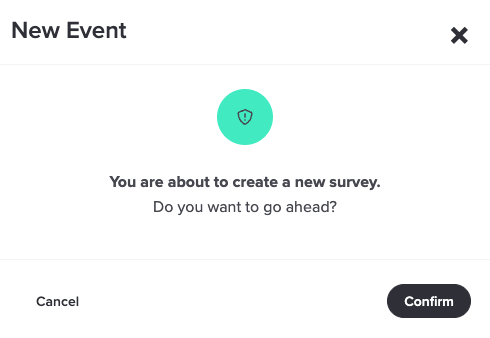
- Click Confirm.
That is it. Your event is created as a draft and the Content page opens. You can keep going, or click Save and Exit to come back later. Your new event will be waiting on the Listen page as a Draft.
What opens up next
Overview is the only phase available when you start. Now that your event exists, the rest of the Event Builder panel opens up as you work through it.
What's next
Your event is saved and ready for content. Enable and Customize Event Pages | Point-In-Time & Lifecycle picks up where this leaves off, with choosing which pages your survey includes.
Was this article helpful?
That’s Great!
Thank you for your feedback
Sorry! We couldn't be helpful
Thank you for your feedback
Feedback sent
We appreciate your effort and will try to fix the article