How To Guides – Users Editor Tool
Overview
Add Record – Click to create a new user record.
Edit Record – Click to edit an existing user record.
Clone Record – Click to create a copy of an existing record that can then be edited.
Delete Record – Click to permanently delete a user record, revoking their access.

Adding/Editing a User Record
Select Add Record or click the Edit button next to an existing record. Then, follow the instructions below to complete the user setup.
Personal Info Tab
Complete ALL required fields below as follows:
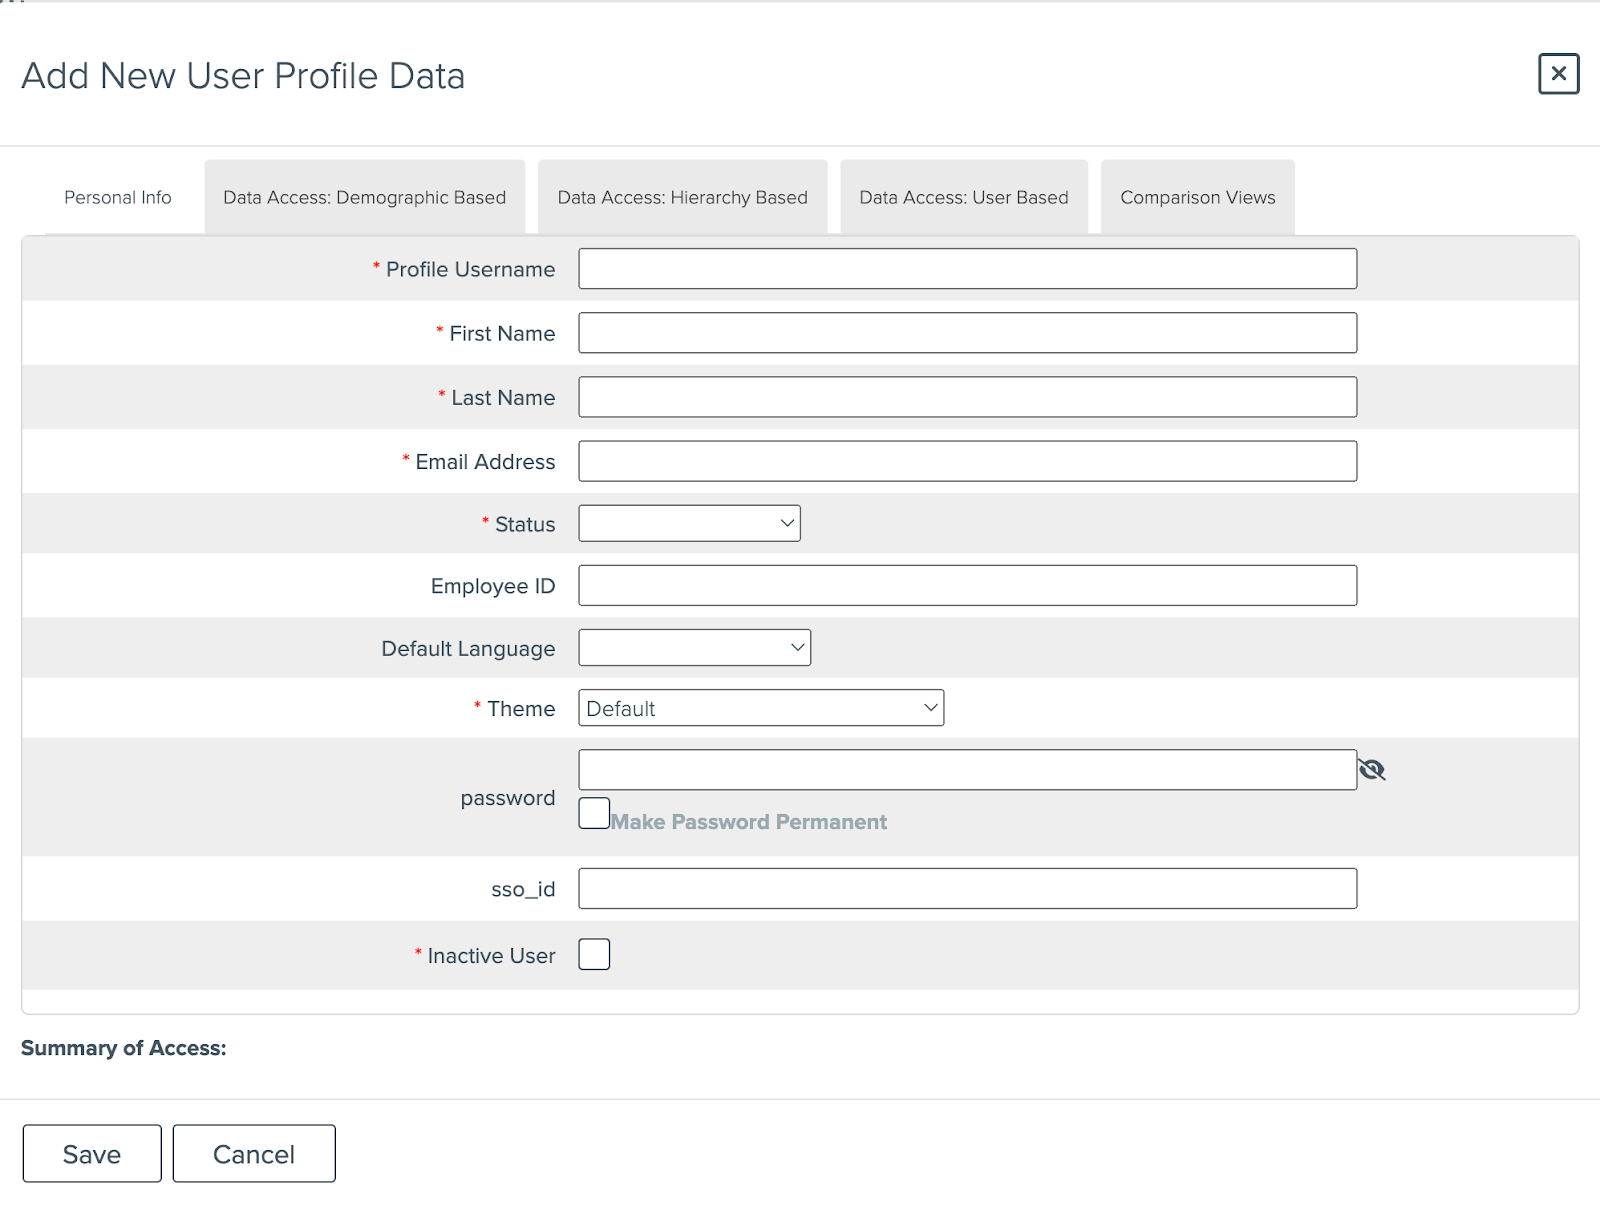
Profile Username: Typically, the initial of the first name and full last name is used for this field (e.g., tsmith)
Add First Name, Last Name, and Email Address.
Status: Select the relevant status from the drop down. Reference your Permissions Matrix for additional information about the status permissions.
Employee ID: Enter the emp ID here; this is required if using Listening Home to link your accounts.
SSO ID: If using SSO for this project, enter the employee ID or other unique identifier being used for SSO authentication.
Note: Each user should only have one user record with their SSO ID. So, if you have a user with a portal account, the portal account should be the only one with an SSO ID filled in.
Inactive user: If using Listening Home, set accounts to ‘Active’ upon creation by unchecking the box. If not using Listening Home, you can opt to leave users inactive until sending account access.
Once all fields are filled in appropriately, you can move to the next tabs to what data the user will be able to view.
Data Access Tabs
Data Access: Demographic Based
On this screen you are able to assign the users view based on your demographic data (eg. Region, Department, Job Title, Gender, Age, etc).
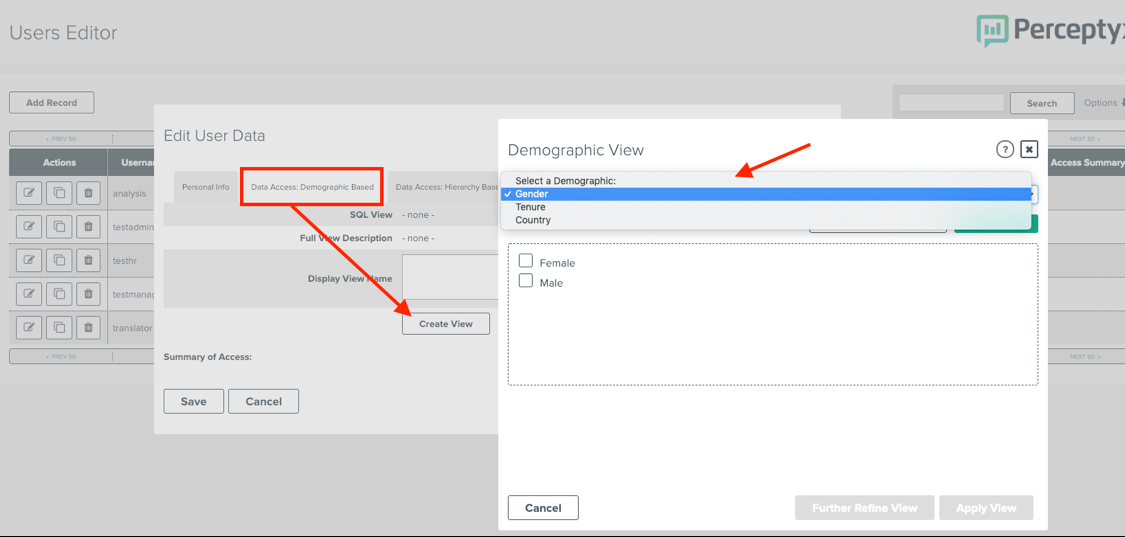
Click Create View. A new window will open.
Select the demographic from the dropdown menu.
Check the box of the value(s) in that demographic for which the user should have access.
If you need to further restrict the view using another demographic, select Further Refine View to continue defining the access.
Note: Using further refine review will create an ‘AND’ view; eg. Country = US AND Department = HR.
For an ‘OR’ view (eg. Country = US OR Department = HR) please reach out to Customer Support for assistance.
Once you have selected all demographic and demographic option(s) requested, click Apply View.
You will be taken back to the Data Access: Demographic Based tab. Here you can modify the Display View Name that appears to the user.
Click Save if you are finished defining the access.
Data Access: Hierarchy Based
On this screen you are able to assign filters based on the manager hierarchy.

In the Data Access box, type the name of the manager or enter their employee ID.
Select the manager(s) from the drop down that appears.
Click Save.
Data Access: User Based
On this screen you are able to grant access to other existing accounts. Upon logging in, the user will need to select which account they would like to view.
Note: In order to use this option, the user must be setup as a ‘Portal’ status on the Personal Info tab.
Type the managers name or enter their employee ID in the Summary of Access box.
Select the correct person(s) in the dropdown.
Click Save once all selections are made.

Comparison Views
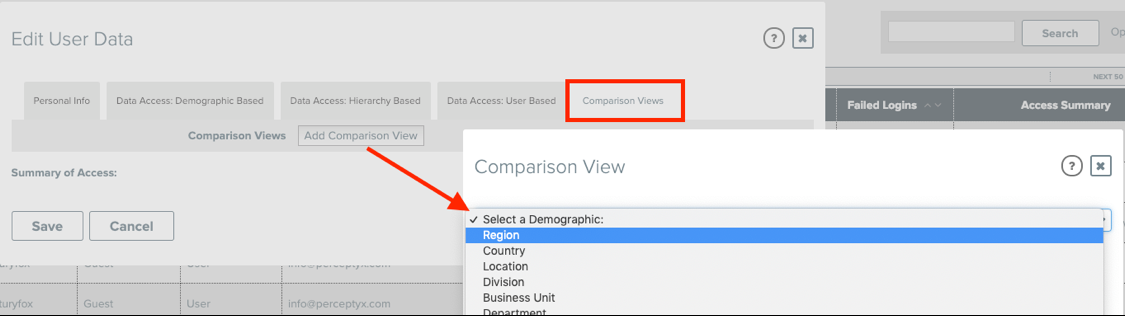
On this screen you can assign a comparison view which is used in the toolkit and report site to provide a user with the ability to view data outside of their view without the ability to filter within that data.
For example, if a manager should have access to a comparison view of the Region they are part of, you would select the Region demographic and then the option that is applicable.
Click Add Comparison View.
Select the Demographic from the drop down. You can Further Refine View to add additional demographic restrictions. Once finished, click Apply View.
Modify the Display Name as needed.
Repeat this process for each relevant comparison view needed.
Click Save.
How To Shadow Users
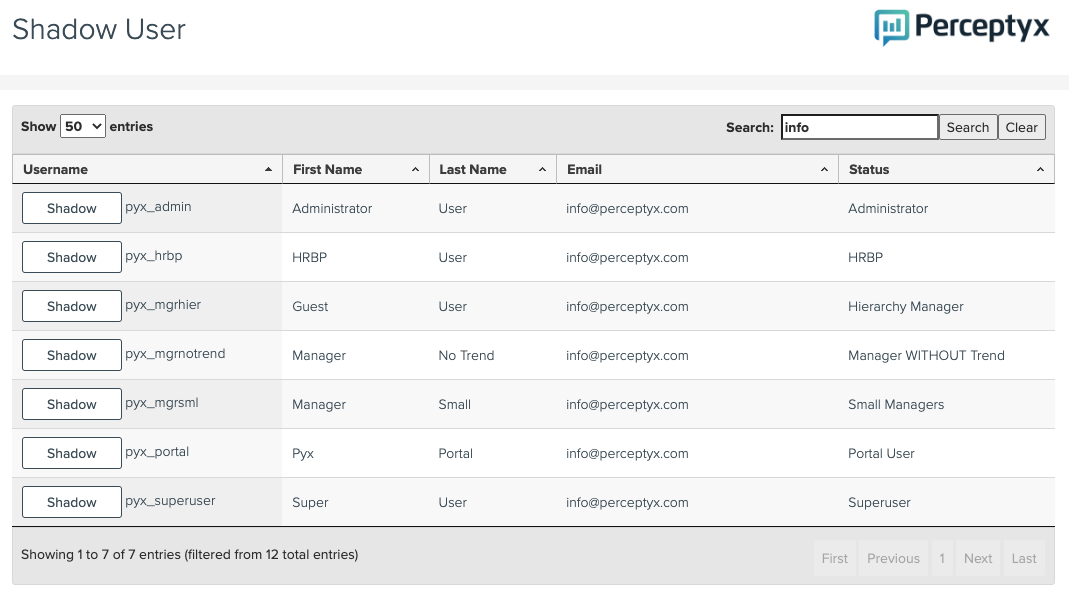
Once you have a user, you may shadow that user to verify they have been setup properly.
Select Shadow User under the Functions menu. You will see a list of all the users you have created to access the Reporting Site.
Click Shadow next to the username.
After clicking Shadow, you will be taken into the Reporting Site as that user; verify you are shadowing the correct user and that the reports/data are appearing as expected.
The top of the page gives the option to End the shadow session and return to your account.

Send User Access Email
If using Single Sign on, you can simply send the user the SSO link. Alternatively, if you need to send them their initial Listening Home access or Username/Password access for individual surveys follow the instructions below to send an email via the Users Editor Tool.
Select the Email button.
Choose the Email Template you wish to send.
The screen will display a basic text version of your email template. Verify that this is correct.
Check the box for Activate Inactive Users, otherwise any inactive accounts will not be included in the email send.

Once you have verified everything is correct select the Send button.
A pop-up will appear to confirm you want to send Email Notifications, click OK.
A second pop-up will appear giving a summary of the actions performed, click OK.
After both pop-ups are confirmed you will be brought back to the Users Editor Tool.


Bottom of Form
Was this article helpful?
That’s Great!
Thank you for your feedback
Sorry! We couldn't be helpful
Thank you for your feedback
Feedback sent
We appreciate your effort and will try to fix the article