After you create your event and complete the Overview and Content information, you enter the Styling phase where you can style your event. You can customize the event colors, text formatting, page layout, and images. Your styling choices apply to the entire event.
This article walks through:

Access the Styling Settings
Navigate to the Styling phase for the event you want to style.
From within the Event Builder:
Click Styling in the left panel.
From Listen:
In the Live Events section or the All Events section, click Manage Event for the event you want to work with.
The Event Builder opens, displaying the Overview page.
In the left panel, click Styling.
The Styling page appears.


Colors
You can use the Colors settings to modify colors for several elements of your event. Choose a color from the color box, a color slider, or use the eye dropper to click a color you want to use. You can also type in an RGB value, an HSL value, or a hex number if you have specific colors for your brand. Hover over the information (i) icon to see a description of each color option.

Change Color Settings
In the Color section, click a color to display the color settings options.
Specify a new color for each event element you want to change.
Color Box
Click the circle in the top-right corner of the color box and drag it to find the color you want.Eye Dropper
Click the eye dropper icon and then click on a color anywhere on your desktop or an open application or document.
Color Slider
Drag the circle in the color slider to change the color.
RGB Values
Type the RGB values in the number boxes.
HSL Values
Click the up or down arrow in the RGB section to display the HSL option, then type the HSL values in the number boxes.
Hex Number
Click the up or down arrow in the RGB section twice to display the HEX option. Double-click the current hex number and then type a new hex number. Make sure to precede the hex number with the pound symbol (#).
Note: Your changes are saved automatically.

Text Formatting
The Text Formatting settings specify the font for your event header. Currently, only the Proxima Nova font is available, and is set for your event. More font options will be available in future updates.


Page Layout
The Page Layout settings specify content alignment, display orientation (landscape or portrait), and inclusion of progress indicators at the top of event pages.

Specify Content Alignment
The Content Alignment options determine the alignment of content on pages that do not contain questions (e.g., Welcome page, Thank You page).
In the Content Alignment section, select Left, Center, or Right.
Specify Layout (Orientation)
The Layout options specify whether questions display on screen in a landscape or portrait orientation. The Landscape option displays multiple questions per page, in a horizontal format. Landscape is the default setting.

The Portrait option displays one question per page, in a vertical format.

You can change the layout while your event is in draft status, but not after it is active.
In the Layout section, select Landscape or Portrait.
Specify Progress Indicators
You can use the Progress options to add either page numbers or a progress bar at the top of the event pages (but not both). You can also choose to not display a progress indicator.
In the Progress section, click Page Numbers, Progress Bar, or None.
Note: Your changes are saved automatically.

Images
You can use the Images settings to upload your own images for specific event pages. Hover over the Information (i) icon to see a description of each option.
Note: Perceptyx provides default images for several of the pages. You can use the default images or replace them with your own images.
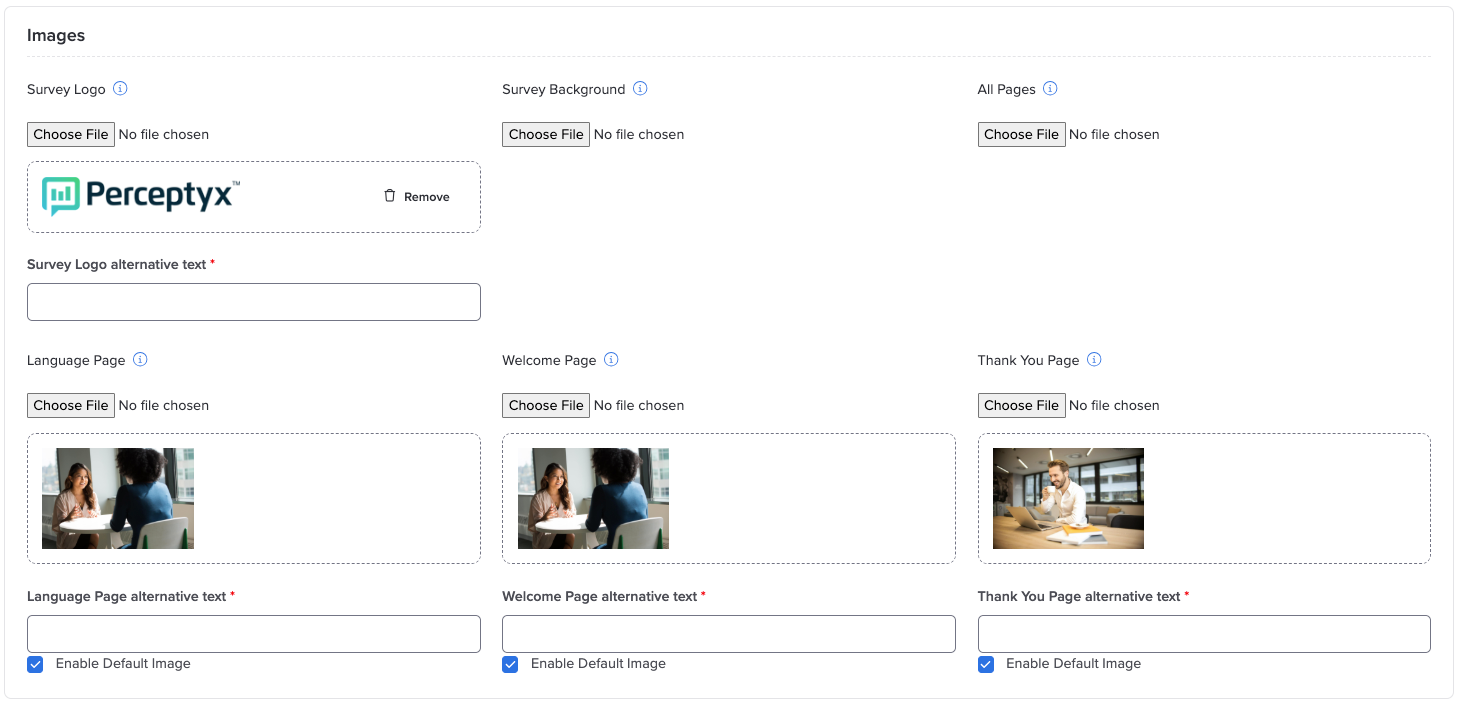
Change Image Settings
Click Choose File for an item or page, navigate to the image file, then double-click the file name to upload.
Note: Images can be no larger than 30MB and must be in .png or .jpg format.
If you want to specify alternative text, click the Alternative Text box, then type the text.
If you want to remove a default image, clear the Enable Default Image checkbox.
Note: Your changes are saved automatically.

Perceptyx Graphics Requirements
Perceptyx can handle many types of logos and images, and can generally work with your team to adjust as needed. To create the best experience, below are the optimal specifications.
Logos
Used for: Data collector, toolkit, reporting site.
Ideal size: 250 px (width) x 100 px (height)
File type: .png (preferred) or .jpg
Ensure image is built for print on the web
Survey Welcome Page, Language Page, and Thank you Page Image
Used for: Welcome page, Language page, and Thank You page
Ideal size: 1920 x 1080 pixels
File type: .png or .jpg
Ensure image is built for print on the web
Banners for Survey Invite and Reminder Emails
Ideal size: 650px (width) x 150px (height)
File type: .jpg (preferred)
Used for: Email headers
Was this article helpful?
That’s Great!
Thank you for your feedback
Sorry! We couldn't be helpful
Thank you for your feedback
Feedback sent
We appreciate your effort and will try to fix the article