The User Management page enables you to keep your user information up-to-date, and add, edit, and remove users. The User Management page displays a table with information and a gear icon for every user. You use the gear icon to edit, clone, delete, or send an invite to the user. You can use the Search box above the table to quickly find specific users or use the Filter By list to filter the table by active or inactive users. You can also add new users and export all the user information to an Excel file.
Note: Applications Settings is available only for customers with Program Builder (self-service).
This article walks through:
- Access User Management
- Search for a User
- Filter by Active or Inactive Users
- Add a New User
- Edit a User
- Clone a User
- Delete a User
- Send an Invitation Email to a User
- Export User Information
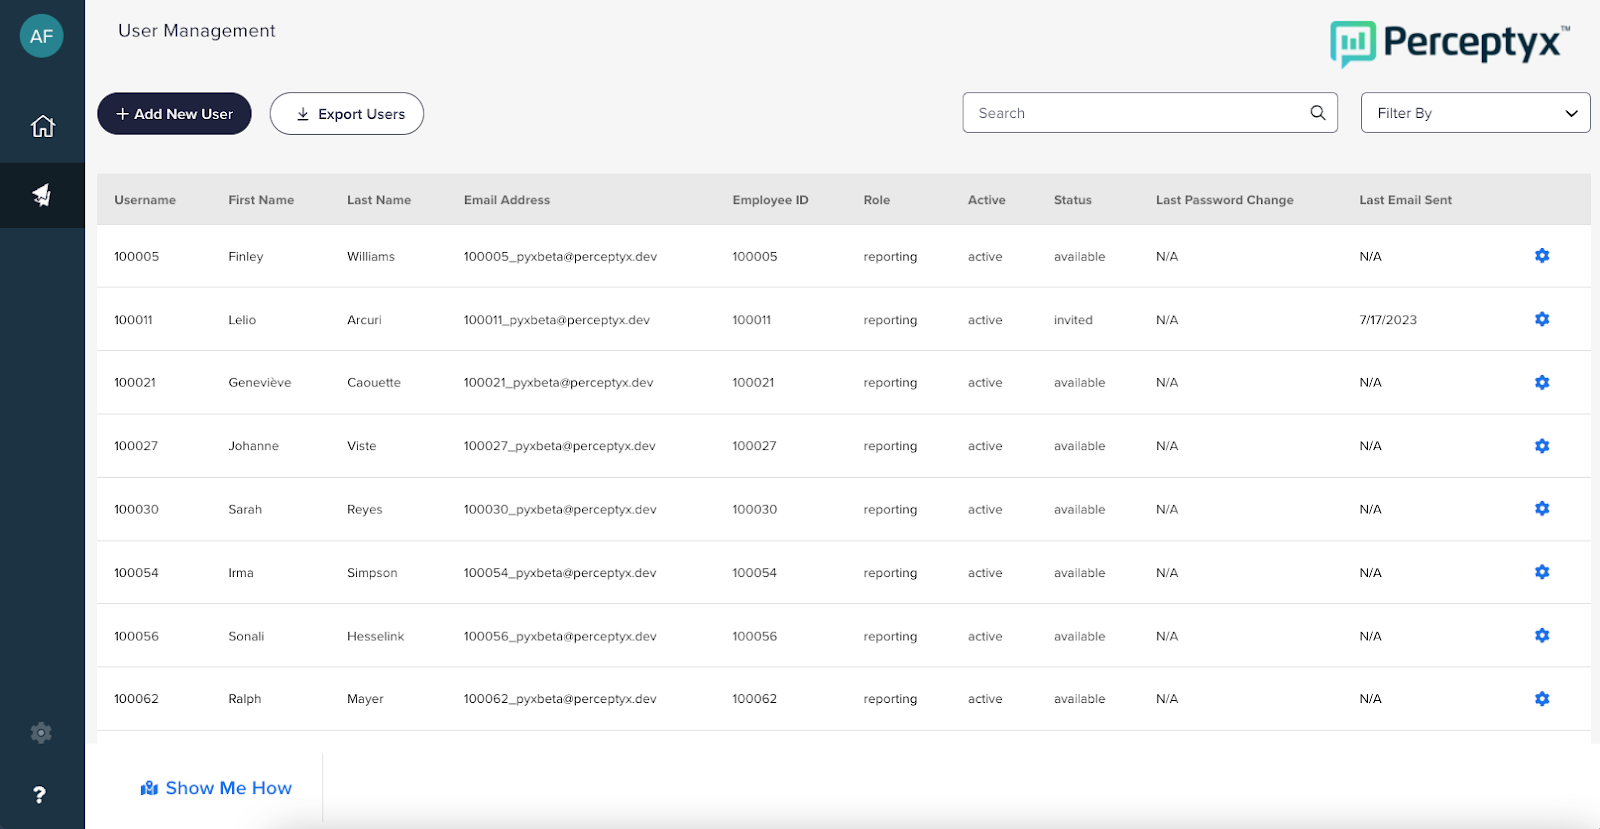

Access User Management
You can access the User Management from the gear icon in the left navigation of the Program Builder (self-service).
Navigate to the Program Builder.
Navigate to the Surveys page and select +Build New Survey.
The Program Builder Wizard displays. You must exit to access the Program Builder main navigation.
Select Exit.
Hover over the left-navigation bar and select Application Settings (gear icon) drop-down.
Select User Management.

Search for a User
Use the Search box to quickly find a specific user by username, first name, last name, email address, or employee ID. As you type your search criteria, the table dynamically updates to display matching user records.
Click the Search box.
Type your search criteria.
If you want to clear the search criteria, click x in the Search box.

Filter by Active or Inactive Users
Click the Filter By list.
Select Inactive or Active.

Add a New User
You can add Admin and Creator users up to your contracted limit and add an unlimited number of Reporting users.
Click + Add New User.
The Add New User dialog box appears.

Complete all the fields, then click Save.
If the user is a Reporting user, also complete the following steps:
Use the Search box to find the record for the user.
Click the gear icon for the user, then select Edit User.
The Edit User dialog box appears.
Click the Application Access tab.
The Application Access tab appears, displaying a list of all available surveys.
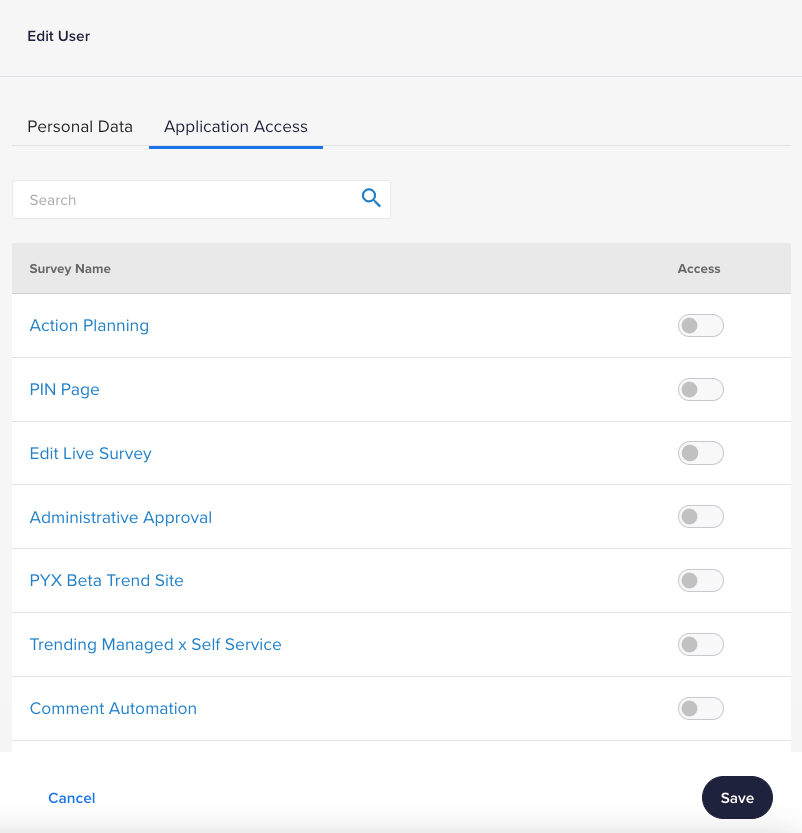
Toggle on the Access option for each survey for which the user will have reporting access.
Click Save.
If you want to send the new user an email invitation with their login credentials, click the gear icon for the user, then select Send Invite.
When the confirmation message appears, click Confirm.

Edit a User
Click the gear icon for the user you want to manage, then select Edit User.
The Edit User dialog box appears.
Edit fields as necessary.
If applicable, click the Application Access tab, then toggle the Access option on or off for surveys as appropriate.
Click Save.

Clone a User
Click the gear icon for the user you wish to manage, then select Clone.
The Clone User dialog box appears.
Click Save.

Delete a User
Click the gear icon for the user you want to manage, then select Delete.
A confirmation box appears.
Click Confirm.

Send an Invitation Email to a User
Click the gear icon for the user you wish to manage, then select Send Invite.
A confirmation box appears.
Click Confirm.

Export User Information
Click Export Users (upper left).
Was this article helpful?
That’s Great!
Thank you for your feedback
Sorry! We couldn't be helpful
Thank you for your feedback
Feedback sent
We appreciate your effort and will try to fix the article