Campaigns help you proactively deliver targeted Intelligent Nudges that support business initiatives such as leadership development, change management, well-being, or AI adoption. Unlike event-driven nudges, campaigns can be launched for any audience at any time, giving you flexibility to reinforce the behaviors that matter most to your organization.
Note: Campaigns replace Nudge Boosts and provide a more flexible way to deliver targeted nudges. Instead of selecting from a predefined set of boost topics, you can create campaigns for any business initiative and target them to specific employee populations.
A campaign combines three elements:
Audience: The employees who receive the nudges
Nudge content: Perceptyx research-backed nudges, your organization's custom nudges, or both
Campaign context: Optional resources and messaging that help recipients understand why they are receiving the nudges
Once launched, campaigns deliver nudges throughout the scheduled campaign period. You can launch a campaign immediately, schedule it to start later, or save it as a draft and return to it when you're ready.
Want to know more about designing campaigns? Check out Designing Campaigns that Change Behavior.
This article walks through:

How Campaigns Fit into the Nudge Cycle
Campaigns do not increase the frequency of nudges. Instead, campaign nudges become part of the existing nudge rotation.
When a campaign is active, recipients receive nudges in the following cycle:
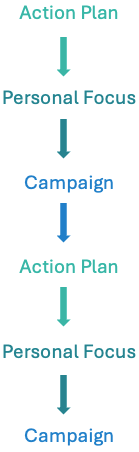
Campaign nudges replace organization behavior nudges in the rotation for the duration of the campaign.

Understand Campaign Content
Campaigns can include Perceptyx nudges, custom nudges, or both. The content source you choose depends on whether you want to use Perceptyx-curated content, your organization's custom nudges, or a combination of the two.
Perceptyx Nudges
Perceptyx nudges are organized by workplace behaviors backed by Perceptyx research. Rather than selecting individual nudges, you select the behaviors you want the campaign to reinforce. The platform then delivers nudges that support those behaviors throughout the campaign.
Use Perceptyx nudges when you want to quickly launch a campaign using curated, research-backed content.
Custom Nudges
Custom nudges are created in Nudge Generator and organized into reusable nudge sets.
When creating a campaign, you select the nudge sets you want to include. If you need to review or update a nudge set before launching the campaign, you can open it directly in Nudge Generator.
Combine Both Sources
A single campaign can include both Perceptyx nudges and custom nudge sets. This allows you to combine research-backed content with messaging tailored to your organization's goals.

Access Campaigns
You access the Campaigns feature from the Advanced Tools menu in the Act page.
To access Campaigns:
Log in to the Perceptyx Platform.
Navigate to the Act page.
Display the Advanced Tools dropdown, then select Campaigns to display the Campaigns screen.
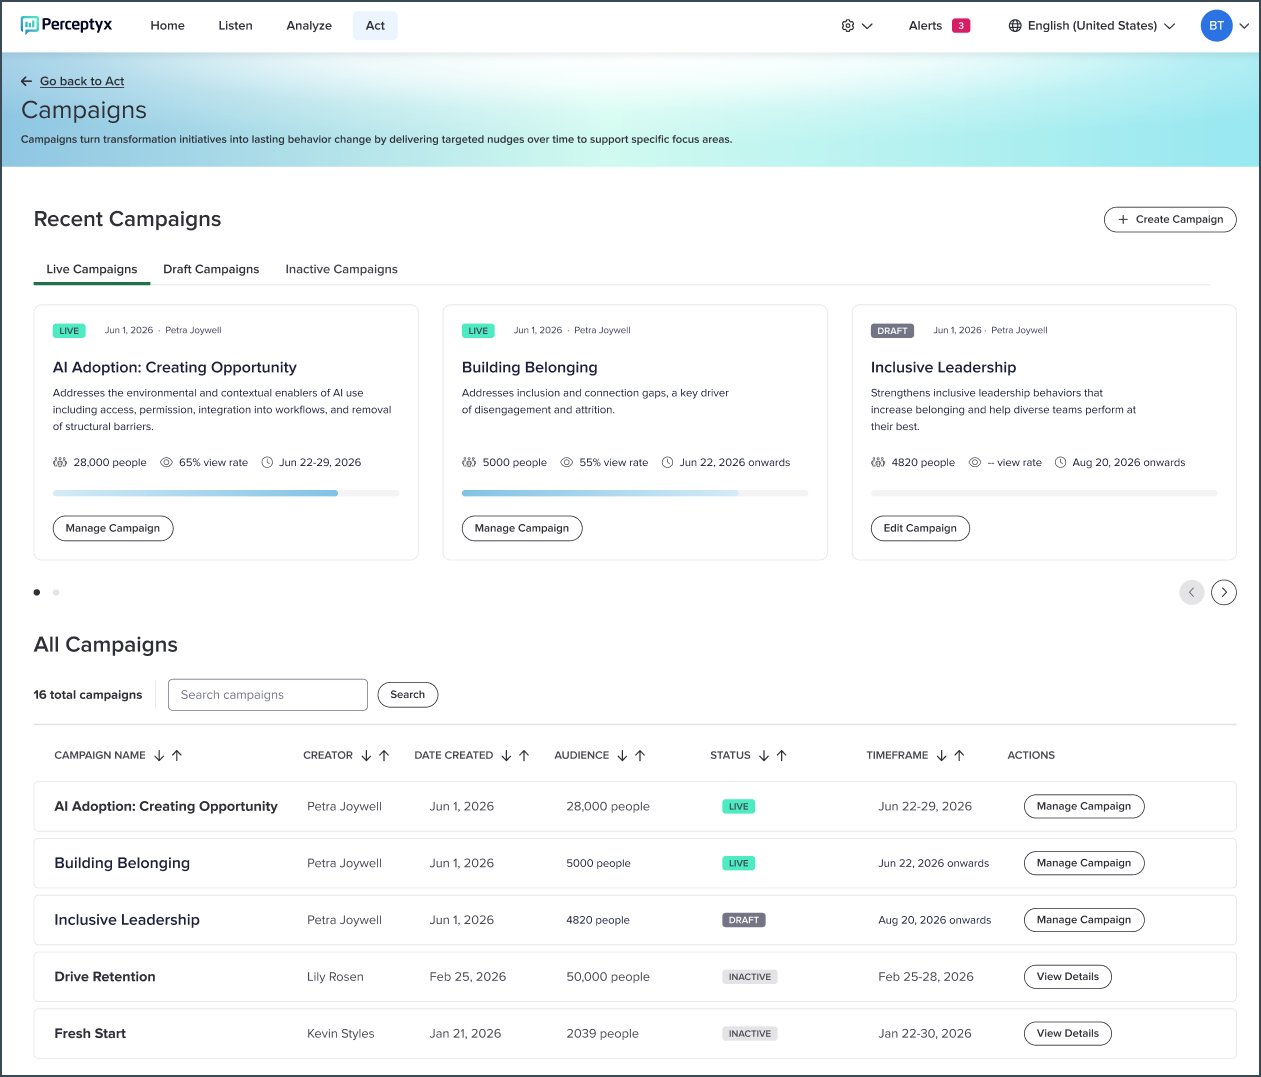
You can use the tabs in the Recent Campaigns section to exclusively view live, draft, and inactive campaigns. Use the All Campaigns section to view all campaigns or search for a specific campaign.

Create a Campaign
Creating a campaign consists of selecting a campaign type and completing a guided workflow. The following sections walk you through each part of the process.
Choose a Campaign Type
When you create a campaign, you can start with a blank campaign or use a customizable Perceptyx template. Templates can help you get started more quickly by providing a predefined campaign structure that you can modify as needed.
To choose a campaign type:
Click + Create Campaign (top right).
Click Create from Scratch or click a template in the Customizable Templates section.
Tip: You can click View Details for any template to view a summary before deciding if you want to use it.
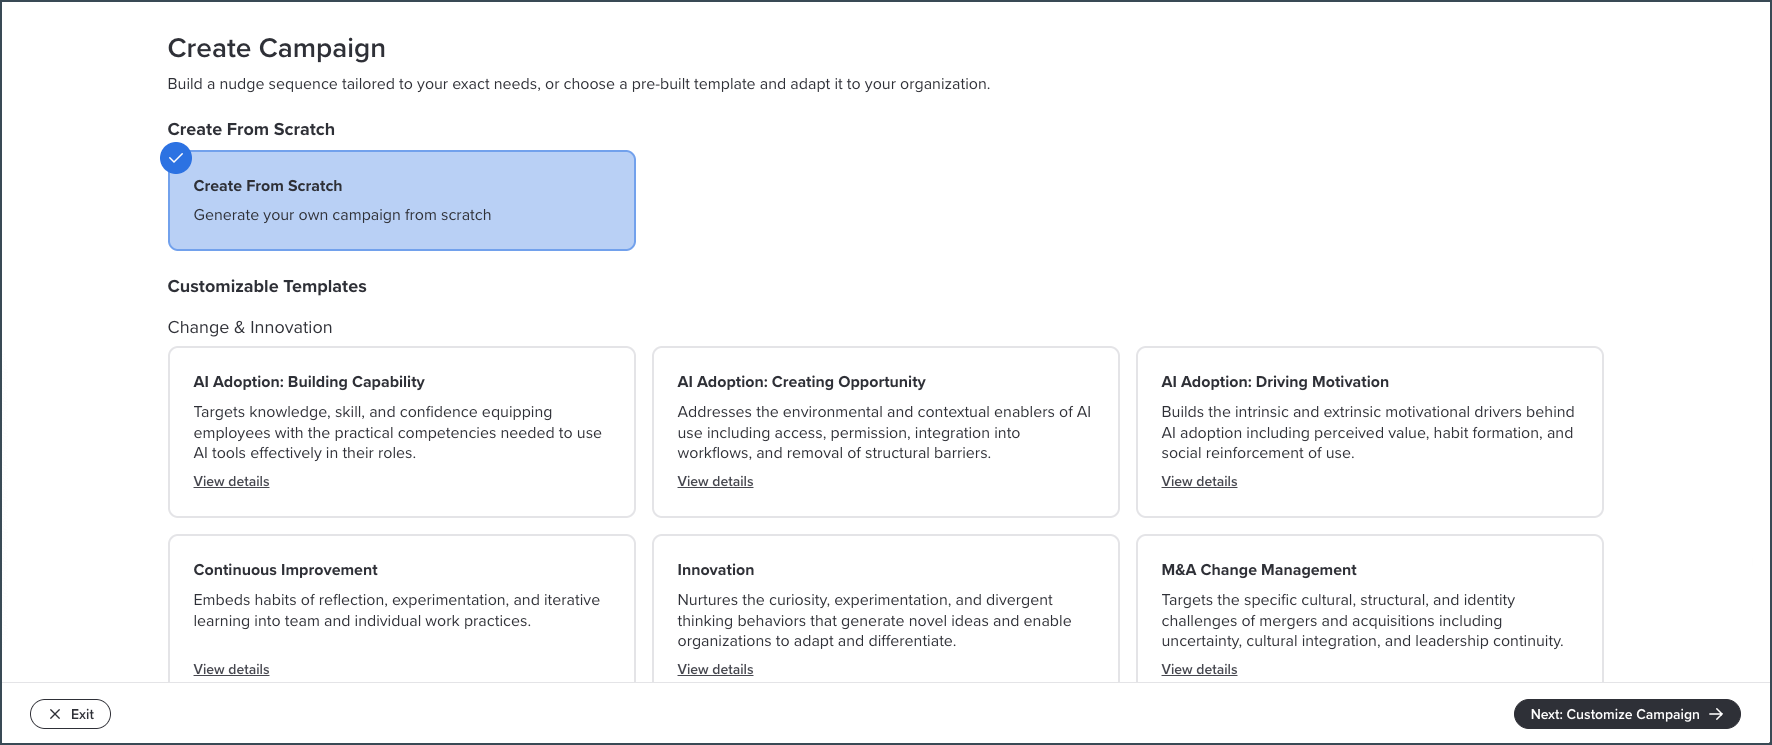
Click Next: Customize Campaign.
Define Campaign Details
After you choose a campaign type, you are prompted to provide basic information about the campaign and select the employees who should receive the nudges. By default, campaigns target everyone in your organization. However, you can use demographic filters to define the audience.
To define campaign details:
Type the campaign name and description.
Select the audience for the campaign (or skip this step if you want the campaign to apply to the entire organization):
Click Filters to display the Filters dialog box.
Click a demographic to display its options, select the applicable options, then click Save.
Repeat for additional demographics, if needed.
Click Apply Filters.
Specify the campaign start date and optionally specify an end date.
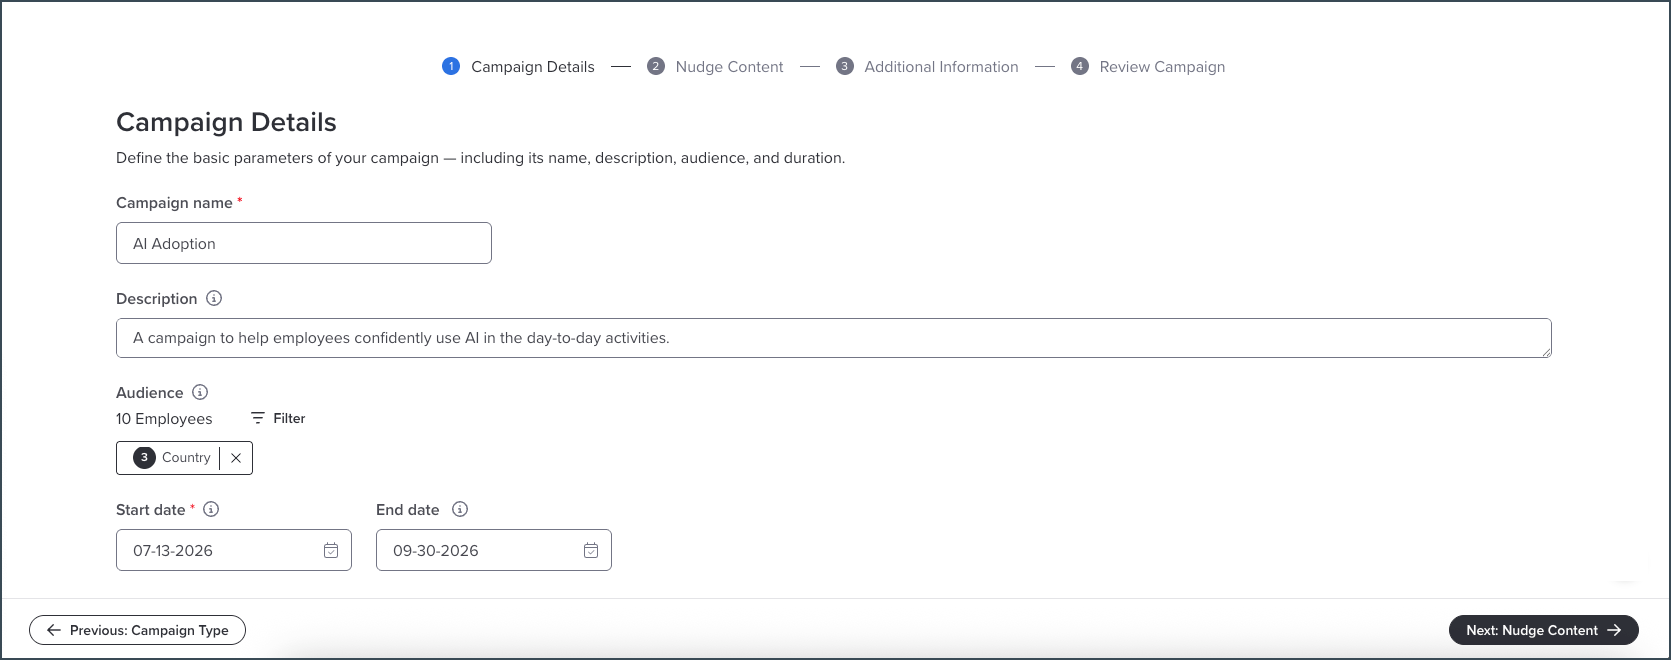
Click Next: Nudge Content.
Choose Nudge Content
Campaigns can include Perceptyx nudges, custom nudges, or both. You use the Nudge Content screen to choose your nudge source(s).
If using custom nudges, you select from nudges you have created in Nudge Generator. If using Perceptyx nudges, you select specific behaviors from the Perceptyx Nudge Library.
To choose nudge content:
Select My Custom Nudges, Perceptyx Nudges, or both.
If using custom nudges:
Select one or more nudge sets.
Optionally click View Nudges to review a nudge set in Nudge Generator.
Note: Nudge Generator opens in a separate browser tab. From there, you can review published nudges, edit existing content, generate additional nudges, or continue working with draft nudges. For more information, see Creating Nudges with Nudge Generator.
If using Perceptyx nudges, click a behavior category to display its individual behaviors, then select the ones you want the campaign to reinforce.
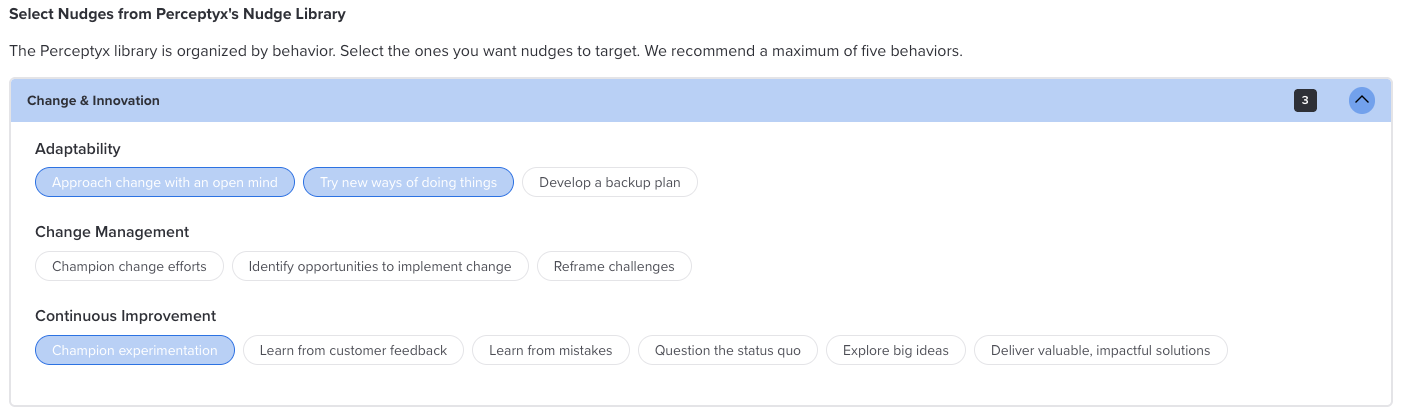
Click Next: Additional Information.
Include Additional Information for Campaign Context
To provide campaign context, you can optionally add a link and link name for a related resource (such as learning guides, internal documentation, etc.) and a nudge context phrase that answers the Why this nudge? component of each nudge. This information helps recipients understand why they are receiving the nudges and where they can learn more.
To add campaign context:
If adding a resource link, enter the URL and display name for the link.
To add nudge context, enter a brief phrase in the Nudge Context box.
Add translations, if needed:
Click Manage Translations, then scroll down to the language you want to use.
Enter the translated text, then click Save.
Note: If a translation is not provided for a recipient's language, the campaign context is not displayed.
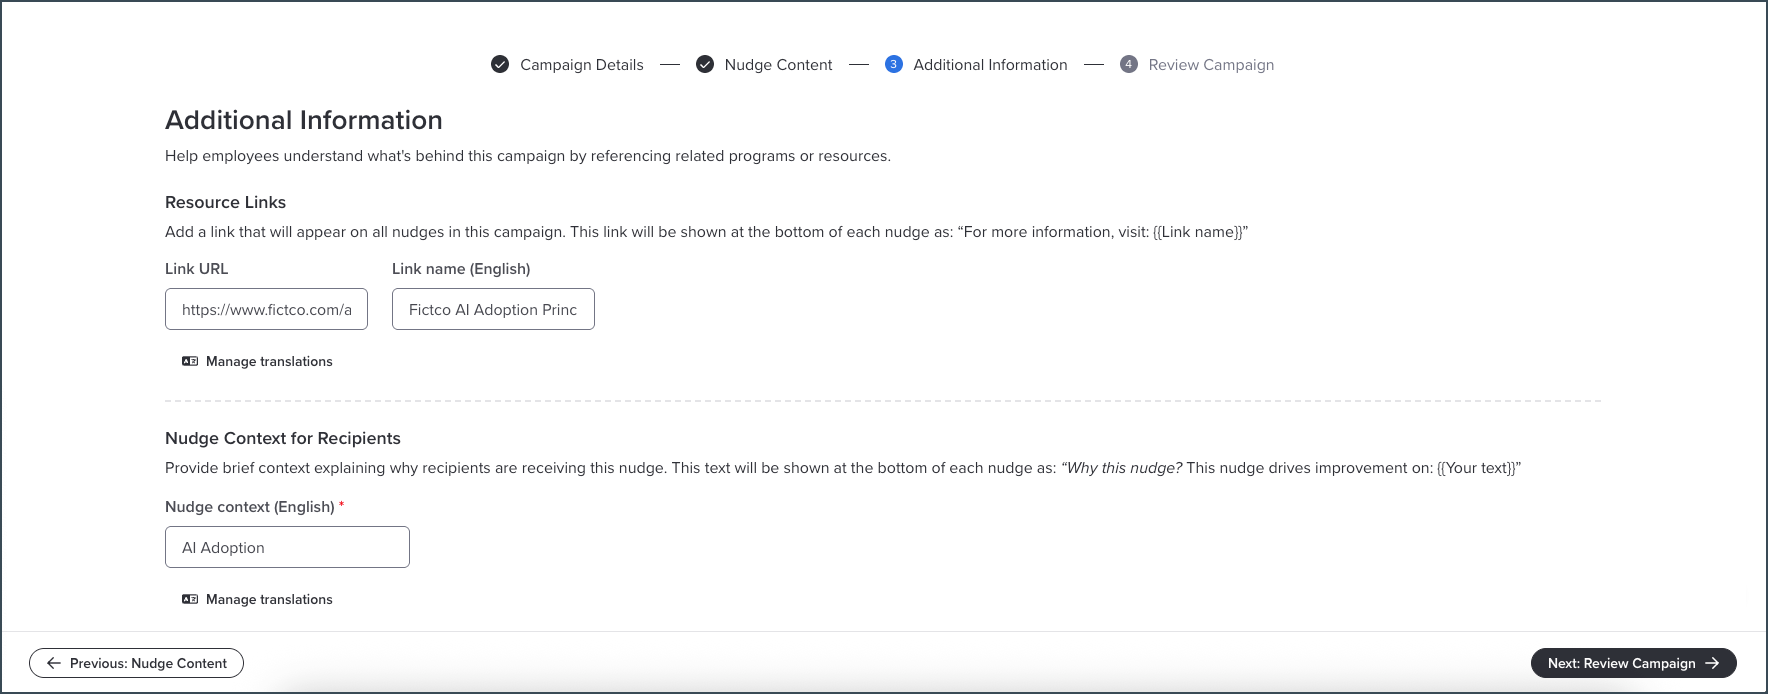
Click Next: Review Campaign.
Review and Launch the Campaign
The Review Campaign screen allows you to confirm everything is correct prior to campaign launch.
To launch a campaign:
Review:
Campaign details
Audience
Nudge content
Sample nudge
Click Launch Campaign.
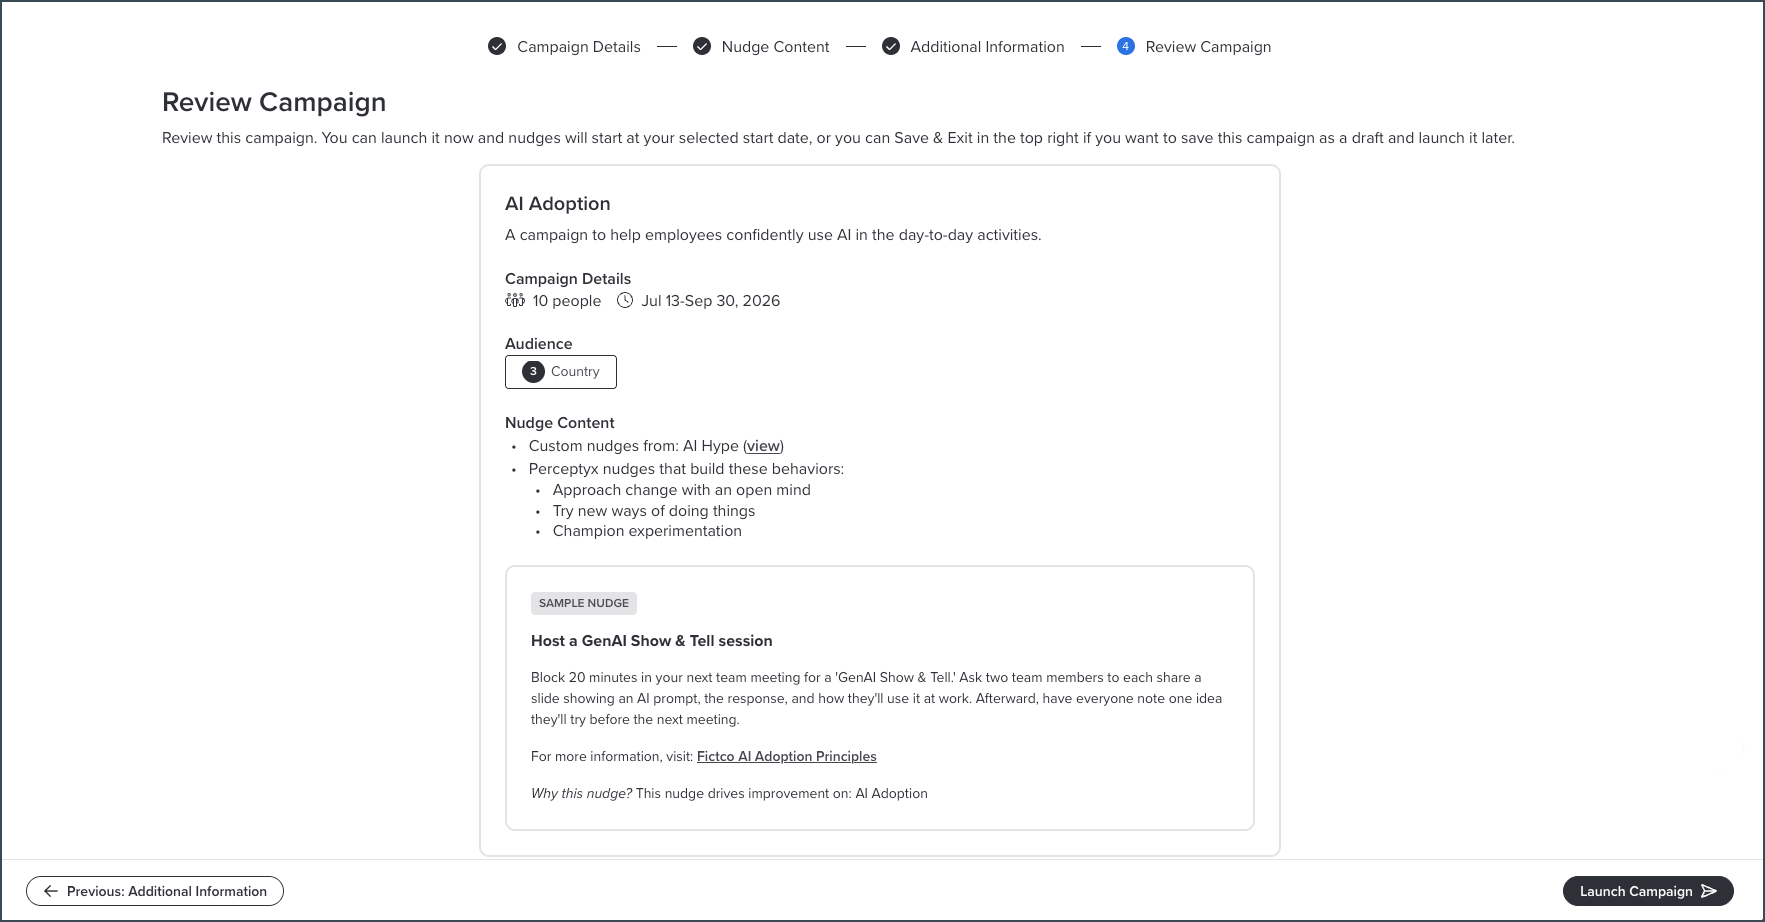
Note: If you’re not ready to launch yet, click Save & Exit (top right) instead of Launch Campaign. The campaign is saved as a draft and you can edit it before launch.

Manage Campaigns
The Campaigns screen displays all campaigns and organizes them by status.
Draft Campaigns
Draft campaigns have not been launched. From a draft campaign, you can:
Modify all aspects of the campaign
Launch the campaign
Delete the campaign
To manage a draft campaign:
Navigate to the Campaigns screen, then click Edit Campaign for the draft you want to modify.
Use the Previous and Next buttons to navigate through the workflow, then make your changes.
Save again in draft mode or launch the campaign.
To delete a draft campaign, click Edit Campaign, click Delete Campaign (top right), then click Delete Campaign in the confirmation popup.
Live Campaigns
Live campaigns are actively delivering nudges. From a live campaign, you can:
Update the campaign name or description
Edit campaign context
Stop the campaign
Delete the campaign
To manage a live campaign:
Navigate to the Campaigns screen, then click Manage Campaign for the campaign you want to manage.
The Manage Campaign dialog box appears.
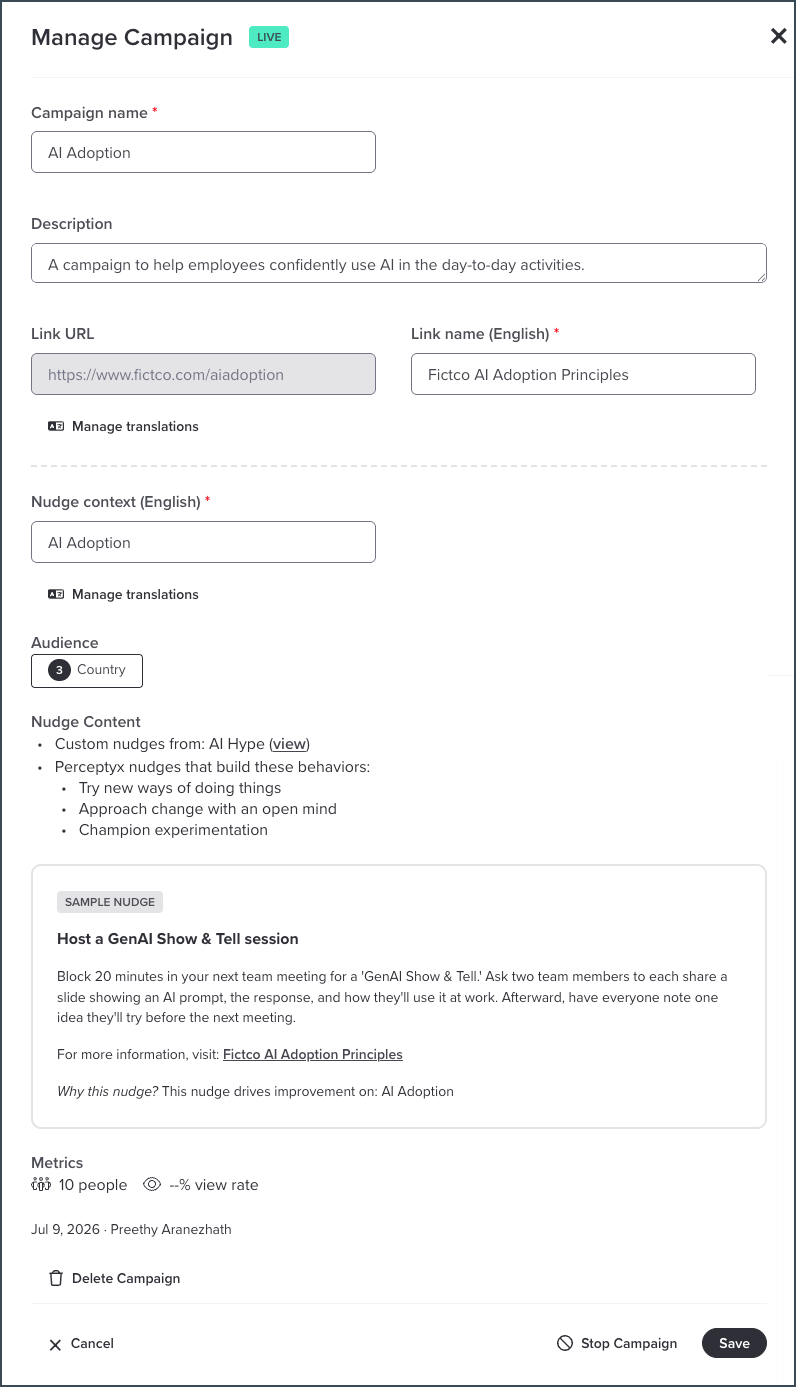
Make any changes to the name, description, or nudge context directly in the dialog box, then click Save.
To stop a live campaign, click Manage Campaign to display the dialog box, click Stop Campaign, then click Stop Campaign in the confirmation popup.
To delete a live campaign, click Manage Campaign to display the dialog box, click Delete Campaign, then click Delete Campaign in the confirmation popup.
Inactive Campaigns
Inactive campaigns have ended and are available for reference. You can also delete inactive campaigns.
To manage an inactive campaign:
Navigate to the Campaigns screen.
Click View Details for the inactive campaign you want to view.
The Manage Campaign dialog box appears with all the campaign details, but with all fields locked down.
To delete an inactive campaign, click Manage Campaign to display the Manage Campaign dialog box, click Delete Campaign, then click Delete Campaign in the confirmation popup.
Was this article helpful?
That’s Great!
Thank you for your feedback
Sorry! We couldn't be helpful
Thank you for your feedback
Feedback sent
We appreciate your effort and will try to fix the article