Listen
Your event is live, but your list of participants can still change. This is where you keep it up to date.
Things change after an event goes live. Someone changes their name or email address, someone leaves the company, someone asks to go back and edit their answers, or a batch of new people needs to be included. All of that is handled from the Invitees tab in the Launch phase.
This article walks through
Review and manage your participants
The Invitees tab lists everyone invited to your event. For each person you can see their details, where their record came from, the date their invitation email was sent, and their access code.
A few things you can do from the top of the tab:
- Click Refresh List to see the latest information. The tab does not update on its own.
- Download the list as an Excel file if you want to work with it outside the platform.
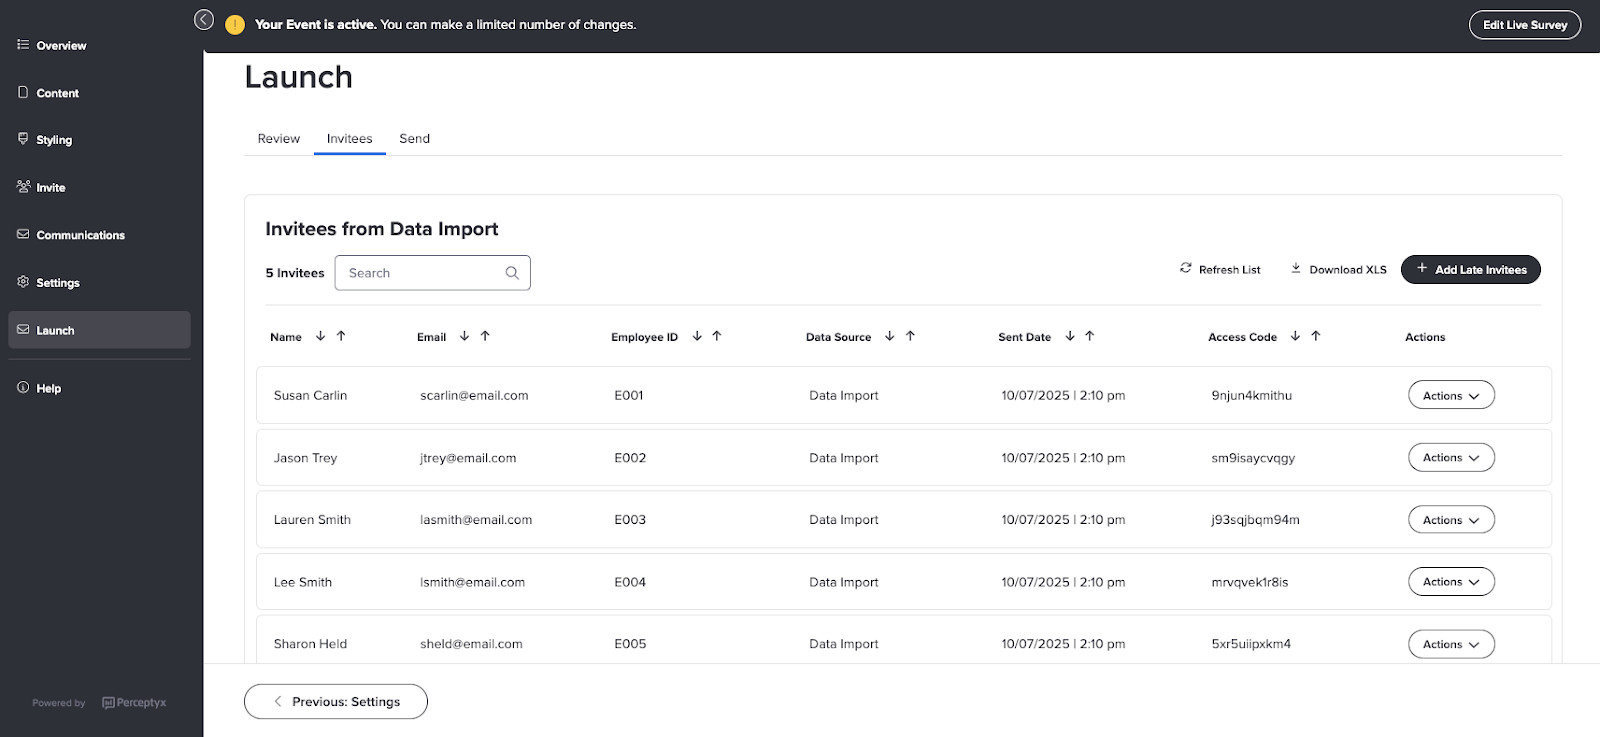
Get to the Invitees tab
From within the Event Builder
- Click Launch in the left panel.
From Listen
- In the Live Events section or the All Events section, click Manage Event for the event you want to manage.
The Event Builder opens, displaying the Overview page. - In the left panel, click Launch.
Once you are on the Launch page, click the Invitees tab.
Make a change for one person
Find the person in the list, click Actions, then pick what you need:
Edit Invitee Change the person's name, employee ID, or email address. |
Delete Invitee Remove the person from the event. Their responses are removed too. |
Reopen Survey Opens their link again so they can go back in and edit their answers. Not available if everyone takes your event through the same shared link. |
Clear Survey Wipes all of their responses. Not available if everyone takes your event through the same shared link. |
Resend Email Sends their invitation again, for example if they lost the original. |
Send Email Sends their invitation for the first time. This is the one you will use for someone you added late. |
Before you delete or clear
Deleting an invitee or clearing their survey removes their responses. If someone just needs to fix an answer, use Reopen Survey instead so they keep everything else they entered.
Add late invitees
If your event sends each person their own unique link, you can add people after it goes live. In the Invite phase, that is the Email Distribution Unique Links for Each Respondent option. If you chose a different option, you will not see the button to add late invitees.
For Point-In-Time events, anyone you add from your HR system data automatically picks up their demographics from that data, so they show up in the right places in your reports.
Get to the Invitees tab
Go to the Launch page the same way as in Review and manage your participants, then follow these steps.
- Click the Invitees tab.
- Click + Add Late Invitees.
The Add New Employee dialog box appears. - Use the tab that fits who you are adding:
Search Look someone up in your full data file and click + to add them. |
Create Add someone who is not in your HR system data at all. They will not have any demographics. |
Batch Paste in a list of employee IDs or email addresses. Anyone found in your data file can be added in one go. |
Incoming Pick people who were added to your data file after the event went live. This tab is only available if your event uses data from your HR system. |
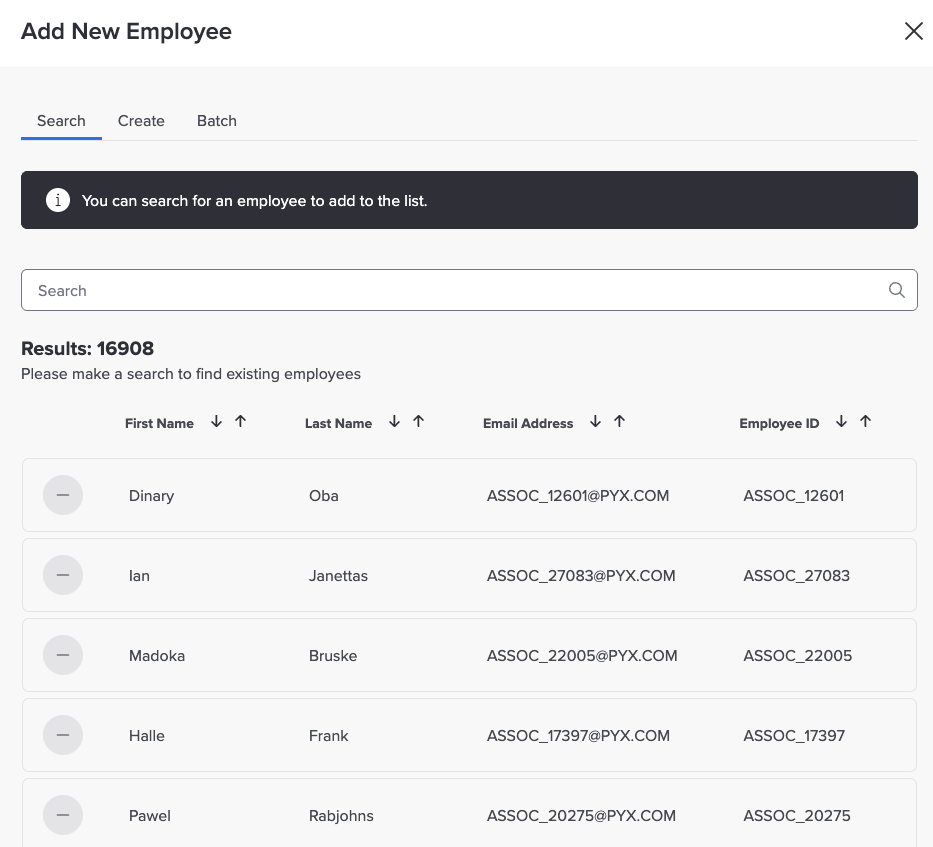
- Click Add Invitee or Add Invitees.
Adding someone puts them on your list. The next section covers getting their invitation to them.
Send your late invitees an invitation
There are two ways to do it, depending on how many people you added.
One person at a time
On the Invitees tab, find the person, click Actions, then select Send Email.
Everyone you added on the same day
Every time you add late invitees, everyone added on that day goes into one group, named Late Additions followed by the date. You can send a notification to just that group, without emailing anyone else on your list.
- On the Launch page, click the Send tab.
- Click + New Email Notification and pick your template and send time as usual.
- Click the Status of Recipients dropdown, then select Group.
A second dropdown called Late Addition Group appears. - Click the Late Addition Group dropdown, then select the group you want to reach.
- Click Save, review the details, then click Send Notification.
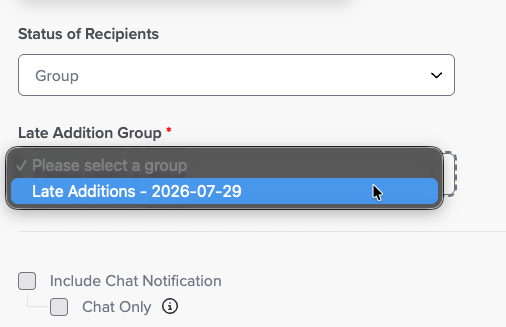
If you added people on more than one day, each day is its own group, so set up one notification for each. The full walkthrough of notifications is in Launch Your Listening Event.
Use Group for the first invitation
Group sends to everyone in the group, including people who have already finished. For reminders after that first invitation, Not Finished is usually the better choice. It skips anyone who has submitted and still reaches the people you added late, though it also reaches anyone from your original list who has not finished yet.
Related
Manage Your Active Listening Event covers watching your response rate and closing your event when you are done.
Was this article helpful?
That’s Great!
Thank you for your feedback
Sorry! We couldn't be helpful
Thank you for your feedback
Feedback sent
We appreciate your effort and will try to fix the article