After you create your survey and complete the Overview information, you enter the Build phase where you can customize your survey settings. You can customize the survey pages you wish to include, page numbers or a progress bar, and to make all questions required (or not).
This article walks through:
- Access the Survey Settings
- PIN Page
- Consent Page
- Welcome Page
- Demographic Page
- Page Titles
- Page Numbers
- Progress Bar
- All Questions Required
- Thank You Page

Access the Survey Settings
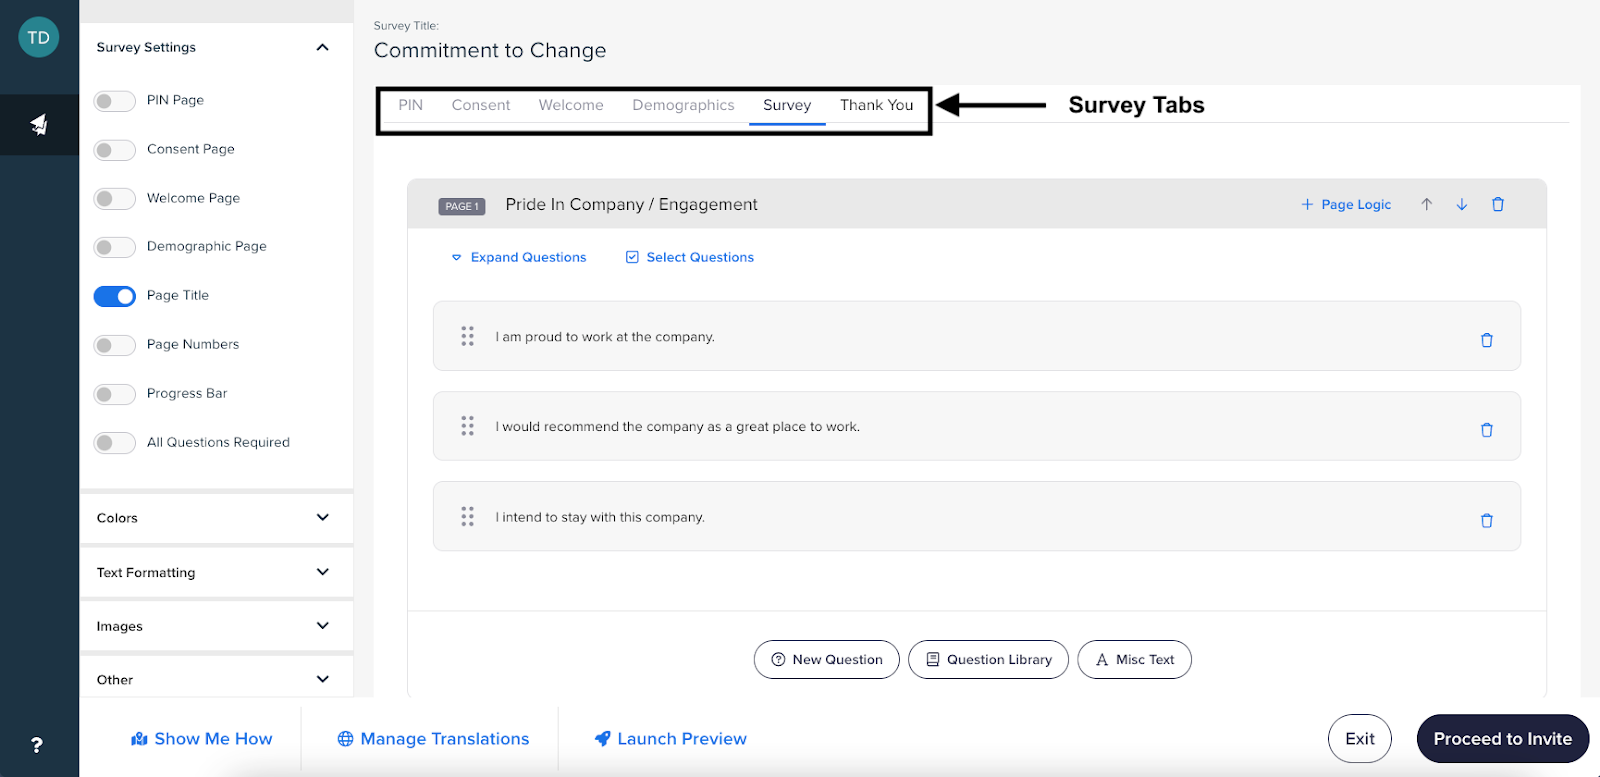
The Survey Settings are part of the Build phase of the Program Builder. You may activate and deactivate elements on the left panel and build out those elements in the main page area. As you turn on options that add pages to the survey, tabs for the pages become active in the survey workspace.
Navigate to the Build phase for the survey you want to customize.
From within the Program Builder:
Click Build in the progress bar.
From My Surveys:
Click the pencil icon for the survey you want to customize.
Note: You can also click the gear icon and then select Edit Survey.
The survey opens in draft mode, displaying the Overview page.
Click Build in the progress bar.
The Build page displays with the Survey Settings on the left and the workspace in the center. If you used a template to create your survey, the associated settings display.
Note: You can collapse and expand any of the options in the left panel by clicking the name (e.g., Survey Settings, Colors, Text Formatting, etc.).

PIN Page
If you want respondents to participate in the survey without receiving an email invitation from Perceptyx, you can add the PIN page that requires an employee ID or email address to log in. This feature is useful if some of your participants don’t have a company email account or easy access to email during working hours, or if you prefer to provide access to the survey internally. When you use the PIN page, the system generates a PIN page URL and a QR code you can give to participants to access the survey.
Add the PIN Page
In the left panel, click Survey Settings, if necessary, to display the survey settings options.
Turn on the PIN Page toggle.
PIN page options display in the survey workspace.
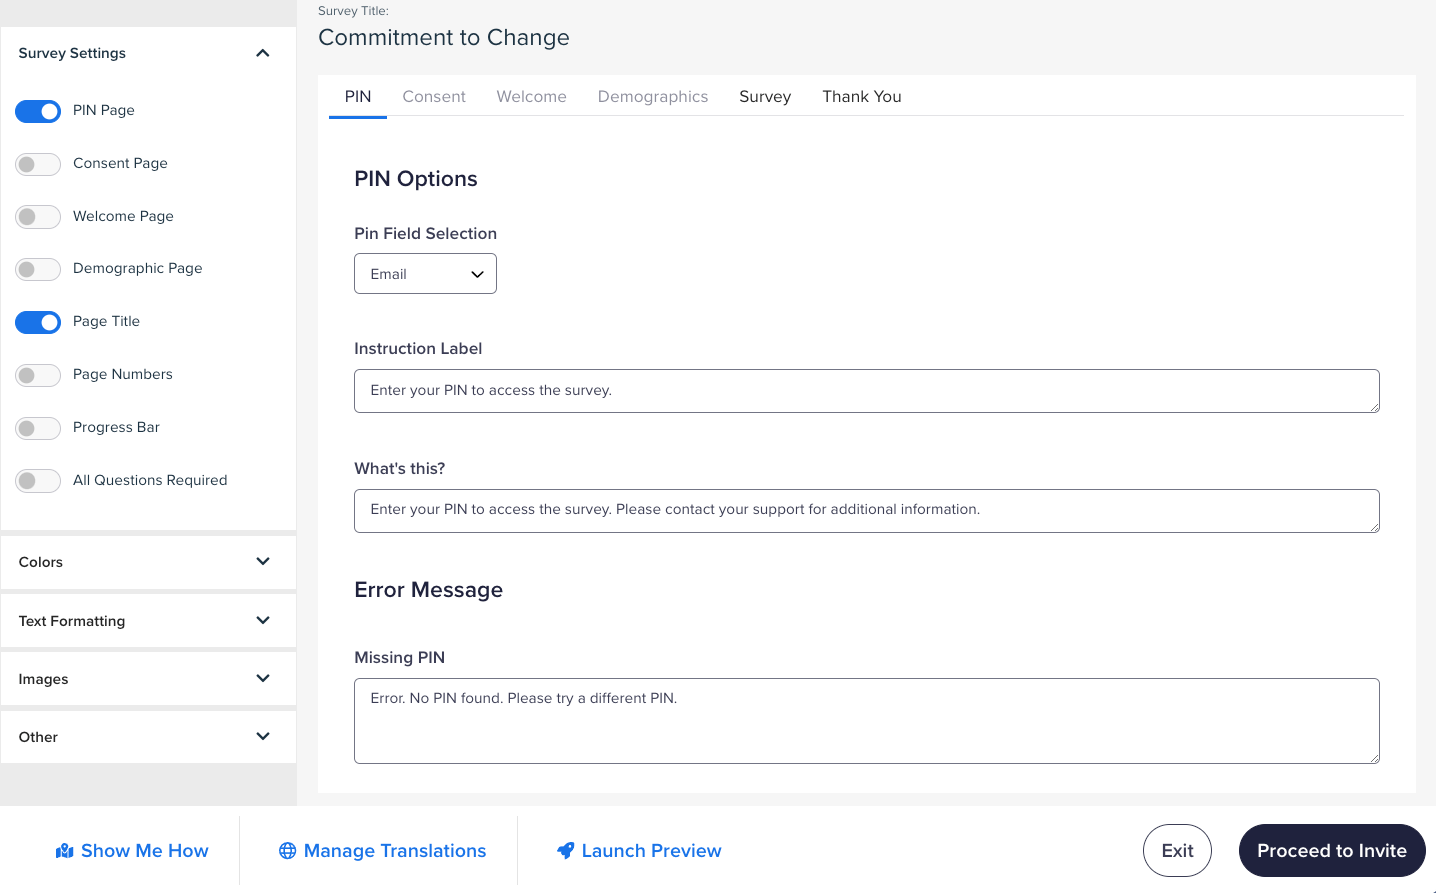
Display the Pin Field Selection dropdown, then select Employee ID or Email to specify the information required for the PIN field.
Edit the remaining options or use the default text:
Instruction Label: Type the instruction text that will display on the PIN page.
What’s This: Type the explanatory text that will display when participants click the What’s This? icon for the PIN field.
Missing PIN: Type the error message text participants will see if they try to begin the survey without entering their PIN.
Note: Your information is saved automatically.
You will receive the PIN page URL and a QR code when you reach the Launch phase of the survey build process.

Consent Page
If you want to require that participants consent to completing the survey, turn on the Consent Page option. Consent options are included as part of the Welcome page. If you choose to use the Consent page, you must also use the Welcome page.
Add the Consent Page
In the left panel, click Survey Settings, if necessary, to display the survey settings options.
Turn on the Consent Page toggle.
A confirmation message appears, indicating that toggling the Consent page setting will also enable the Welcome page setting.
Click Confirm.
Consent page options display in the survey workspace.
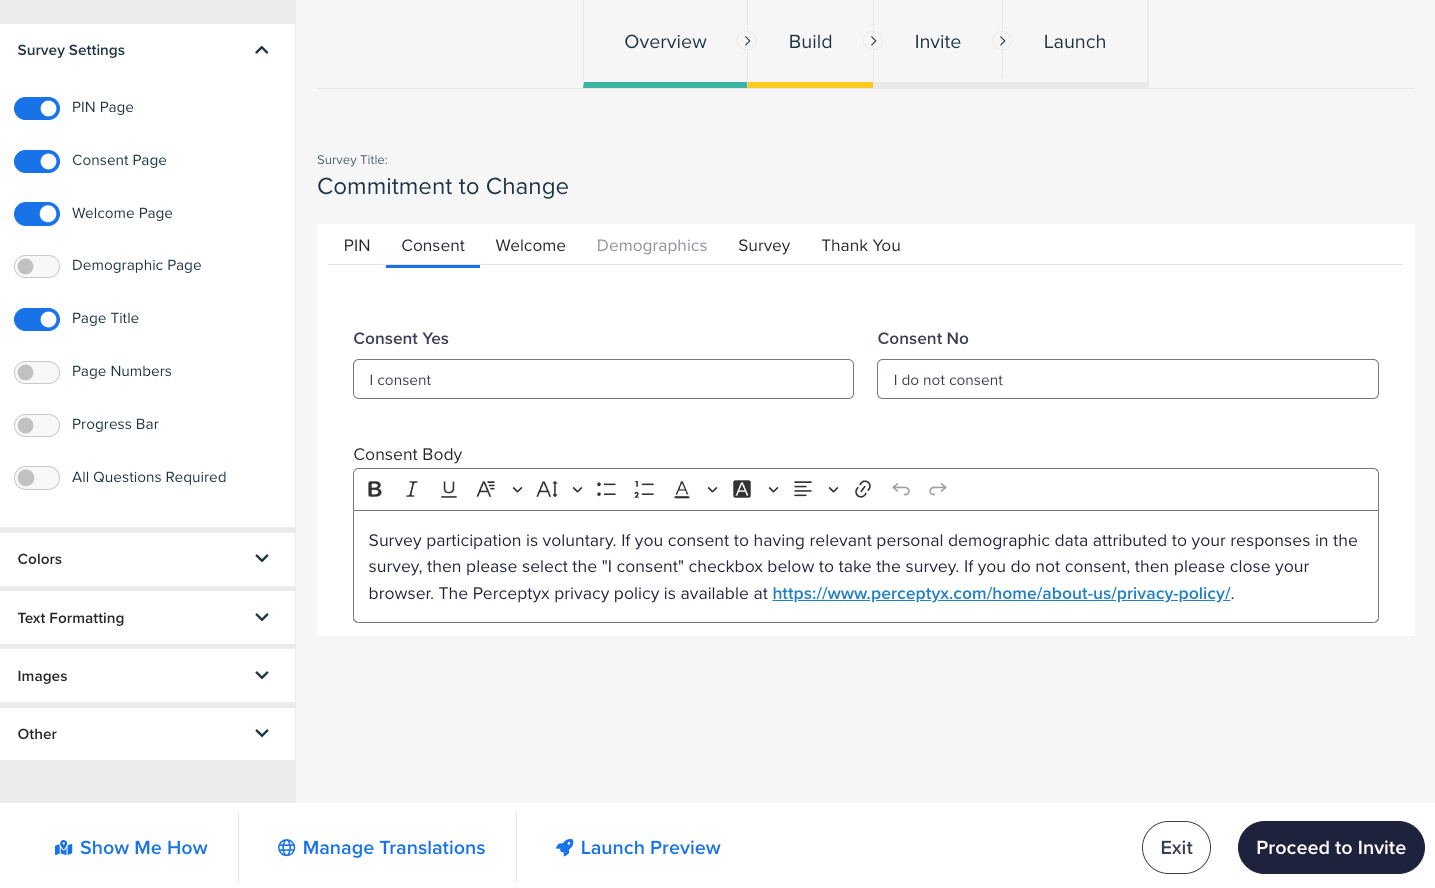
Edit the consent text options or use the default text. Use the formatting toolbar to enhance the look of your content.
Consent Yes: Type the text for the consent option. If the user clicks this option, they can proceed to the survey.
Consent No: Type the text for the do not consent option. If the user clicks this option, the survey page will close.
Consent Body: Type the text that explains the consent requirement.
Note: Your information is saved automatically.

Welcome Page
You can include the Welcome page to present the survey to participants and explain its purpose, your goals, or any other pertinent information. If you choose to use a Consent page, the consent text and options appear at the bottom of the Welcome page when participants take the survey.
Add the Welcome Page
In the left panel, click Survey Settings, if necessary, to display the survey settings options.
Turn on the Welcome Page toggle.
Welcome page options display in the survey workspace.
Note: If your survey includes a Consent page, the Welcome page toggle is already turned on. To view the Welcome page options, click the Welcome tab in the survey workspace.
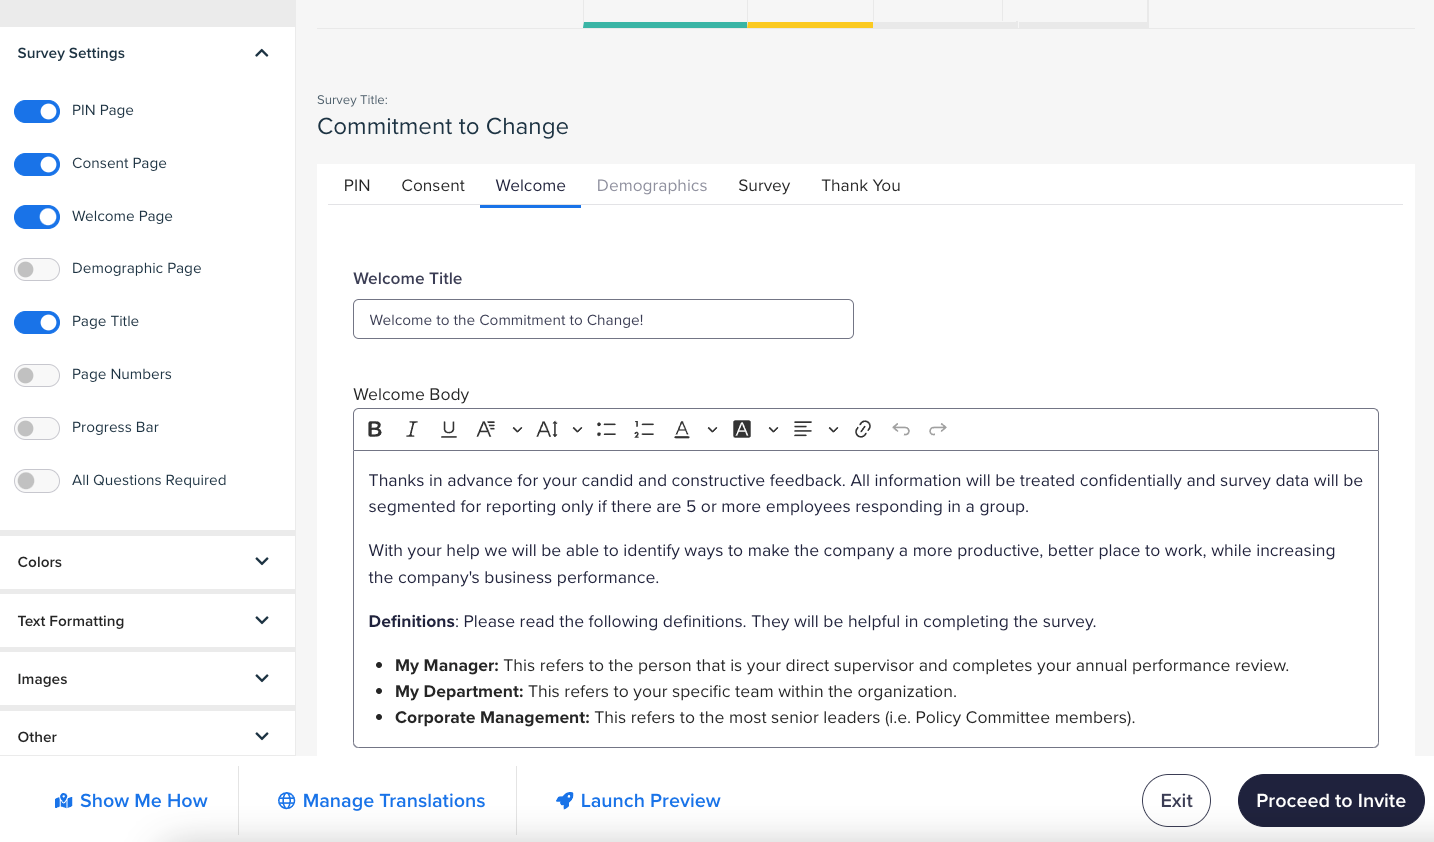
Edit the welcome text options or use the default text. Use the formatting toolbar to enhance the look of your content.
Welcome Title: Type the text for the title that introduces the welcome text.
Welcome Body: Type the text for the welcome message.
Note: Your information is saved automatically.

Demographic Page
You can use the Demographic page to ask self-select demographic questions (questions that collect demographic information not included in your organization’s automated data file). These questions become available as filters within the survey reports.
You can add demographic presets (our predefined questions and answer options) or your own custom questions and answer options. You can also specify whether the questions appear at the start or the end of the survey and whether they are required.
Note: The Demographic page option is available only if your system administrator turns it on in system settings.
Add the Demographic Page
In the left panel, click Survey Settings, if necessary, to display the survey settings options.
Turn on the Demographic Page toggle.
Demographic page options display in the survey workspace.
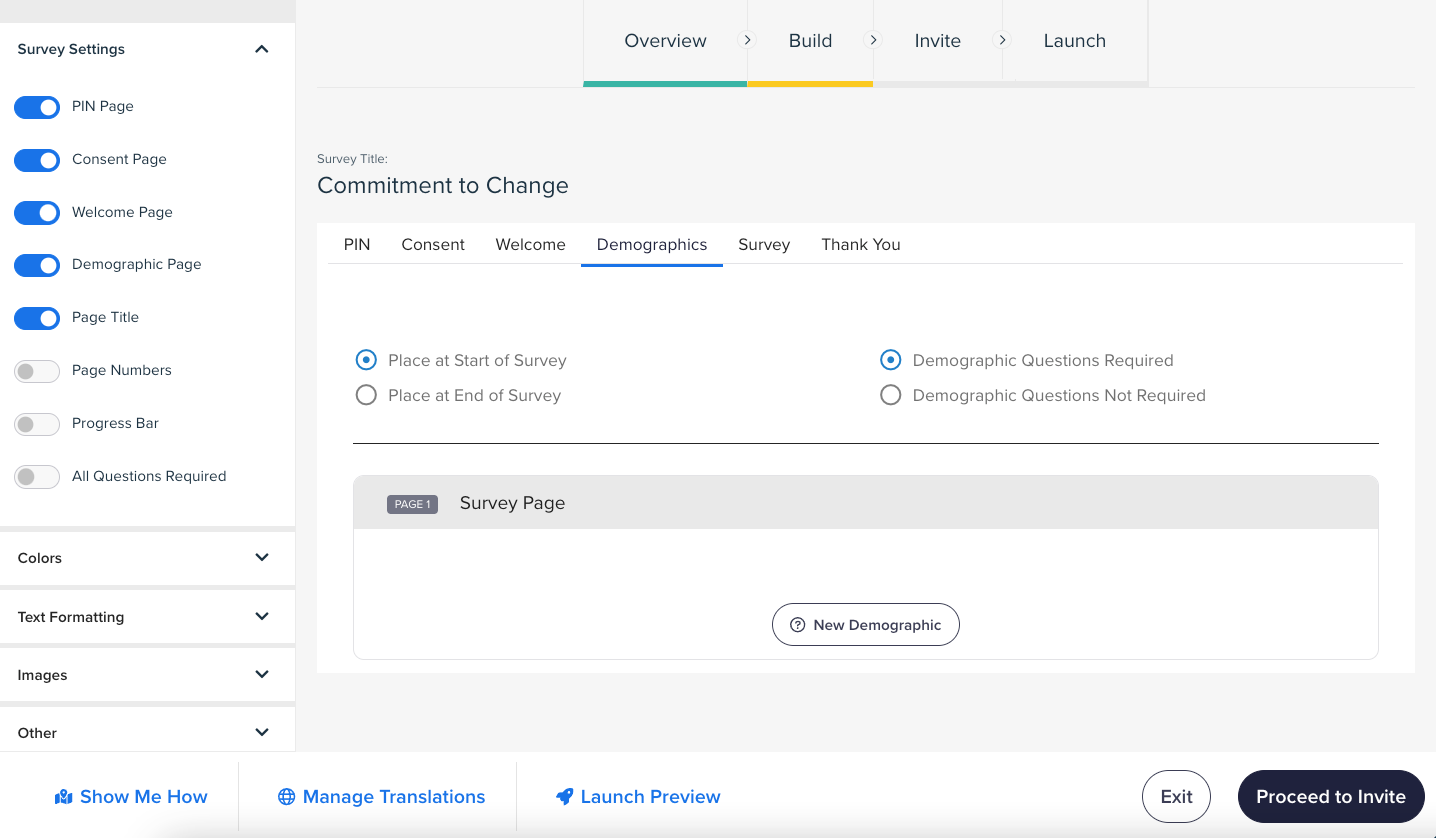
Select Place at Start of Survey or Place at End of Survey to specify where the demographic questions will appear.
Select Demographic Questions Required or Demographic Questions Not Required to specify whether participants must answer the demographic questions to proceed with the survey.
Add Demographic Presets
Perceptyx provides six demographic presets:
Age
Gender
Race
Years of Service
Disability
Veteran
All presets include predefined question text and answer options; however, you can modify them as needed.
In the survey workspace, click the Demographics tab.
Click New Demographic.
The New Demographic dialog box appears.

Click the Demographic Presets dropdown, then select the preset you want to add.
The demographic type, demographic text, display type, and answer options defined by the preset populate in the dialog box.
Make adjustments to the Demographic Setup options, if needed:
To specify whether the question will support a single answer or multiple answers: Display the Demographic Type dropdown, then select Single Selection or Multiple Choice, as appropriate.
Note: If you select Multiple Choice, the Display Type value (see below) changes to Checkboxes, and no other values are available.
To modify the question text and formatting: Add, delete, or modify the text in the Demographic Text box and use the formatting bar to make simple formatting changes.
To specify how the response options will display: Display the Display Type dropdown and select Pull-Down List or Radio Buttons. If your Demographic Type is set to Multiple Choice, this option will be set to Checkboxes.
Make adjustments to the Answer Setup options, if needed:
To edit a response option: Click the option to open it in edit mode.
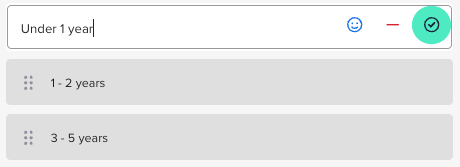
Modify the response text as necessary.
Click the emoji icon to add an emoji to the response option.
Click the minus sign to remove the response option.
Click the green check mark icon to save your changes to the response option.
To move a response option: Click and hold the 6-dot symbol for the option, then drag it to the preferred location.
To add a new response option: Click the Enter New Value box at the bottom of the response list, type the response text, then click the green check mark icon.
Click Save.
All the demographic specifications are saved and the question and its options display in the survey workspace.

Add Custom Demographics
In the survey workspace, click the Demographics tab.
Click New Demographic.
The New Demographic dialog box appears.
Click the Demographic Presets dropdown, then select Custom Demographic, if necessary.
Specify the Demographic Setup:
To specify whether the question will support a single answer or multiple answers: Display the Demographic Type dropdown, then select Single Selection or Multiple Choice, as appropriate.
Note: If you select Multiple Choice, the Display Type value (see below) changes to Checkboxes, and no other values are available.
To specify the question text and formatting: Type the question text in the Demographic Text box and use the formatting bar to make simple formatting changes.
To specify how the response options will display: Display the Display Type dropdown and select Pull-Down List or Radio Buttons. If your Demographic Type is set to Multiple Choice, this option will be set to Checkboxes.
Specify the Answer Setup options:
Click the Enter New Value box, type the first response option, then click the green check mark icon.
Repeat the process for the remaining response options.
Click Save.
All the demographic specifications are saved and the question and its options display in the survey workspace.

You can also define display and skip logic for demographic questions. See the Display Logic and Skip Logic topics in the Build Your Survey Content article.

Page Titles
You can add page titles to the pages that contain your demographic and survey questions. If you used a template to create a survey, the survey pages will already have titles; however, you can change them if needed. You can easily change the title for each page in the Demographics and Survey tabs.


Change a Page Title
In the survey workspace, select the tab in which you want to change page titles (Demographics or Survey).
Navigate to the page on which you want to change the title, then click the current page title to open it for editing.
Select the current title, type your new page title, then click outside of the page title area.
Repeat as needed for each survey page.

Page Numbers
You can add page numbers to your survey to help participants know where they are in your survey. You may use page numbers, a progress bar, or neither. You cannot use both page numbers and a progress bar.
In the left panel, click Survey Settings, if necessary, to display the survey settings options.
Turn on the Page Numbers toggle.

Progress Bar
You can add a progress bar to your survey to help participants know where they are in your survey. You may use page numbers, a progress bar, or neither. You cannot use both page numbers and a progress bar.
In the left panel, click Survey Settings, if necessary, to display the survey settings options.
Turn on the Progress Bar toggle.

All Questions Required
You can require all questions to be answered by turning on the All Questions Required toggle.
In the left panel, click Survey Settings, if necessary, to display the survey settings options.
Turn on the All Questions Required toggle.

Thank You Page
Every survey ends with a required Thank You page that displays after the participant clicks Submit at the end of the survey. There is no toggle to turn on for the Thank You page; however, you can modify the default title and body text.
In the workspace, click the Thank You tab.
The Thank You page options appear.

Edit the options or use the default text:
Thank You Title: Type the title text that will display on the Thank You page.
Thank You Body: Type the main text that will display on the Thank You page.
Note: Your information is saved automatically.
Was this article helpful?
That’s Great!
Thank you for your feedback
Sorry! We couldn't be helpful
Thank you for your feedback
Feedback sent
We appreciate your effort and will try to fix the article