Listen
People give their most honest answers in the language they know best. The Event Builder lets you offer your event in more than one language, gives you a machine-translated first draft, and lets you fine-tune every line before anyone sees it.
This article covers Point-In-Time and Lifecycle events. Translation happens in three spots in the Event Builder: you pick your languages in the Overview phase, translate your event content in the Content phase, and translate your emails in the Launch phase.
This article walks through
How Translation Works
You can offer your event in English plus up to 97 other languages. Participants pick their language when they open the event, and everything they see switches over.
Here is what gets translated:
- Your event content. Questions, answer choices, page titles, and any other text you added.
- System text. The words Perceptyx adds for you, like the Next, Previous, and Submit buttons and the messages participants see along the way.
- Your emails. Invitations and reminders.
You have a few ways to fill in each language. Machine translation gives you a quick first draft, which you can keep, edit, or replace with your own text. Questions from the Question Library often come with ready-made Perceptyx translations, so a lot of the work may already be done for you. Languages that read right to left, like Arabic or Hebrew, display right to left automatically.
Note
Machine translation is a starting point, not a final answer. It can miss tone, workplace terms, and the way your organization talks. Have someone who speaks the language read it before you launch. A small number of languages have no machine translation option at all, so for those you type the translation in yourself.
Tip
Build and test the English version of your event first, then translate. Every change you make to the English text after translating means going back to update each language too.
Select Your Languages
Languages are set in the Overview phase, the first stop in the Event Builder.
- From the Listen page, find your event and click Manage Event. If you are already in the Event Builder, click Overview in the left panel.
- Open the Event Languages dropdown. You can type to search, and each language shows both its English name and its own name.
- Select the checkbox for each language you want to offer.
- Click Next: Content.
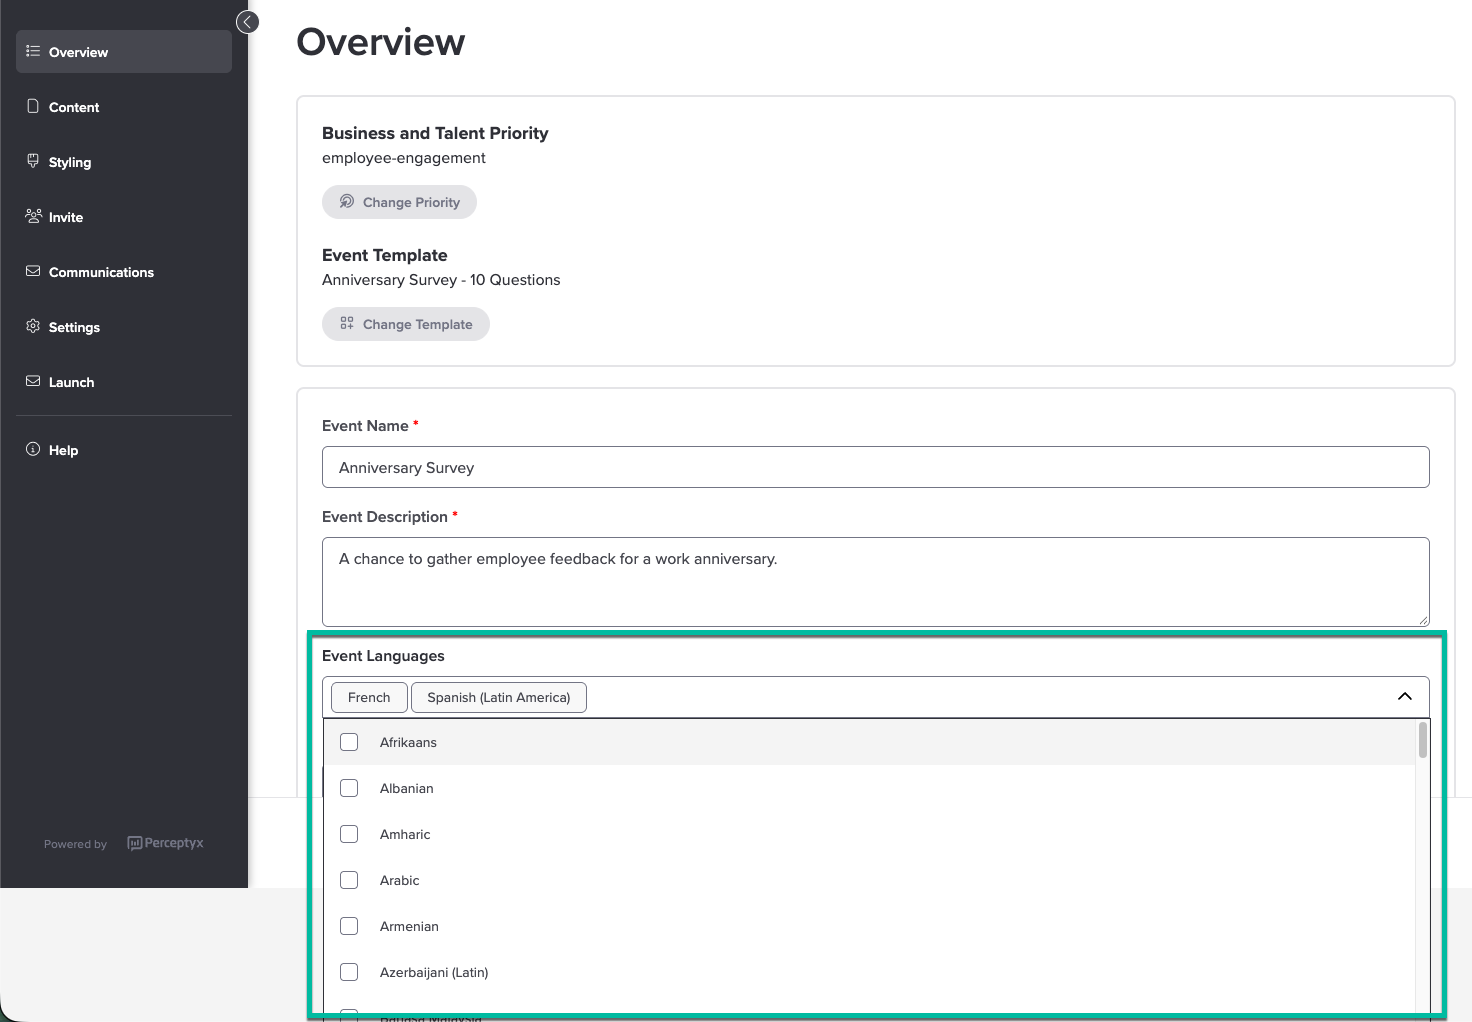
Changed your mind? You can add or remove languages at any time. Head back to Overview and update your checkboxes.
Manage and Edit Translations
Once your languages are picked and your English content is in good shape, you translate everything in one place: the Manage Translations screen.
- Go to the Content phase of your event.
- Click Manage Translations in the top right.
- Open the Please select a language dropdown and choose the language you want to work on.
- Translate the text using any of the options below. You can mix and match.
- Repeat for each language.
- When you are done, click Go back to builder to keep working, or Save and Exit.
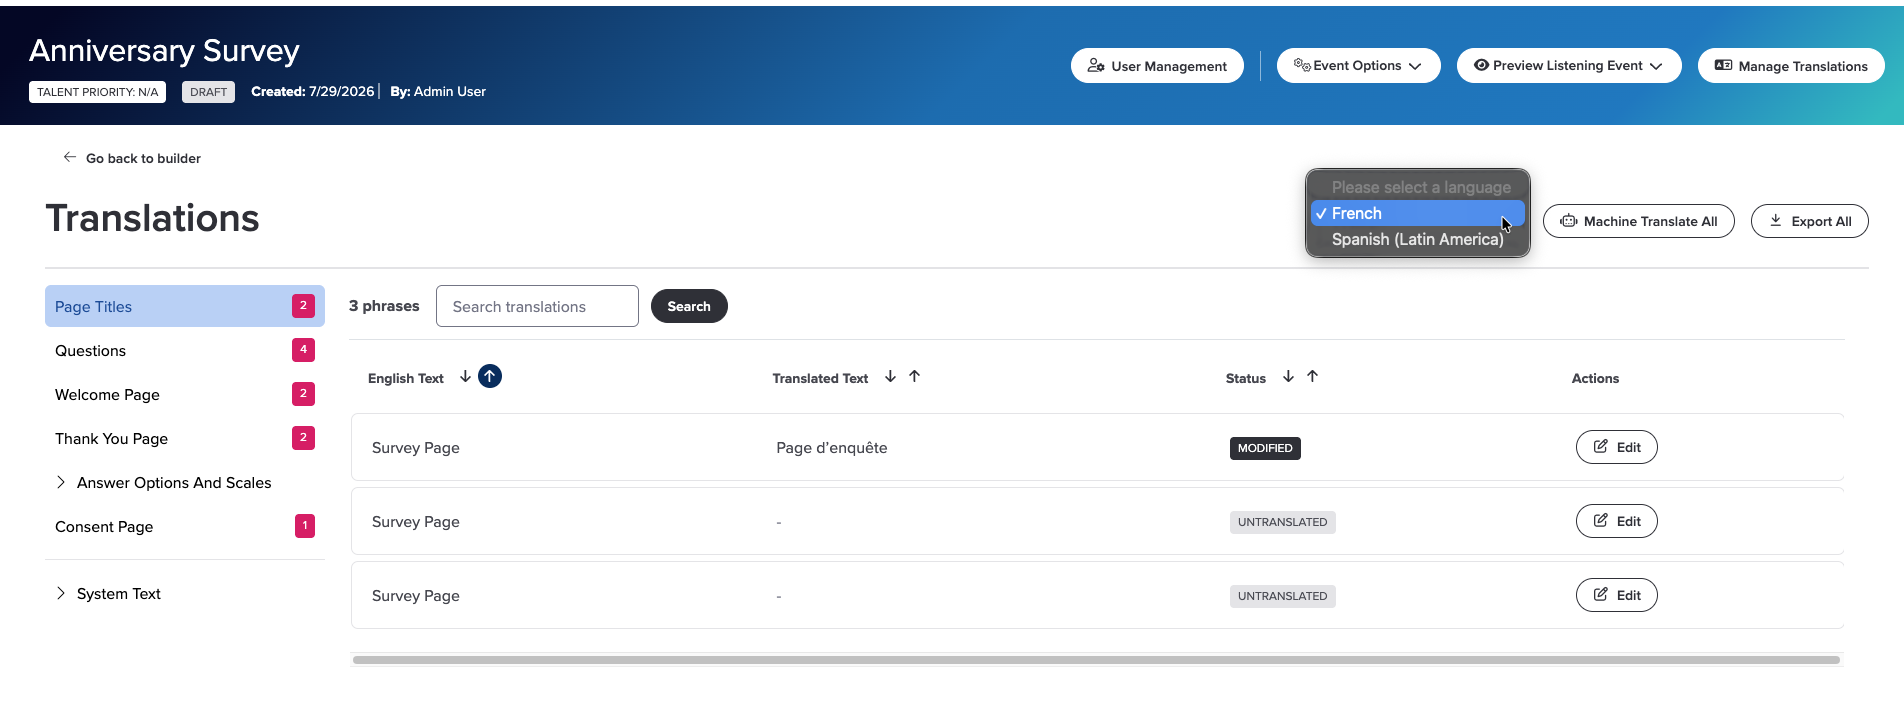
Your text is grouped into categories down the left side of the screen. Categories with a number next to them have items that still need a translation. Categories without a number already have Perceptyx translations in place. You can use those as they are or edit them.
Each item shows its English text, its translated text, and a status, so you can see at a glance what is done. Untranslated means the item still needs a translation, and Perceptyx means it is using a ready-made Perceptyx translation.
Machine translate everything at once
The fastest way to get a full draft. Click Machine Translate All to translate every item for the selected language, then read through the results and fix anything that sounds off.
Machine translate one item
Open the item to bring up the Edit Translation dialog, then use machine translation for just that item. This is handy when you have tweaked one question in English and only need that one refreshed.
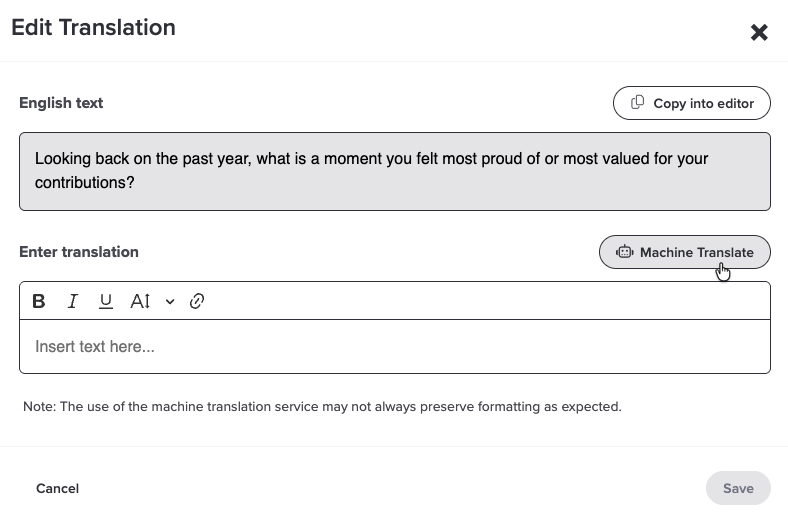
Type or paste your own translation
In the Edit Translation dialog, enter the translated text yourself. Use this when a translator or a native speaker has already given you the wording, or when you want to adjust a machine translation.
Find a specific word or phrase
Use the search box to jump straight to the text you are looking for. It is the quickest way to update a term that shows up in lots of places, like a team or program name.
Export your translations for review
Click Export All to download your translations as an Excel file. Send it to translators or native speakers so they can review everything in one place without needing access to the Event Builder.
Tip
If your text uses bold, italics, or other formatting, preview the translated version to make sure the formatting came through. It is easy for formatting to shift when text is pasted into the translation field.
Translate Your Emails
Emails are translated separately, after they are written. Create your invitation and reminder emails in the Communications phase first. Create and Test Your Listening Event Communications | Point-In-Time & Lifecycle walks through that.
Then translate them from the Launch phase:
- Go to the Launch phase of your event.
- Click Manage Translations in the top right.
- Open the Please select a language dropdown and choose a language.
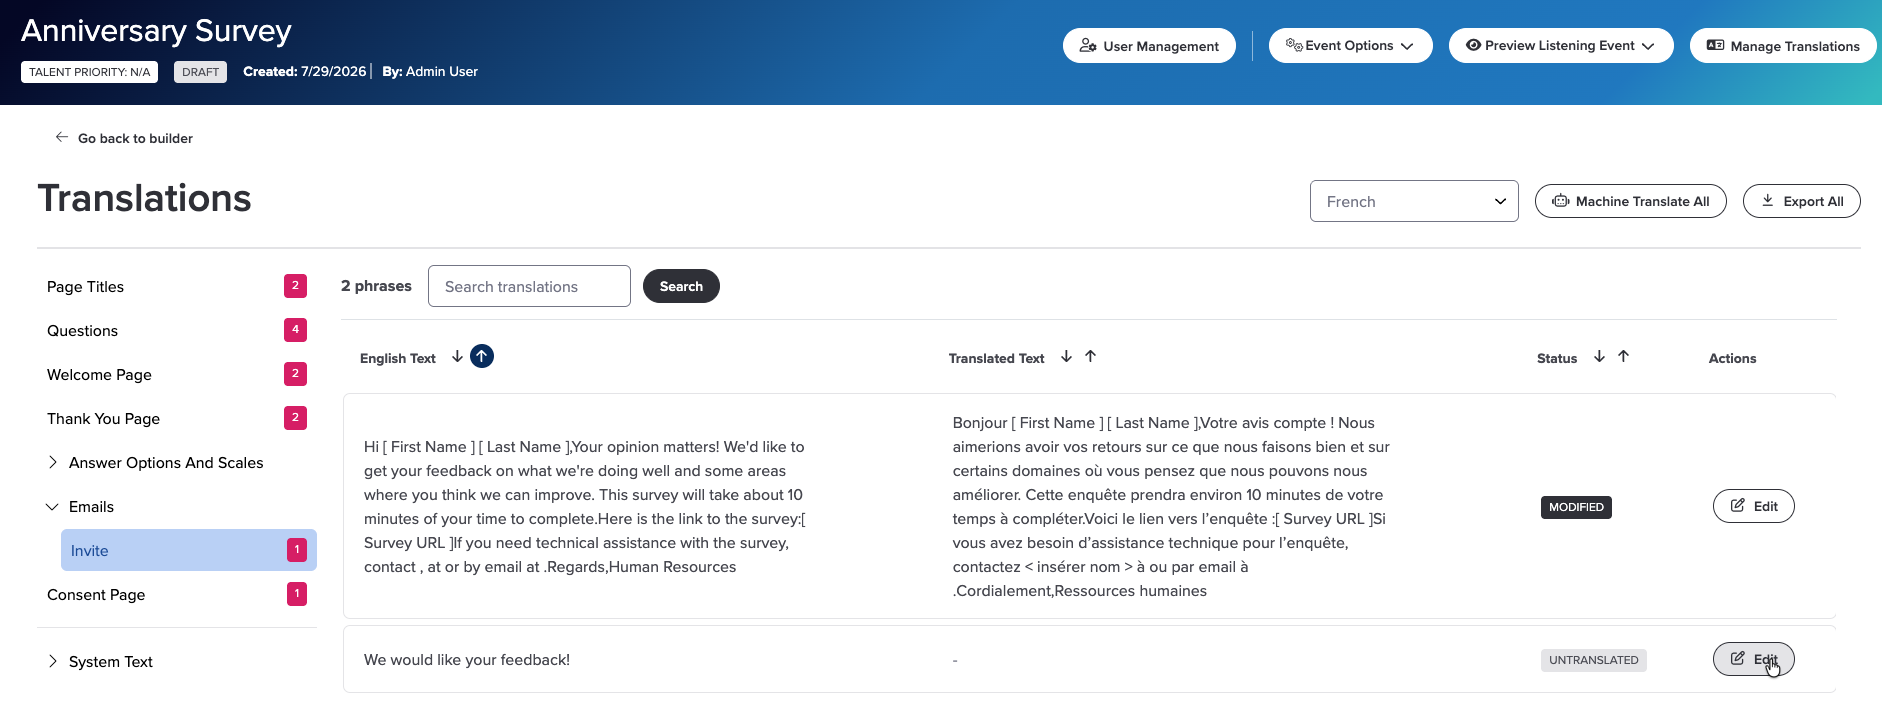
- On the left side of the screen, expand the Emails category.
- Pick the email you want to translate, like the invitation or a reminder, and translate it with machine translation, your own text, or both.
- Repeat for each language.
- To send the email translations out for review, click Export All.
- Click Go back to builder or Save and Exit.
Note
The language an email goes out in is not picked automatically from the demographic data in your participant file. To let people choose their own language, include the Language Selections placeholder in your email.
Check Your Translations Before You Launch
A quick review now saves confused participants later.
- Preview your event in each language and click all the way through, including the buttons and the thank you page.
- Send the Export All file to a native speaker for each language, especially anything that was machine translated.
- Send yourself a test email from the Communications phase and check how it reads.
- Wrap up your translations before you launch. Once your event is live, translations are locked and can no longer be edited.
Need a language that is not on the list? Reach out to the Perceptyx Customer Care team and they can talk through your options.
What's next
Your translations are in place. Now see your event the way participants will. Preview Your Event | Point-In-Time & Lifecycle walks you through previewing it before you launch.
Was this article helpful?
That’s Great!
Thank you for your feedback
Sorry! We couldn't be helpful
Thank you for your feedback
Feedback sent
We appreciate your effort and will try to fix the article