Listen
Every question in your event sits on a page. Pages decide how your survey is broken up, so participants see a few related questions at a time instead of one long scroll.
This article covers Point-In-Time and Lifecycle events. You add and organize pages in the Content phase of the Event Builder, on the same tab where you work on your questions.
Adding your questions themselves? That has its own steps in Add and Manage Questions | Point-In-Time & Lifecycle.
This article walks through
Add a Question Page
Why add a page
- Keep related questions together. Questions about the same topic read more naturally side by side.
- Keep pages short. A handful of questions per page is easier to get through than a long list.
- Give a question a page of its own. Some conditional logic works best when a question sits on a separate page, so you can decide who sees it. Every page has its own Add Page Logic option for this. Apply Conditional Logic to Event Content | Point-In-Time & Lifecycle explains how.
Add the page
- In the left panel of the Event Builder, click Content.
- Click the Questions tab.
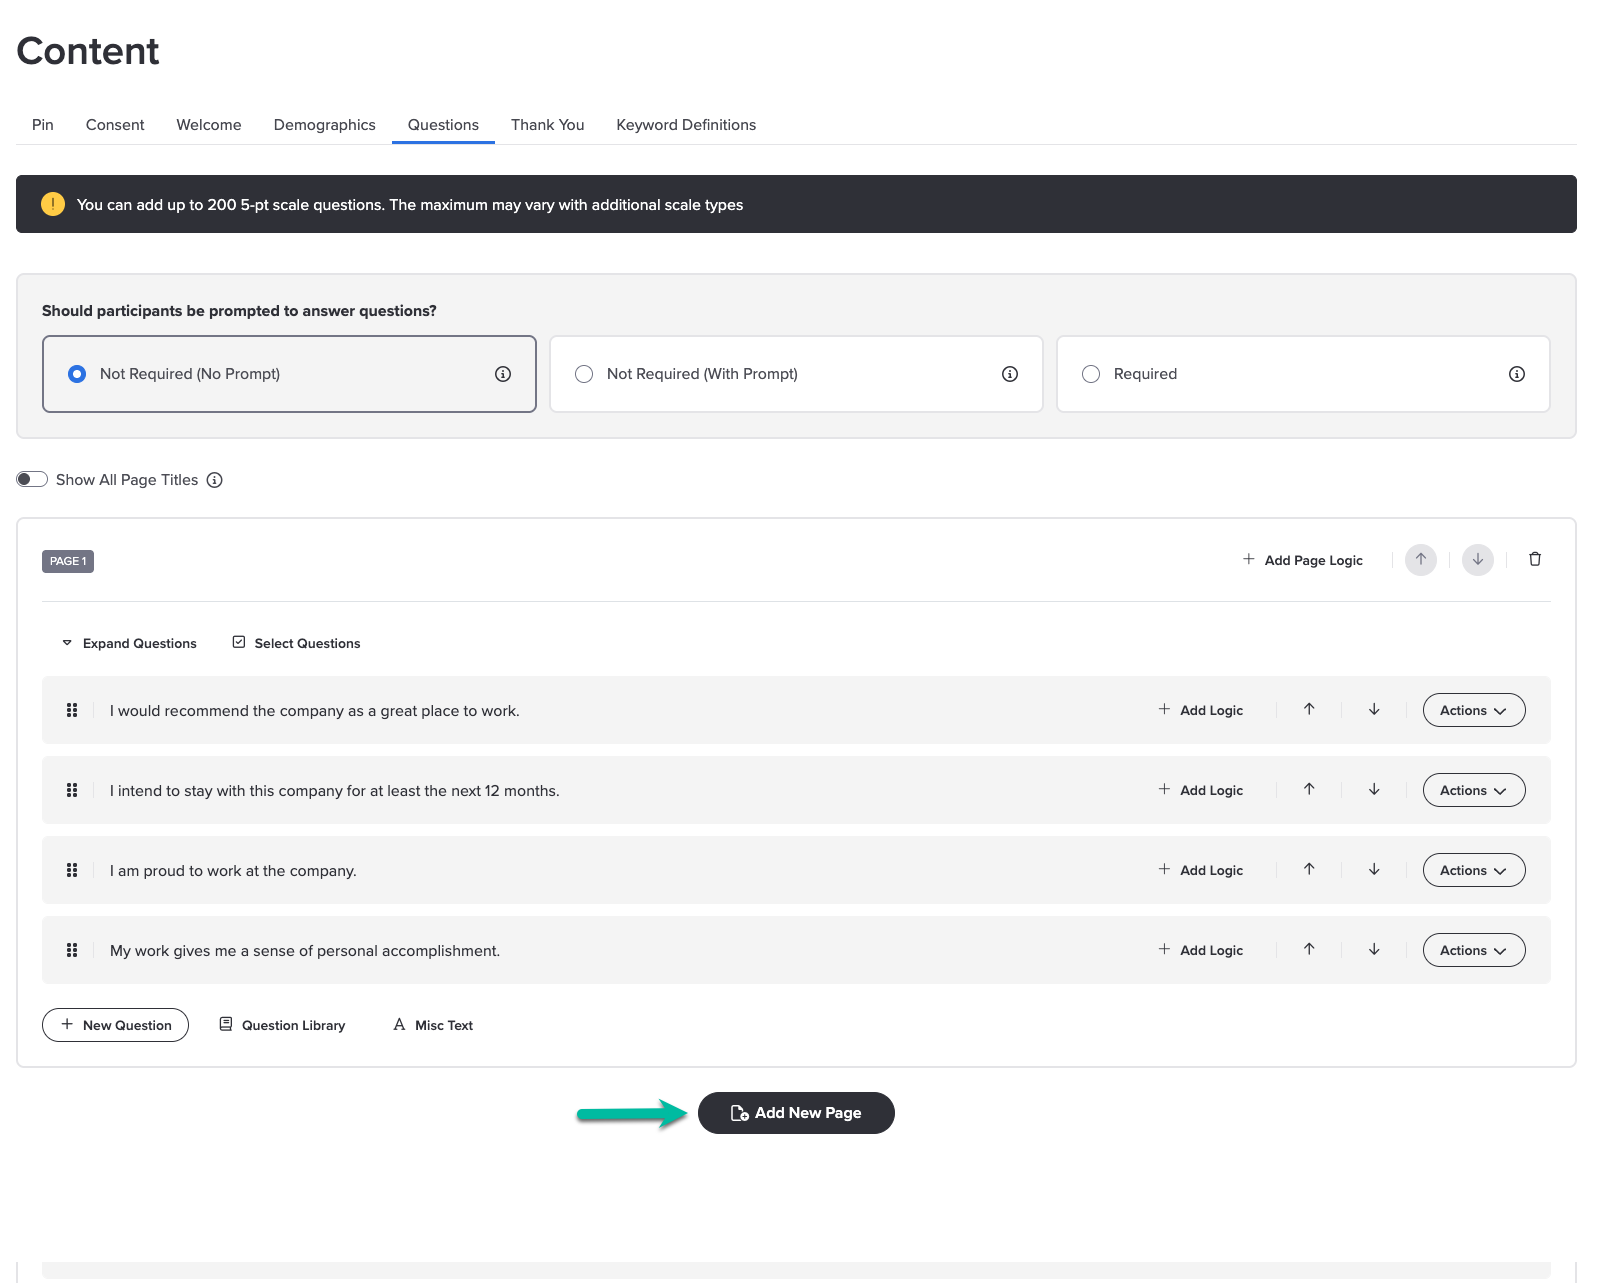
- Scroll to the bottom of the tab and click Add New Page, just below your last page. Your new page appears at the end of the list, ready for questions.
Turn Page Titles On or Off
Page titles are off when you start. While they are off, participants do not see them and you cannot add or edit them. To work with page titles, turn them on first.
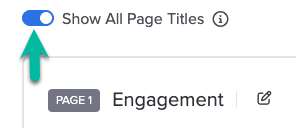
- On the Questions tab, find the Show All Page Titles toggle. It sits just above your first page, below the setting for whether participants are prompted to answer questions.
- Turn it on. Page titles are now available on every page, and participants will see them.
- To hide them again later, turn the toggle off.
A few things to know:
- The toggle covers all the pages in this event at once. You cannot show the title on just one page.
- It applies to this event only. If you want titles on other events, turn the toggle on in each one.
- Turning titles off does not delete them. When you turn the toggle back on, your titles are right where you left them.
Keep accessibility in mind
We recommend turning page titles on. They help participants keep their place in the survey and support accessibility. Leave them off only when they would repeat something your design already makes clear.
Name, Move, and Fill Your Pages
Once your page is there, give it a title, put it where it belongs, and move questions onto it. Do these in any order.
Give the page a title
Page titles are only available while the Show All Page Titles toggle is on. If they are off, turn page titles on first.
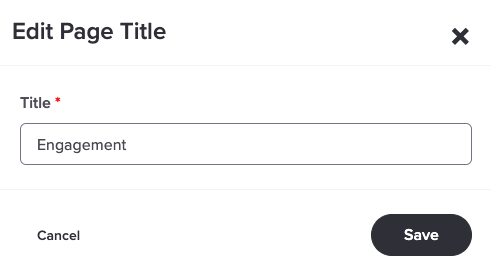
- With page titles on, each page shows its title with a pencil icon next to it. Click the pencil icon.
- In the Edit Page Title window, type your title in the Title box. A title is required.
- Click Save.
Pick a title that tells participants what the page is about, like "Your Team" or "Growth and Development."
Move the page
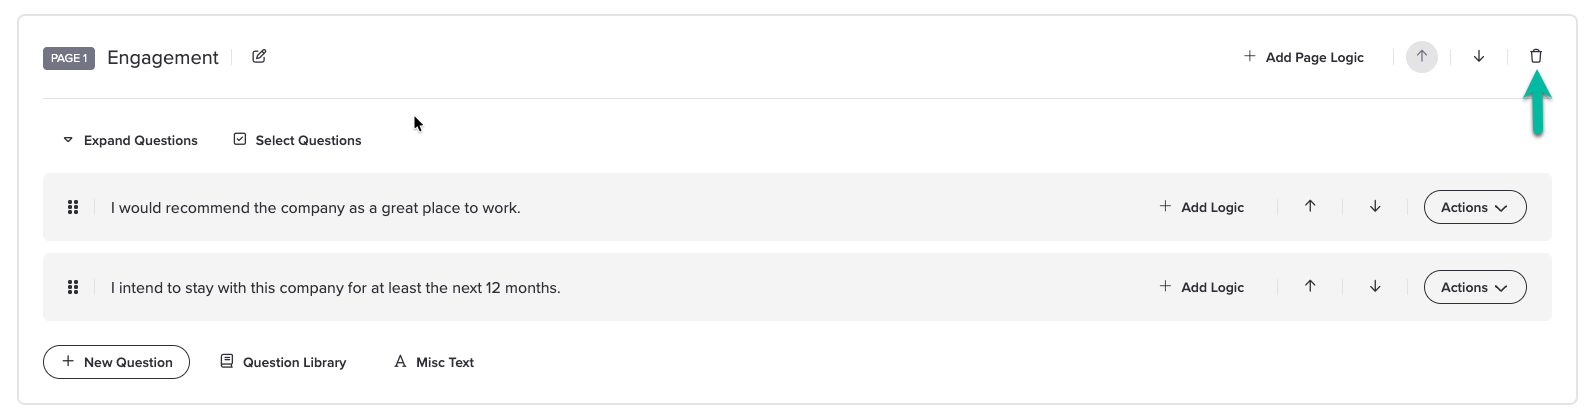
Each page is numbered in its top left corner. In the top right corner of the page, use the up and down arrows to move the page earlier or later in your survey. The questions on the page move with it, and the page numbers update to match.
Move questions onto the page
There are two ways to move a question:
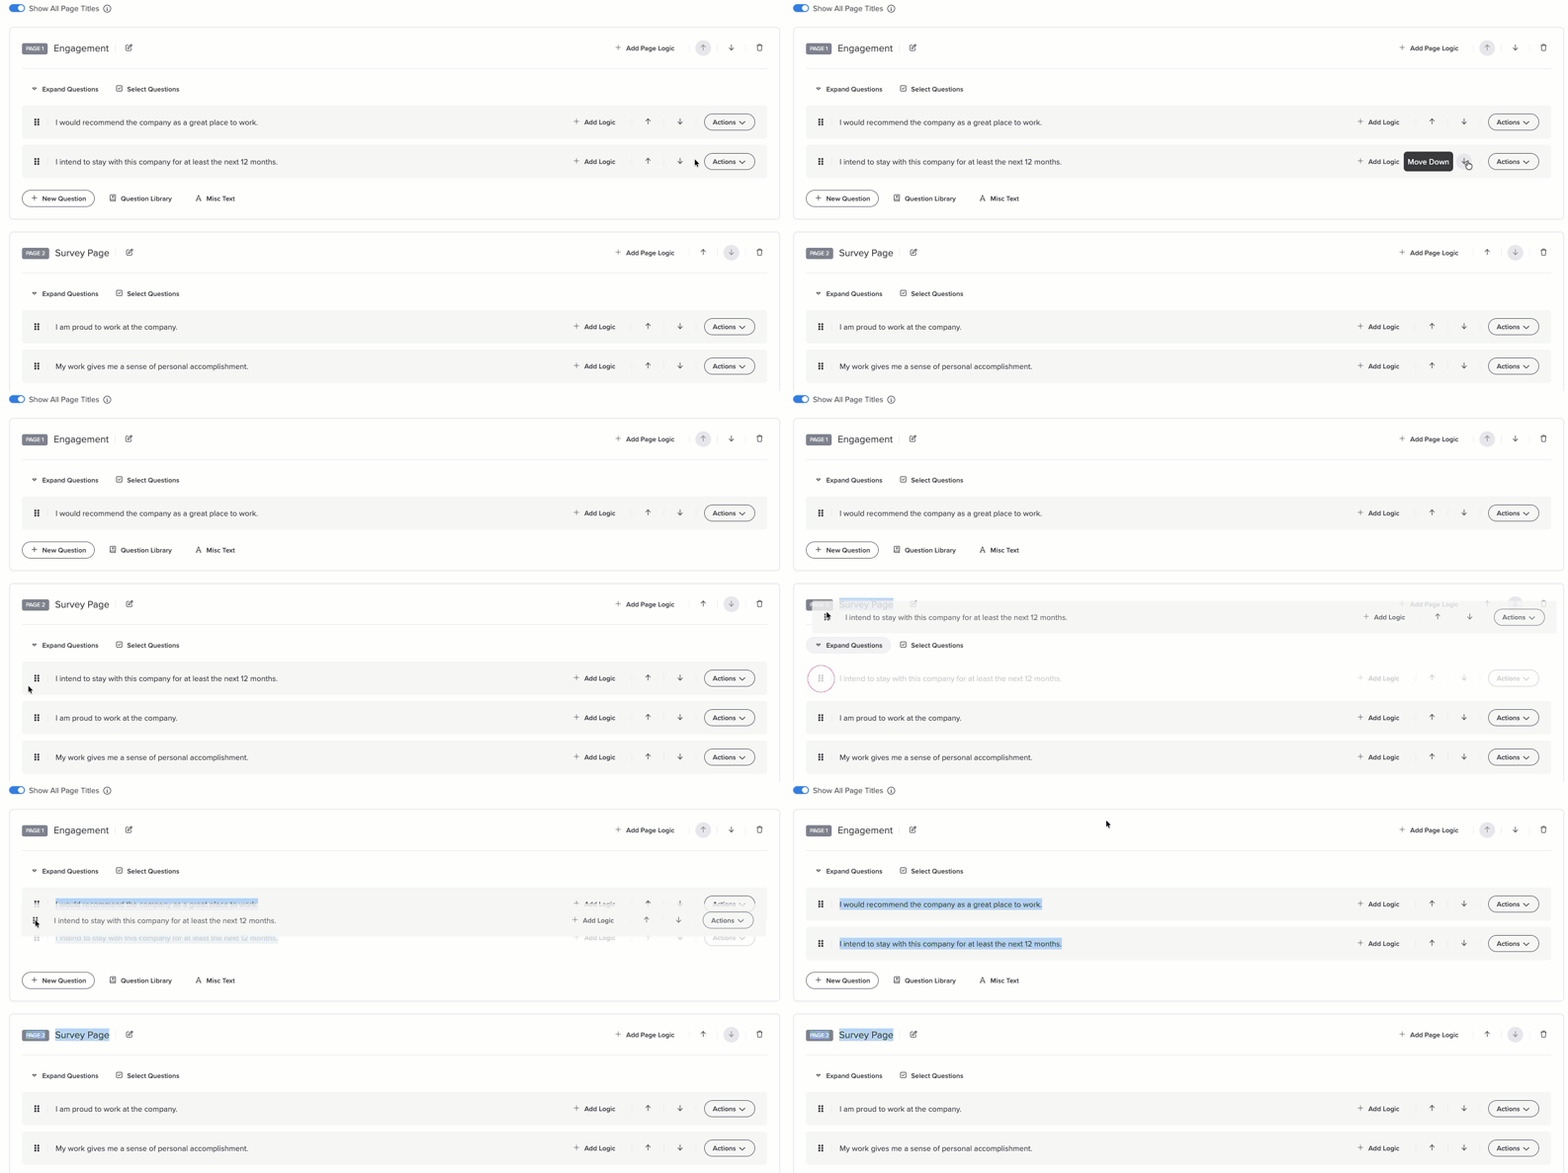
- Drag it. Click and hold the handle made of six dots on the left of the question, then drag it onto the page where you want it.
- Use the arrows. The up and down arrows on the right of each question move it up or down, and can take it onto the page before or after.
Delete a Question Page
Before you delete
Deleting a page deletes everything on it, including its questions. If there are questions you want to keep, drag them to another page first.
- In the left panel of the Event Builder, click Content.
- Click the Questions tab.
- Find the page you want to remove.
- Click the trash can icon in the top right corner of the page, next to the up and down arrows.
- A confirmation message appears. Confirm to delete the page and everything on it.
What's next
Your pages are organized. If you want some participants to skip a page or see a question only when it applies to them, Apply Conditional Logic to Event Content | Point-In-Time & Lifecycle shows you how to set that up.
Was this article helpful?
That’s Great!
Thank you for your feedback
Sorry! We couldn't be helpful
Thank you for your feedback
Feedback sent
We appreciate your effort and will try to fix the article