Analyze
Putting people into a group and deciding, person by person, whose responses each of them is allowed to see.
If you just finished building a group and clicked Continue to Add Users, you are already on the right screen. Skip ahead.
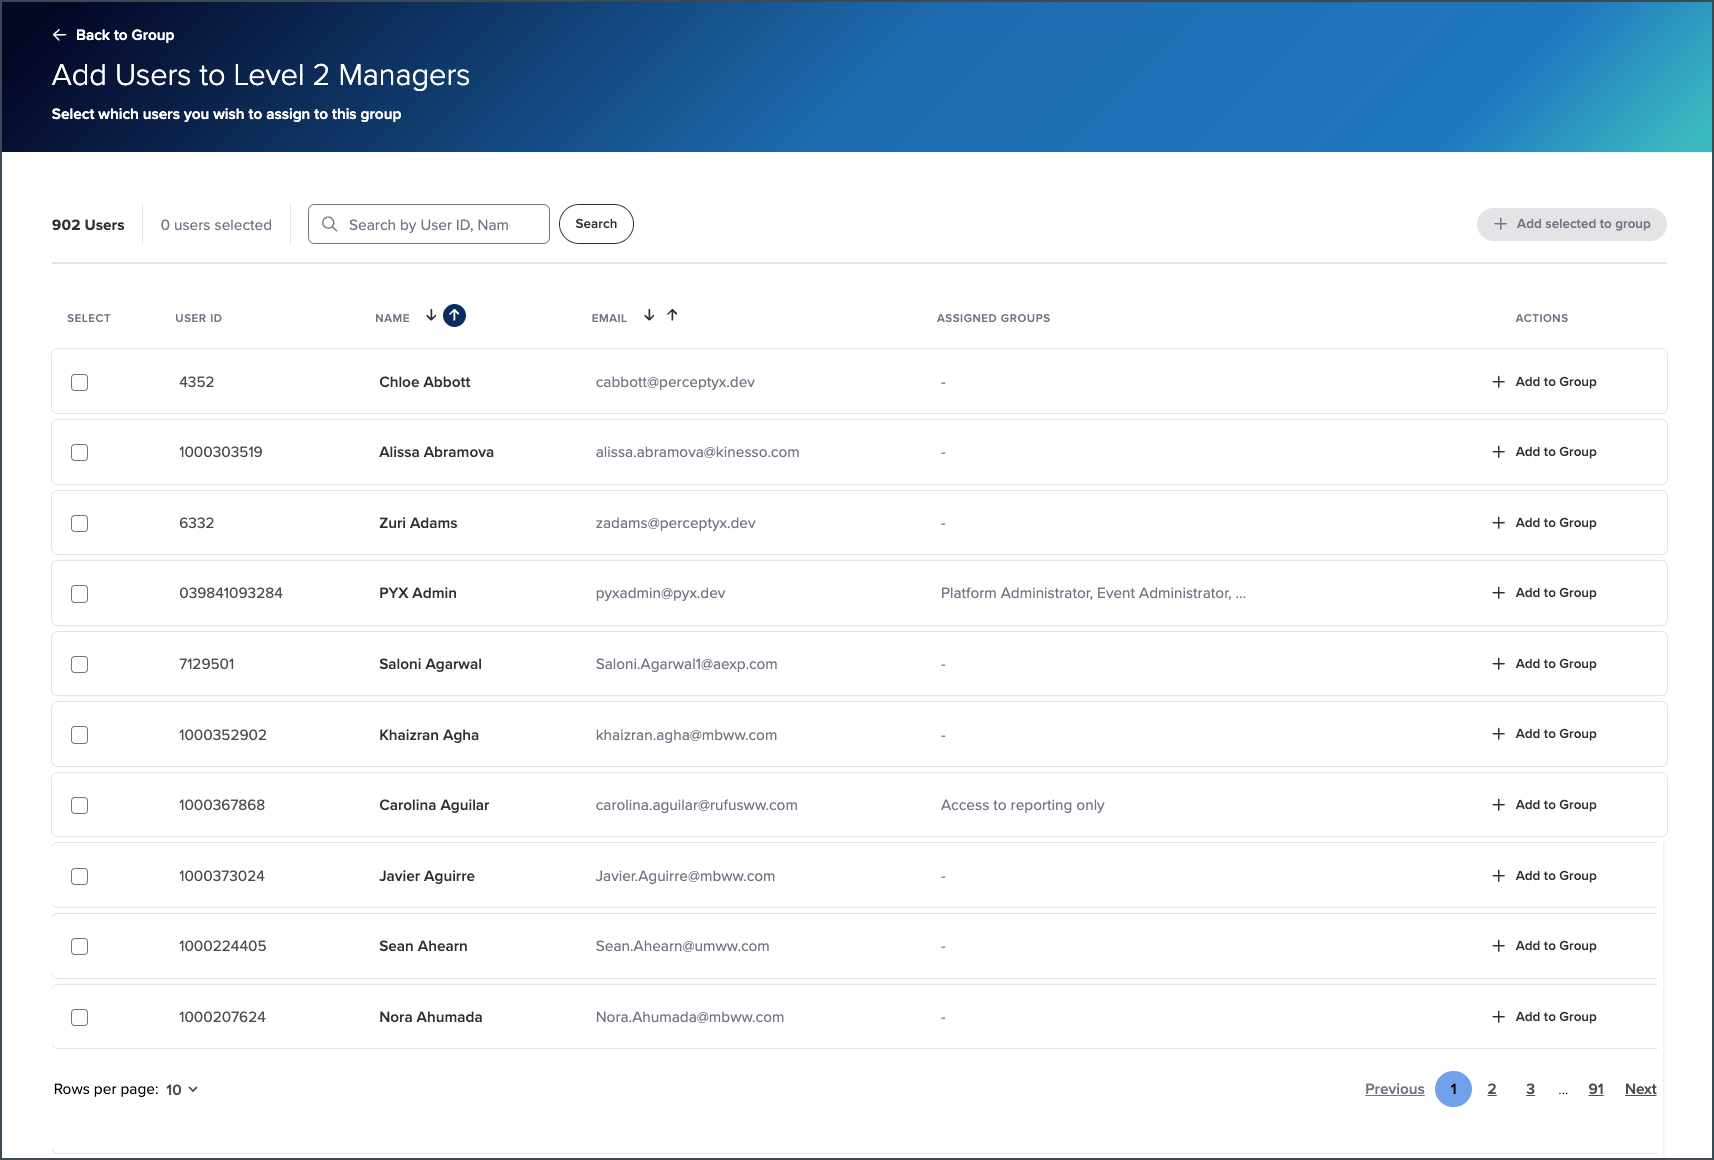
Coming back to a group you built earlier? Open the Report Editor, go to the Permissions tab, find your group, and click Manage Group. The Assigned Users tab opens first. Click + Add Users to Group to get going.
Two things to know
- People do not need to have taken the survey to get reporting access. A new hire or a leader who just inherited a team can be added.
- Who you can add comes from your latest platform data feed, not from the event snapshot. If somebody is not in that feed, they will not appear in the list.
One more thing before you start. Adding people does not let them in. You activate them afterwards, which is covered in Activate Reporting Group Access.
What population access means
Every time you add somebody, you set their population access. That is the pool of responses they are allowed to see inside the reports the group can open. Depending on your event, you may have these options:
- Overall access. Everything in the event.
- Demographic based access. Only responses from the demographic groups you pick, so a regional leader sees their region and nothing else.
- Hierarchy based access. Only responses from a particular spot in the manager hierarchy, so a manager sees their own team and the teams below them.
Note
Anyone you add to the Administrator group gets overall access automatically. There is nothing to configure for them.
Adding one person
- Find the person. You can search by User ID, name, or email address. The list does not filter as you type, so click Search to run it.
- Click + Add to Group. The Population Access window opens, showing their name, email, and Employee ID.
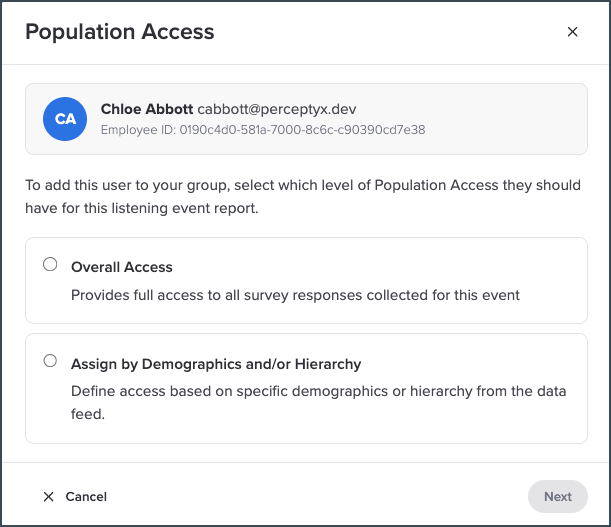
To give them everything
- Select Overall Access.
- Click Next.
To give them a slice
- Select Assign by Demographics and/or Hierarchy, then click Next.
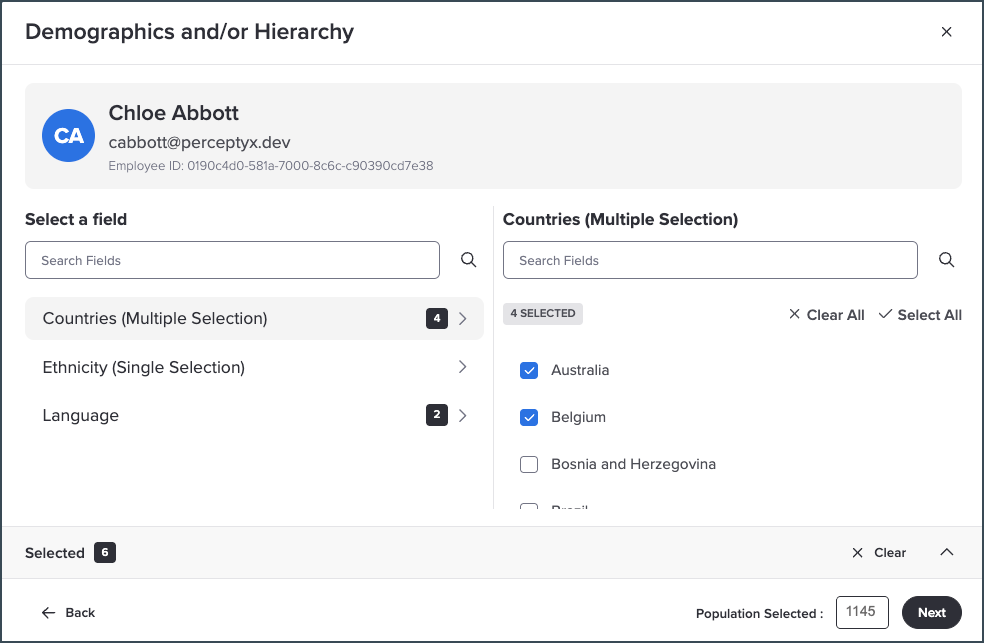
- A separate window opens with two panes, both headed Select a field. Click a category on the left and its options appear on the right.
- Tick the options you want to give them. The right pane has its own search, plus Clear All and Select All, and a running count of how many you have selected.
- Repeat with as many other categories as you need.
- Click Next.
Watch the bottom of the window
Bottom right you will see Population Selected with a live count, and an amber Below threshold badge appears next to it when your selection is too small. Worth glancing at, because a selection that falls short means this person opens a report with nothing in it even though you gave them access.
Adding several people at once
You can select a batch of people and then decide whether they each get their own population access or all share the same one.
- Tick the checkbox next to each person you want to add. A count next to the user total shows how many you have picked.
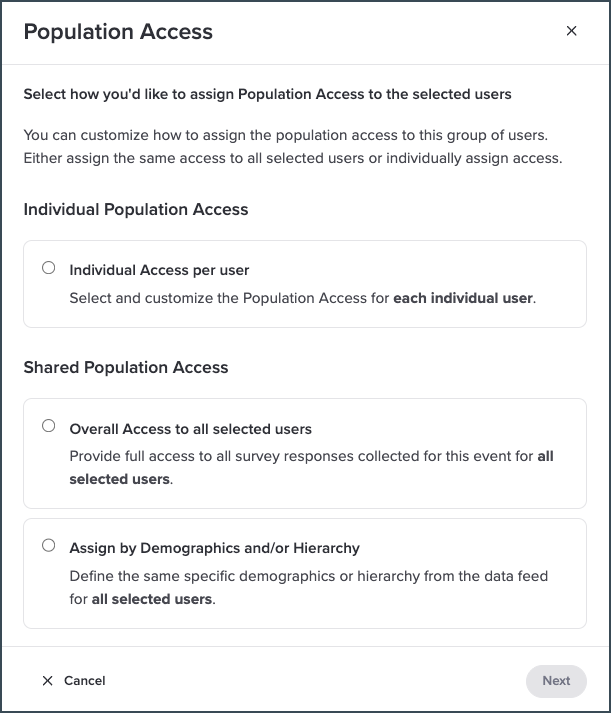
- Click + Add selected to group at the top right. The Population Access window opens.

Different access for each person
- Under Individual Population Access, select Individual Access per user, then click Next.
- Set up the first person.
- Click Next to move to the following person. The window tells you who you are working on, so you will not lose your place.
- Keep going until everyone is set.
They do not all have to get the same kind of access. One person can have overall access while the next has a single demographic.
The same access for everyone
- Under Shared Population Access, select either Overall Access to all selected users or Assign by Demographics and/or Hierarchy.
- Click Next.
- Set up the shared access.
- Click Next. The Review Population Access window opens.
Checking your work and confirming
The review step only appears when you add several people at once. Adding one person commits straight away, with a short confirmation message and no review screen.
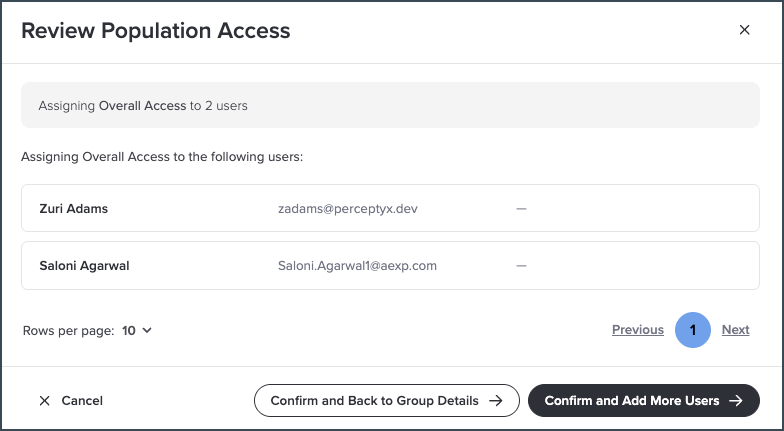
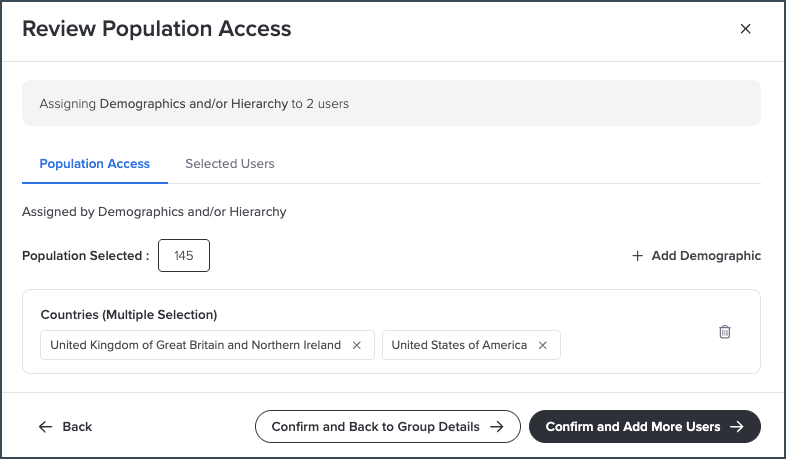
On the multi user path you land on Review Population Access, which lists everybody who is about to get access along with their email and any groups they already belong to. It looks a little different depending on which kind of access you assigned.
Overall access
Demographic access
Tip
If you went the demographics route, click the Selected Users tab to see exactly who is about to get this access. You can also click + Add Demographic from here if you realize you missed one.
- Not finished? Click Confirm and Add More Users to keep going.
- Finished? Click Confirm and Back to Group Details to see your group with everyone in it.
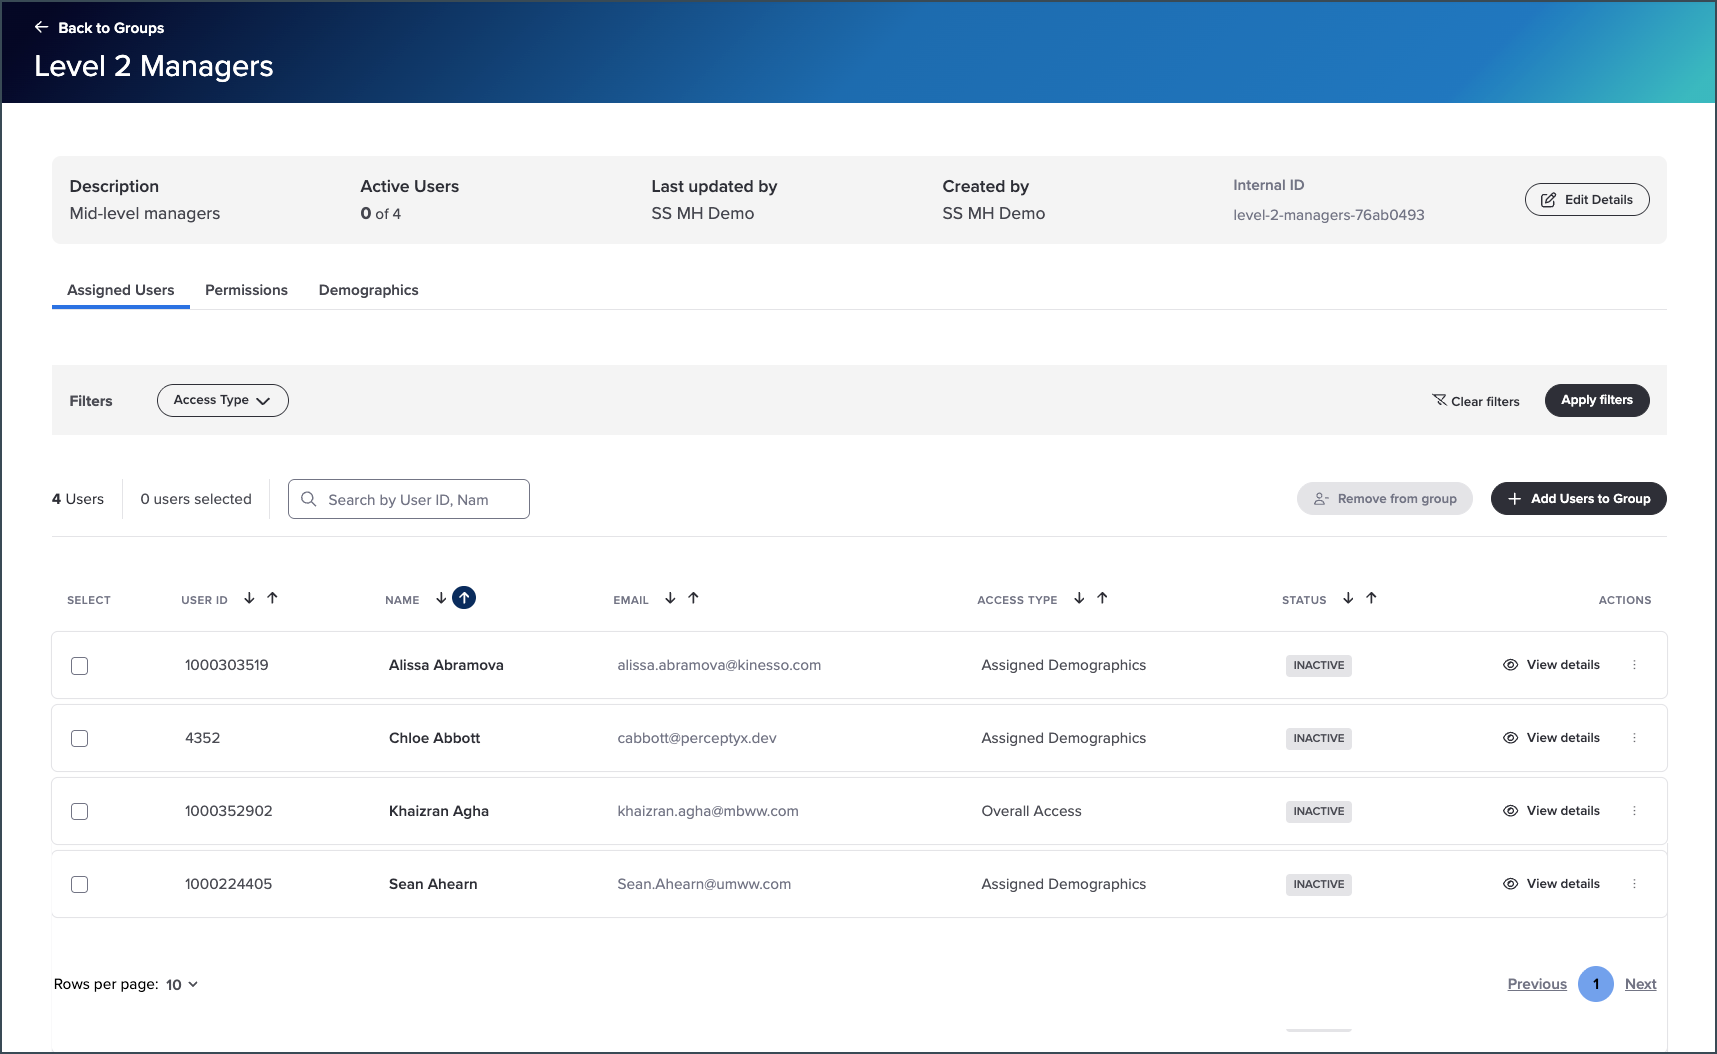
From here you can open the Permissions and Demographics tabs to check or change what the group can do.
One thing you will notice back on the Add Users screen: anyone already in the group carries an Already in group badge, and their row action changes to Remove from Group. There is also an Assigned Groups column showing which other groups each person belongs to.
What comes next
Was this article helpful?
That’s Great!
Thank you for your feedback
Sorry! We couldn't be helpful
Thank you for your feedback
Feedback sent
We appreciate your effort and will try to fix the article