Develop
There are two ways to get learners into a course, and they are built for different jobs. Picking the right one saves you a lot of chasing later.
Rather watch than read? The video above walks through both invite methods.
Which method do you want?
Both live on the Participants screen. Get there by clicking Participants in the left navigation panel, or Next: Participants at the bottom of the Content screen.
Email invitations Use this when you know exactly who needs the course and you care about who finishes. You get scheduling and reminders, and everyone shows up in the participant table. |
A shareable link Use this when the course is open to anyone in your organization and you do not want to maintain a list. No scheduling, but no list to keep up to date either. |
You can use both on the same course if you want, for example a named list for the team that has to take it and a link for everyone else who might find it useful.
Invite people by email
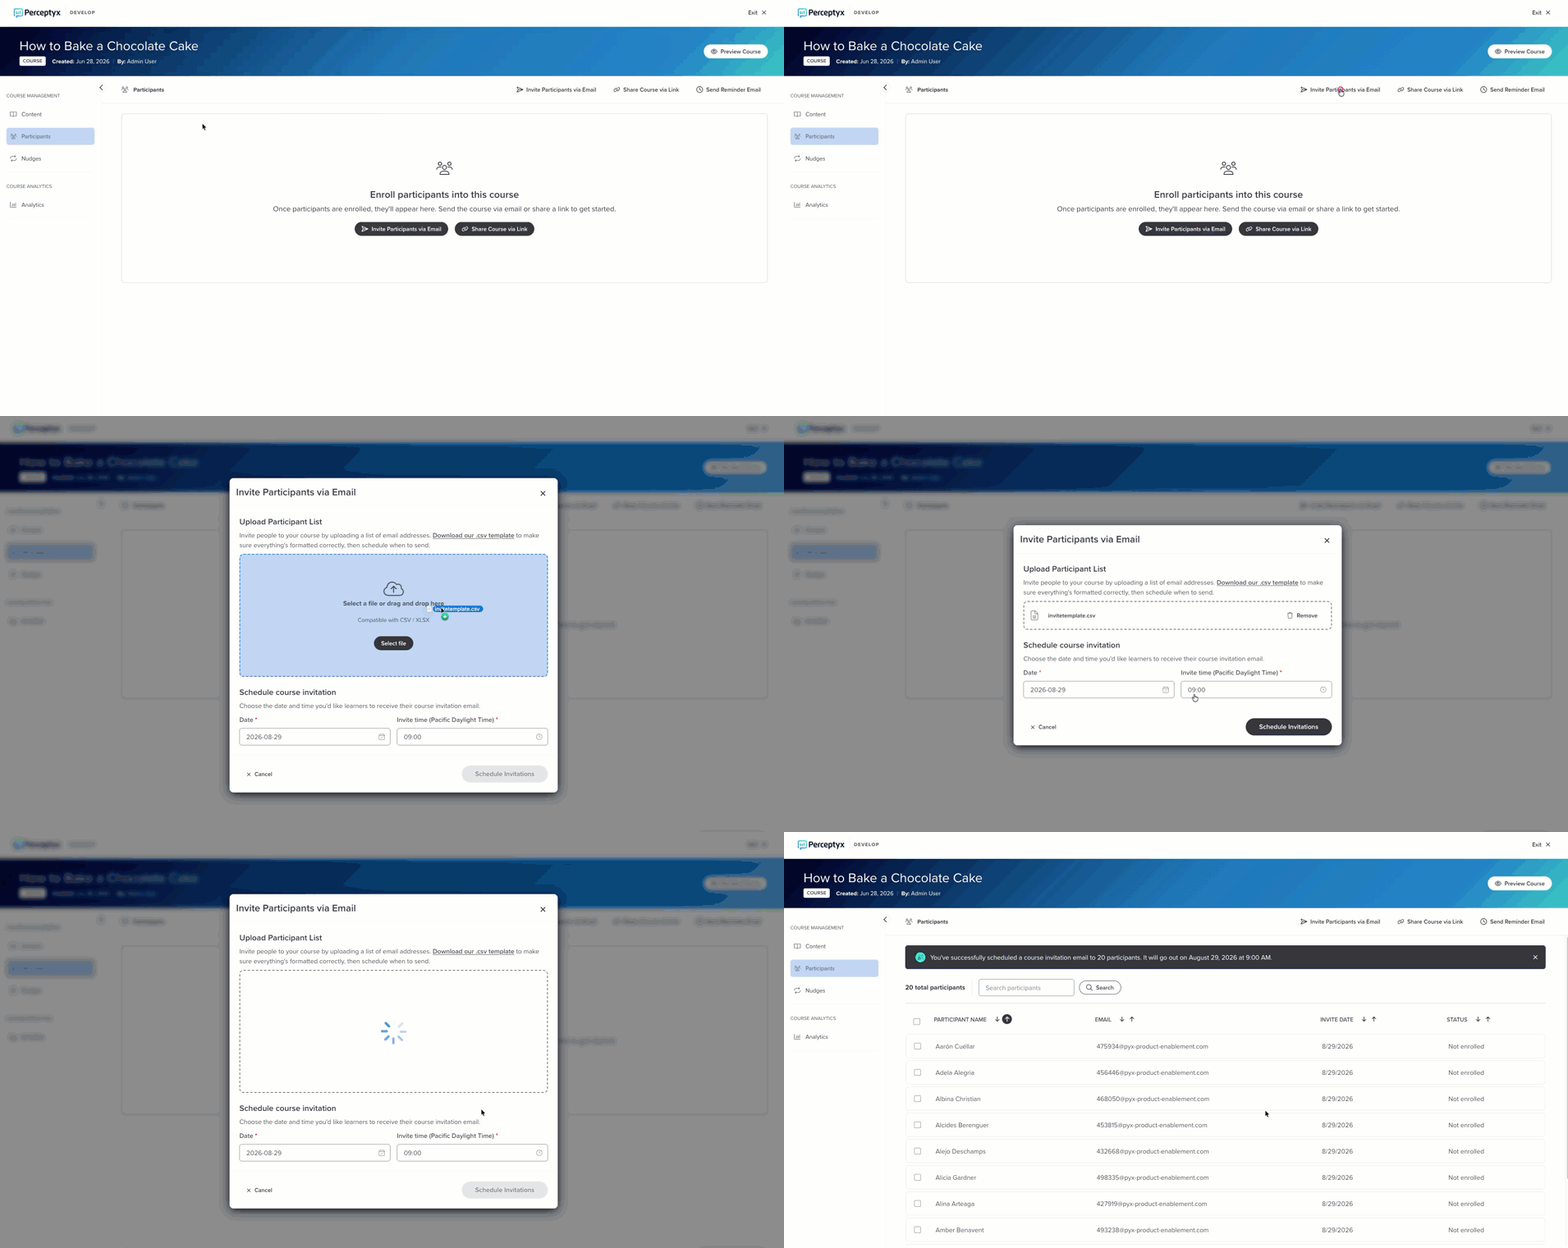
This method runs on the template, so start there rather than with a list you already have. Your own spreadsheet will not upload, no matter how tidy it is.
- Click Invite Participants via Email.
- Click Download our .csv template.
- Add your participant email addresses to the template and save it.
- Drag the saved file into the upload area, or click Select file and pick it.
Leave the template as you found it
Save the template back in the same format it came down in, as a comma separated values file, with the columns and headers exactly as they were. Renaming a header, adding a column, or saving it as an Excel workbook will stop the upload reading it. If you opened it in Excel, use Save As and pick the comma separated values format rather than letting Excel convert it to a workbook.
Give it a quick scan before you upload, too. Duplicate email addresses and blank cells are the two things most likely to make rows fail, and they are much easier to fix in the spreadsheet than after the fact.
- Under Schedule course invitation, choose the date and time the invitation should go out.
- Click Schedule Invitations.
A banner confirms when the invitation is going out. Everyone you added appears in the table as Not Enrolled until they click Take Course in their email, at which point they flip to Enrolled. If any addresses could not be invited, a banner tells you which ones and why, so sort those out before you try again.
Why scheduling is worth paying attention to
You can finish building on a Thursday and have invitations land on Monday morning, when people are more likely to actually do something with them. It also gives you a window to preview the course one last time before anyone sees it.
Share the course as a link
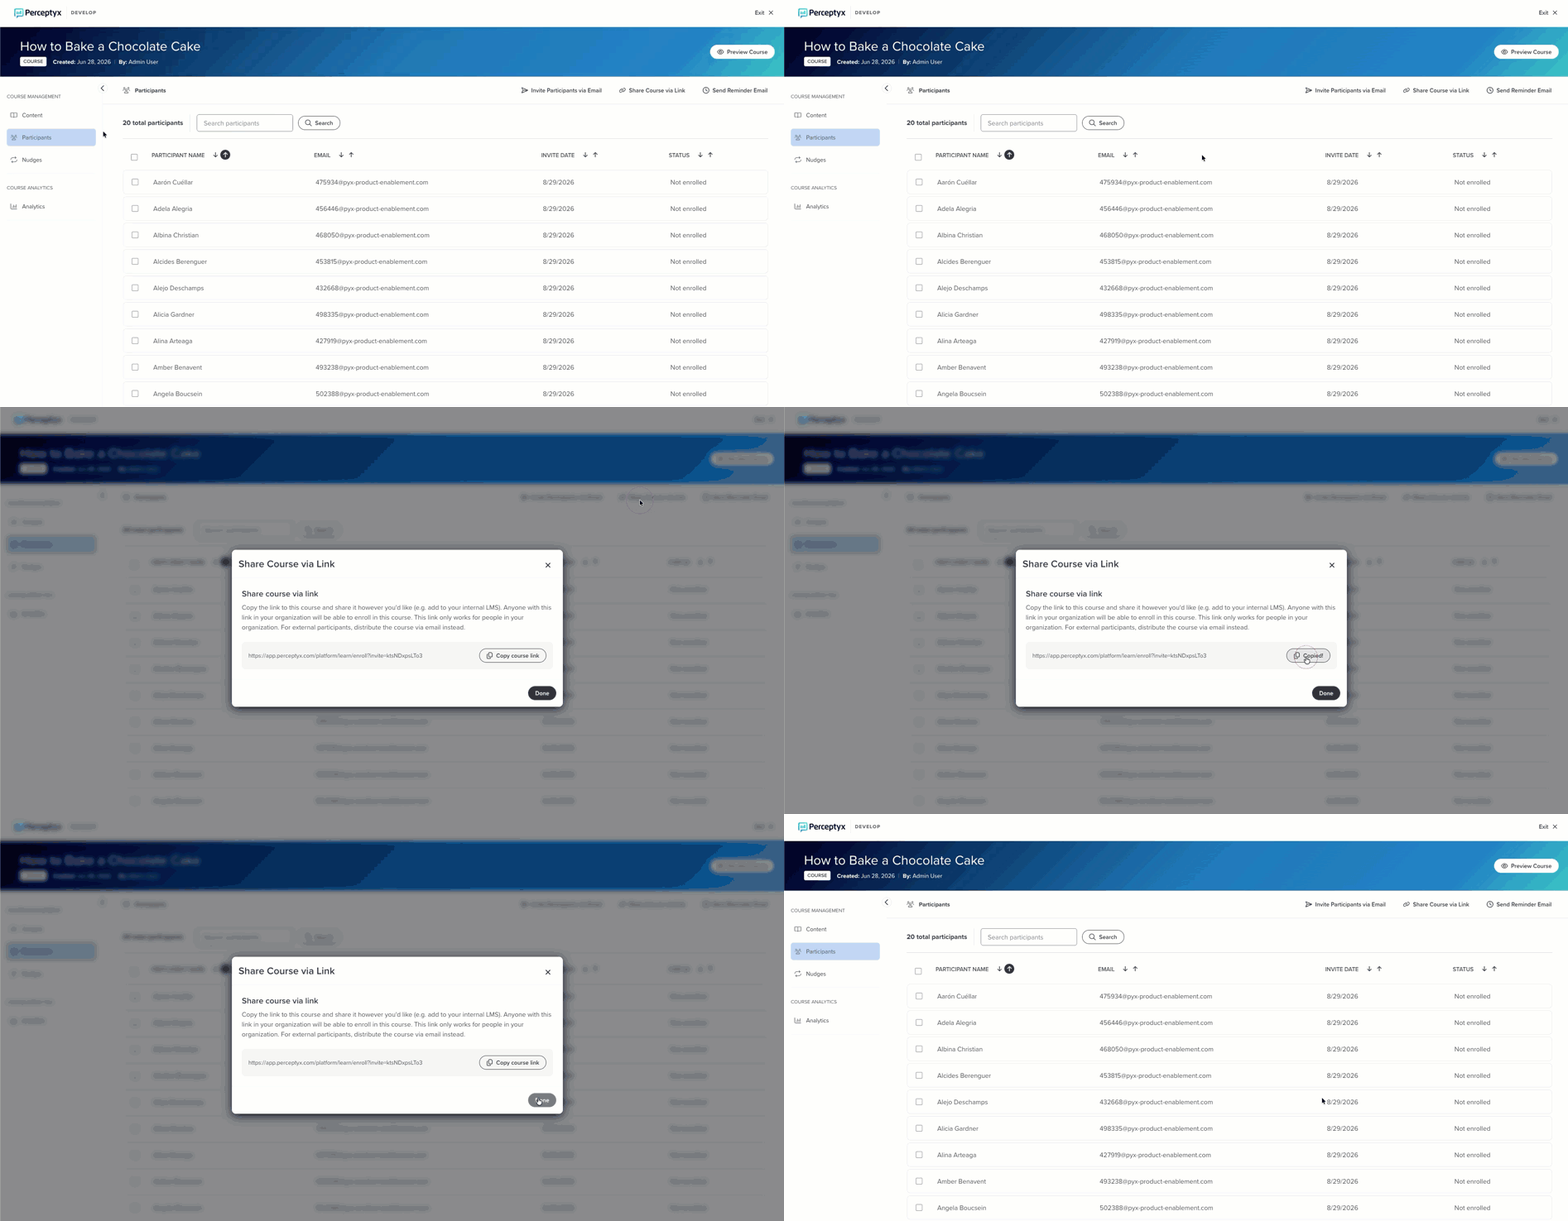
- Click Share Course via Link.
- Click Copy Course Link.
- Click Done.
- Paste it wherever your people actually look. A team channel, an email, an onboarding page, your learning management system.
Anyone in your organization who clicks the link can enroll themselves. They still show up in the participant table, they just will not have an invite date, since there was no invitation to date.
Send a reminder
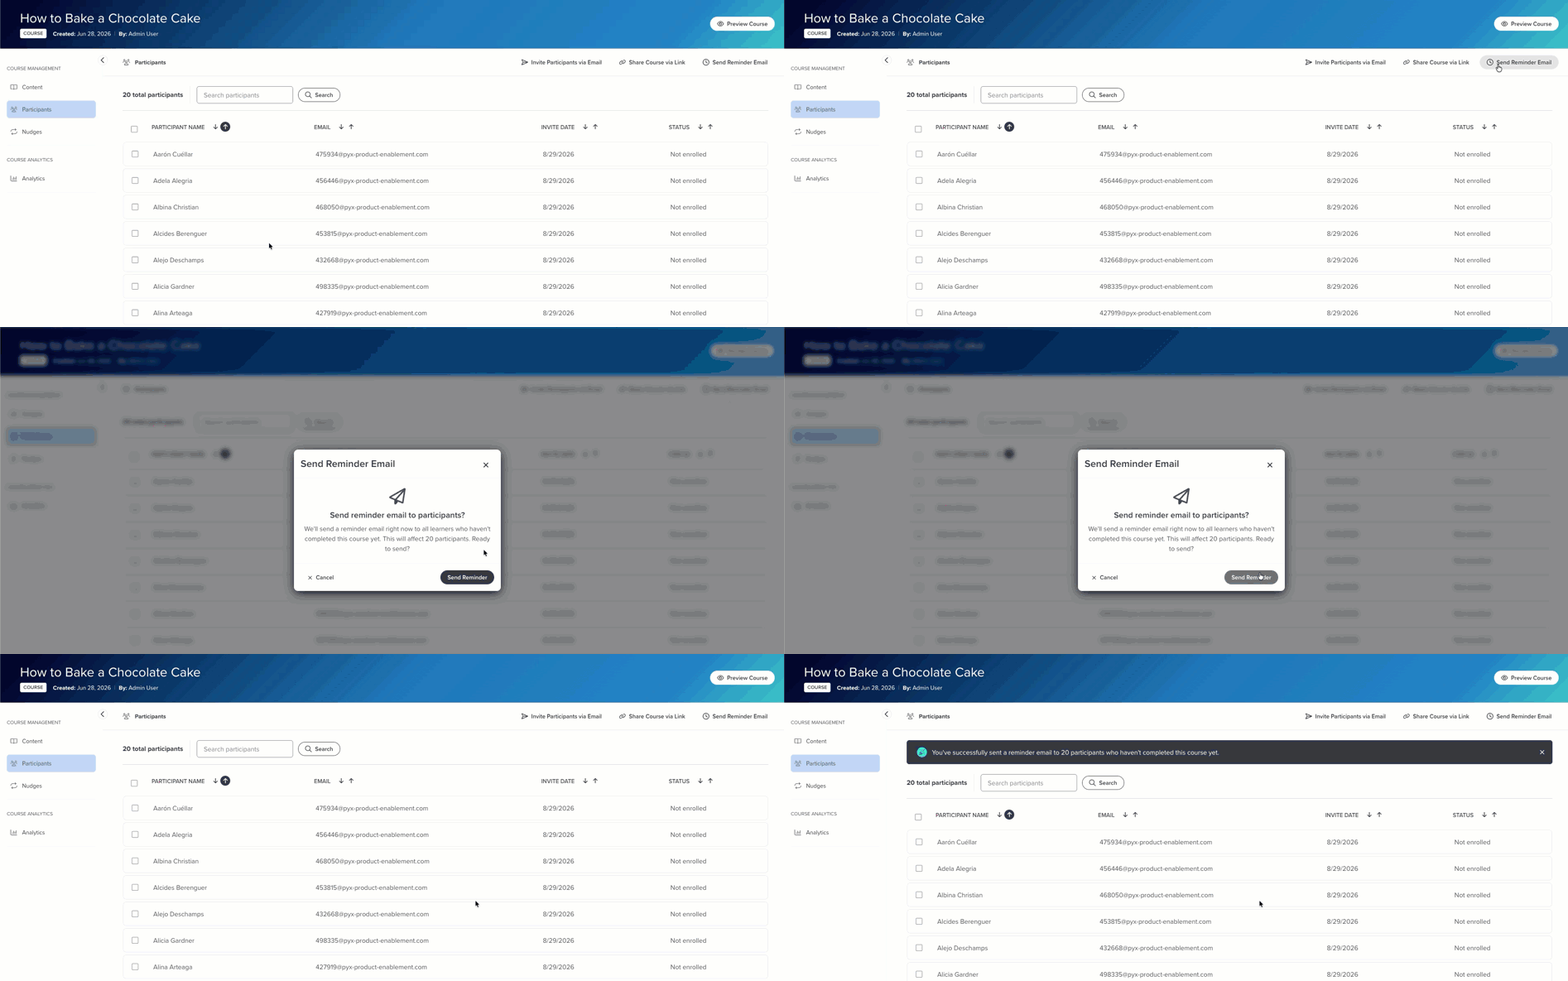
Click Send Reminder Email, then Send Reminder. It goes out immediately to every enrolled participant who has not finished the course.
There is no way to pick individual people, so this is a blunt instrument on purpose. Use it sparingly and it keeps working. Send one every three days and people start ignoring anything from you.
Check on your participants
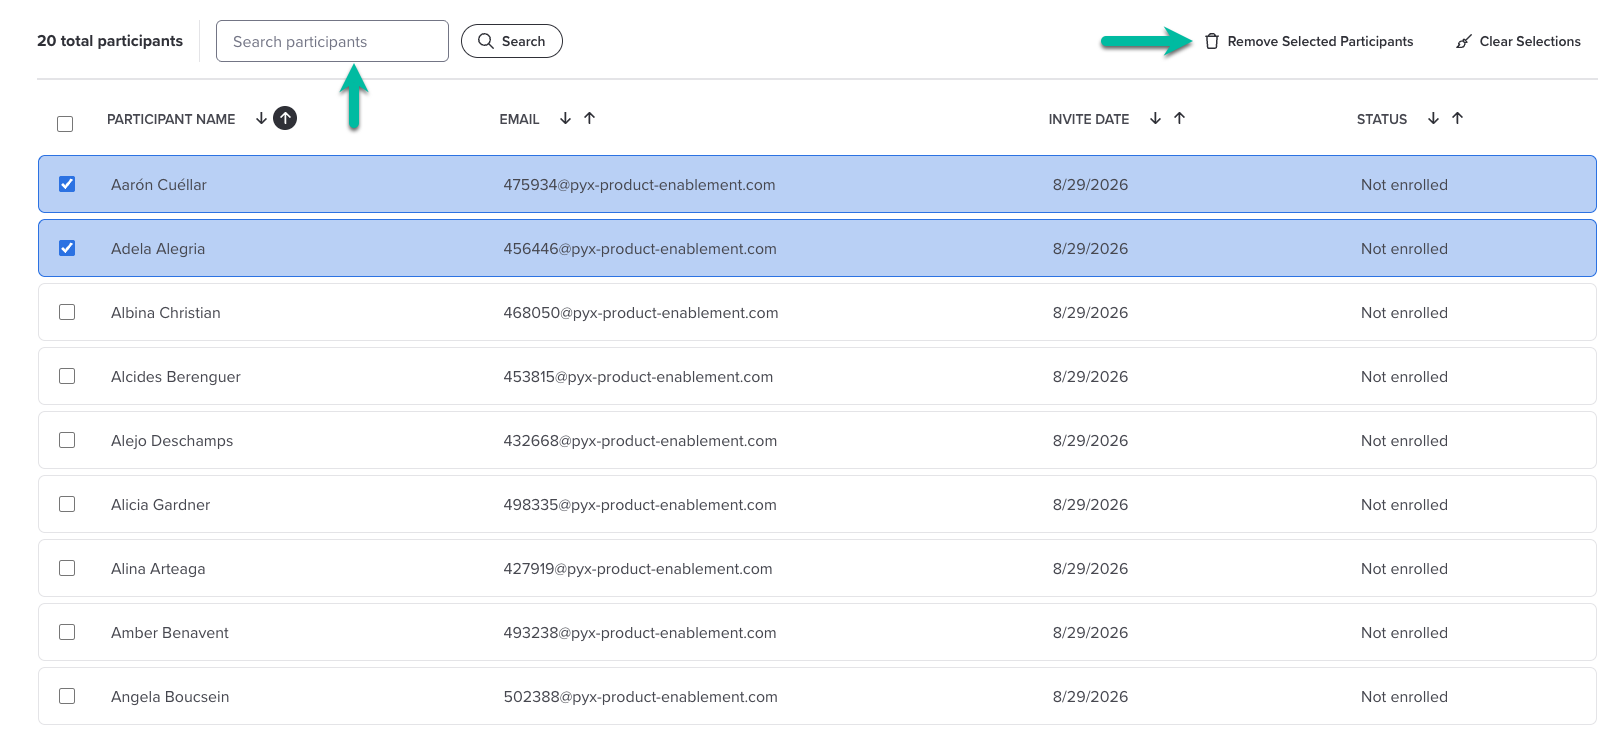
The table on the Participants screen shows each person's name, email address, invite date if they got one, and status. Sort by any column, or use Search to find someone by name or email address.
To take someone off the course, select the checkbox next to their name and click Remove Selected Participants. The checkbox in the column header selects everyone, and Clear Selections undoes the lot if you change your mind.
Was this article helpful?
That’s Great!
Thank you for your feedback
Sorry! We couldn't be helpful
Thank you for your feedback
Feedback sent
We appreciate your effort and will try to fix the article