Listen
Some organizations like a second set of eyes on an event before it goes out. If yours does, creators send their finished draft to an Event Administrator, who either approves it or sends it back for changes.
This article covers Point-In-Time and Lifecycle events. Approval happens in the Launch phase, right before an event goes live. If your account does not need approval, you can skip straight to Launch Your Listening Event | Point-In-Time & Lifecycle.
This article walks through
Who Needs Approval
Whether a creator needs approval comes down to one permission on their group: Allow Survey Launch without Approval.
- When it is on, creators in that group launch their events on their own.
- When it is off, creators in that group send each event to an Event Administrator before it can go live.
The permission starts out on, so nobody needs approval until a Platform Administrator sets it up. Event Administrators never need approval to launch.
Turn on approval for a group of creators
This part is for Platform Administrators. The built-in Event Creator group is protected, so its permissions cannot be changed. To require approval, make your own creator group with the permission turned off, then put the right people in it.
- Click the gear icon in the navigation bar to open the Admin Portal.
- In the User Management section of the left panel, click Groups and Permissions.
- Find the Event Creator group, click Actions, then click Clone Group. (You can also build a new group from scratch if you prefer.)
- Give the group a name that makes its purpose obvious, like Event Creators, Approval Required, then click Next.
- On the permissions step, turn off Allow Survey Launch without Approval.
- Work through the rest of the steps to add the people who need approval, then review and activate the group.
Screenshot placeholder
The permissions step of the group workflow in the Admin Portal, for an Event Creator group type, showing the three editable permissions (Distribute Events by Email, Add Content to Question Library, and Allow Survey Launch without Approval) with Allow Survey Launch without Approval turned off.
For everything else about building groups and adding people, see Manage Group-Based Access and Permissions (Platform Admins Only).
Sending Your Event for Approval
If your events need approval, you build them exactly the way you normally would. The only difference comes at the very end: instead of launching, you send the event to an Event Administrator. It cannot go live until they approve it.
Open the Launch phase
If you are already in the Event Builder, click Launch in the left panel.
If you are starting from somewhere else:
- Go to the Listen page and find your event.
- Click Manage Event. The Event Builder opens.
- Click Launch in the left panel.
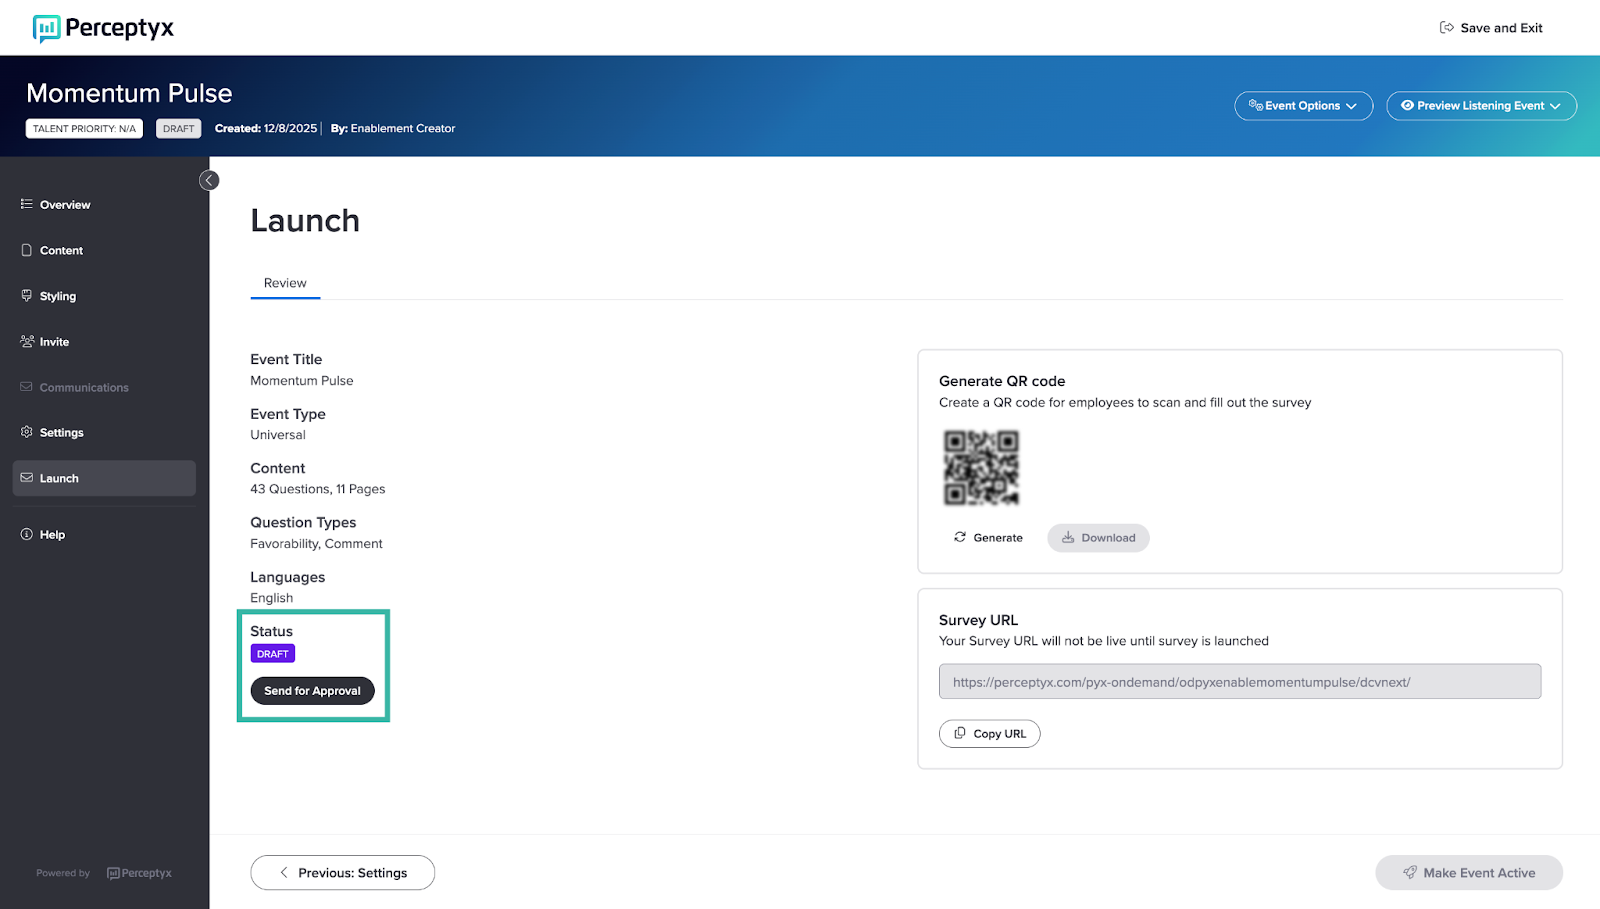
The Review tab opens with a quick summary of your event.
Send it for approval
- In the Status section, click Send for Approval.
- The status changes to Waiting for Approval, and your Event Administrator gets an alert in the platform.
Note
Spotted something you want to change? Click Unsubmit to pull the event back. Make your edits, then send it for approval again.
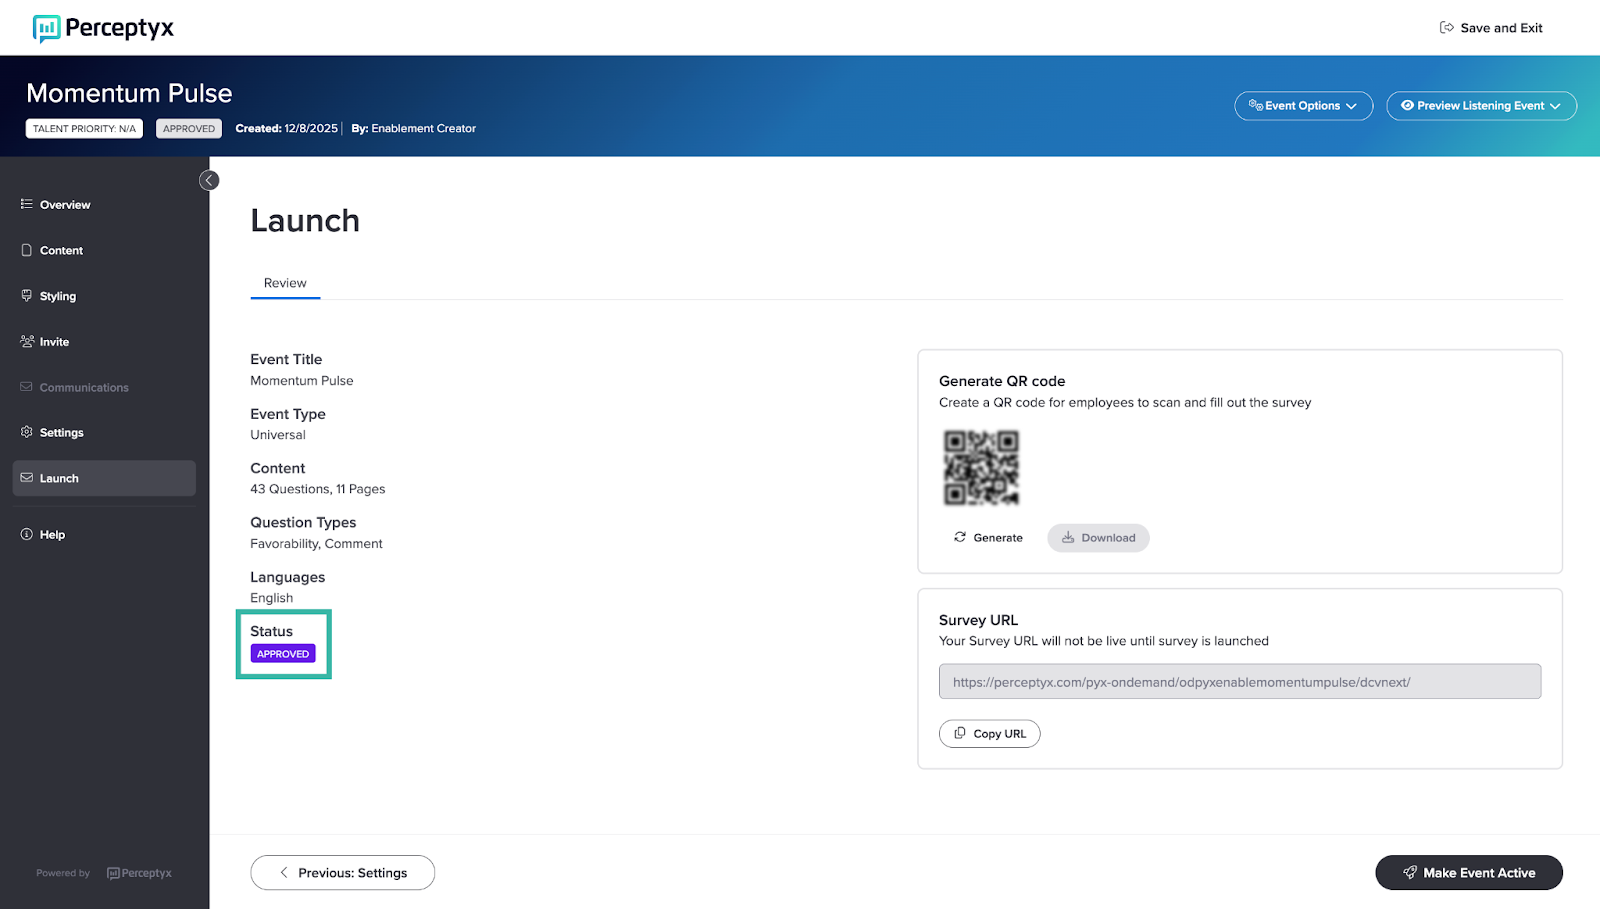
Once your Event Administrator approves it, the status changes to Approved and you can finish launching the event as usual. Launch Your Listening Event | Point-In-Time & Lifecycle walks you through the rest.
Reviewing and Approving an Event
When a creator sends an event for approval, you get an alert in the platform. It shows up in the notifications area on the Home page if it is your most recent notification, and in Alerts in the navigation bar. You need to be logged in to see it.
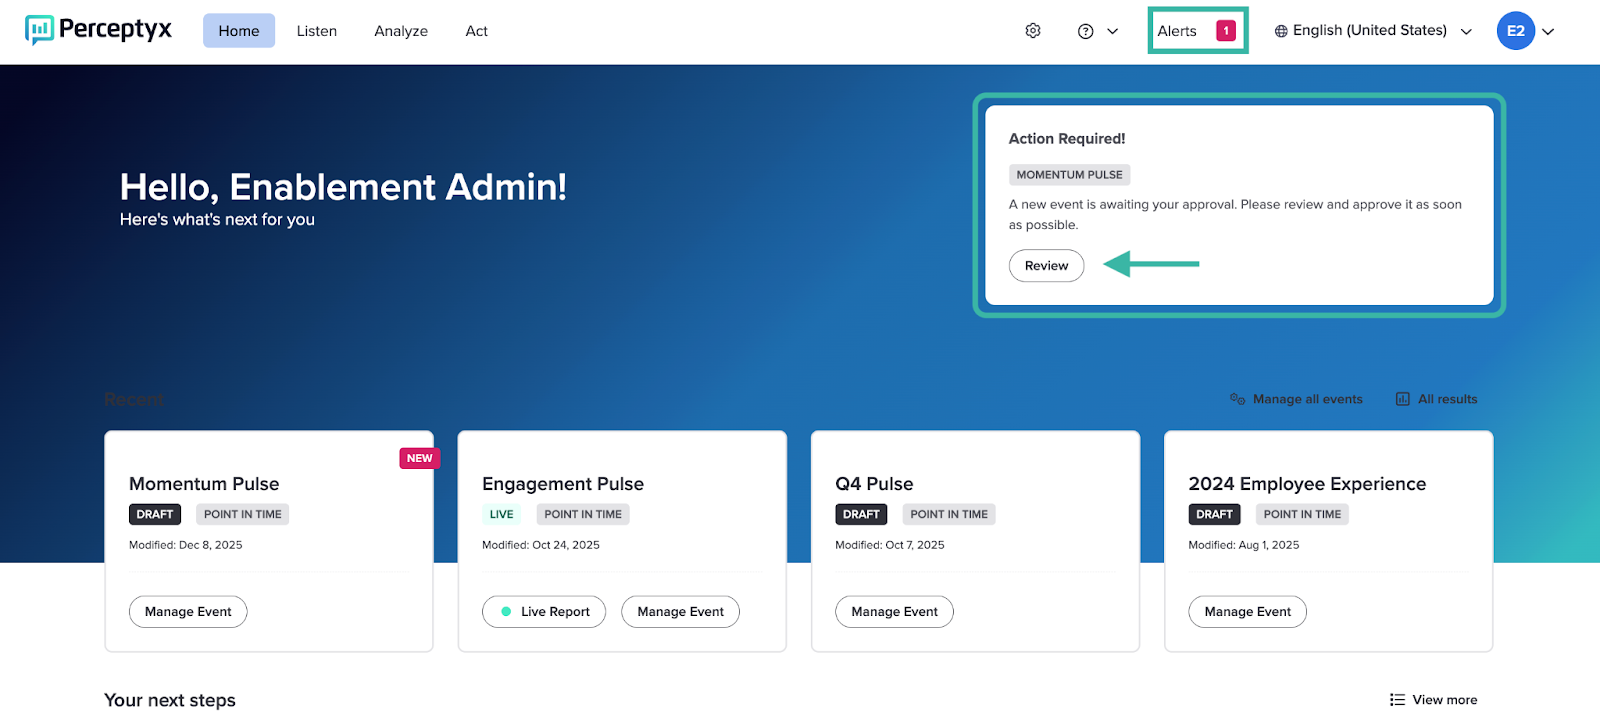
- Log in to the Perceptyx platform and find the approval request on the Home page or under Alerts in the navigation bar.
- Click Review. The event opens in the Event Builder.
- Click through each phase in the left panel and check the event over.
- Click Launch in the left panel.
- Click Event Options (top right), then click Approve/Decline. The Manage Approval window opens.
- Choose Approved or Declined, then click Send Response. A confirmation banner appears and the status updates.
- Click Save and Exit (top right).
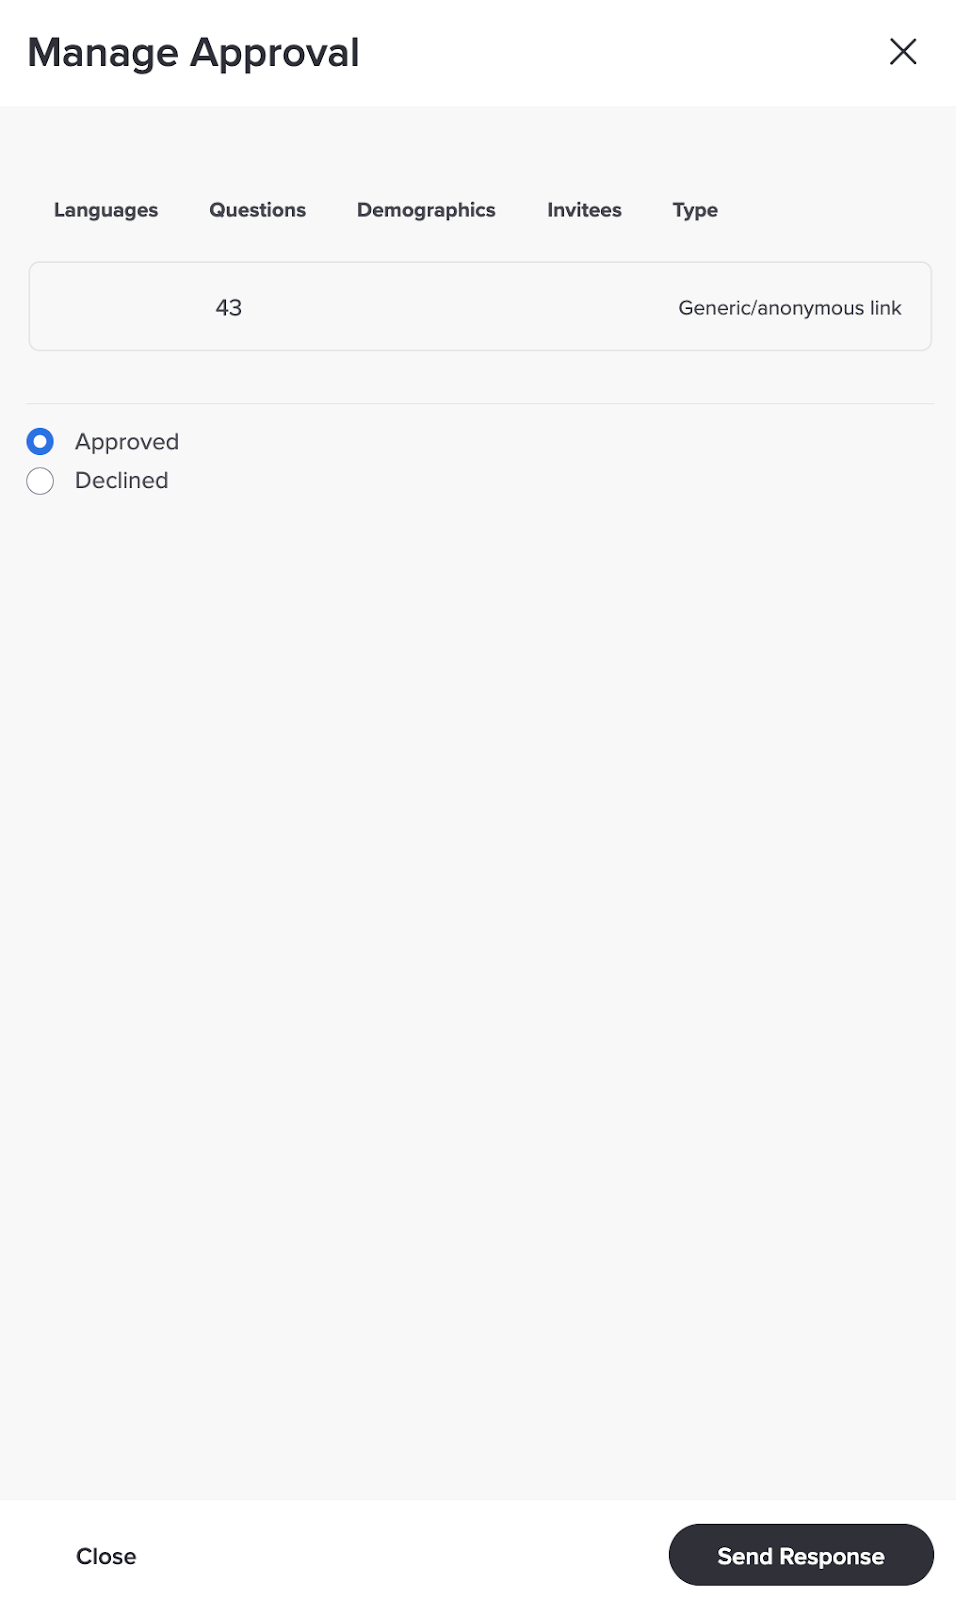
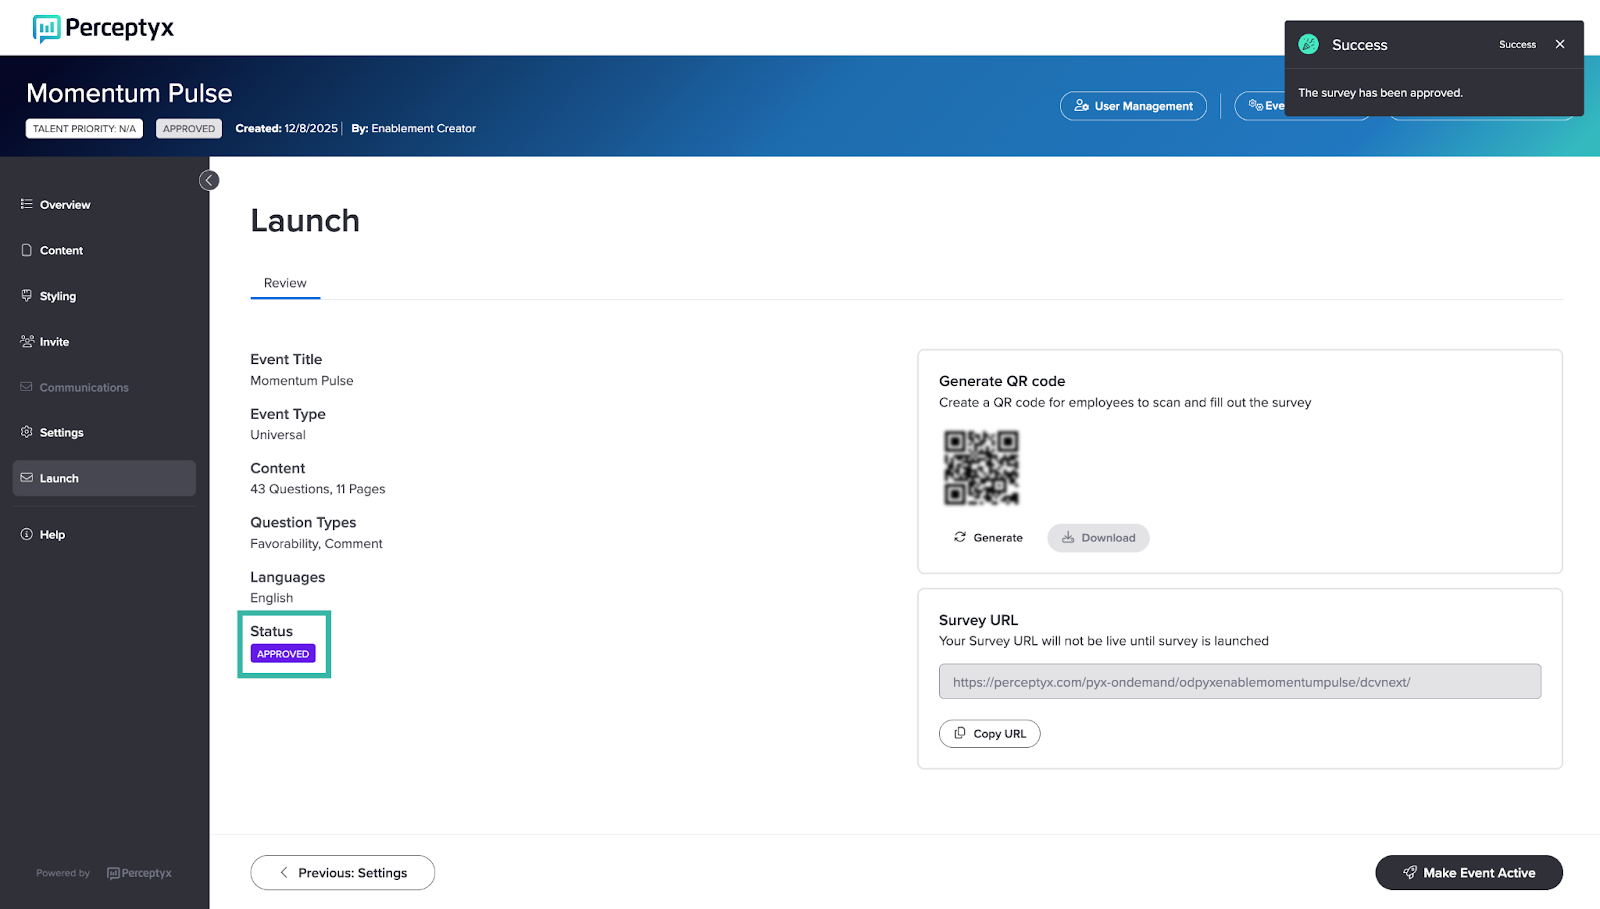
If you approve the event, the creator can go ahead and launch it. If you decline it, the creator puts it back into draft, makes changes, and sends it to you again.
What to Do If Your Event Is Declined
If your Event Administrator declines your event, a Declined status shows under the event name. While it is declined, you can still get to the phases up to and including Invite, but not the ones after it, and preview is not available.
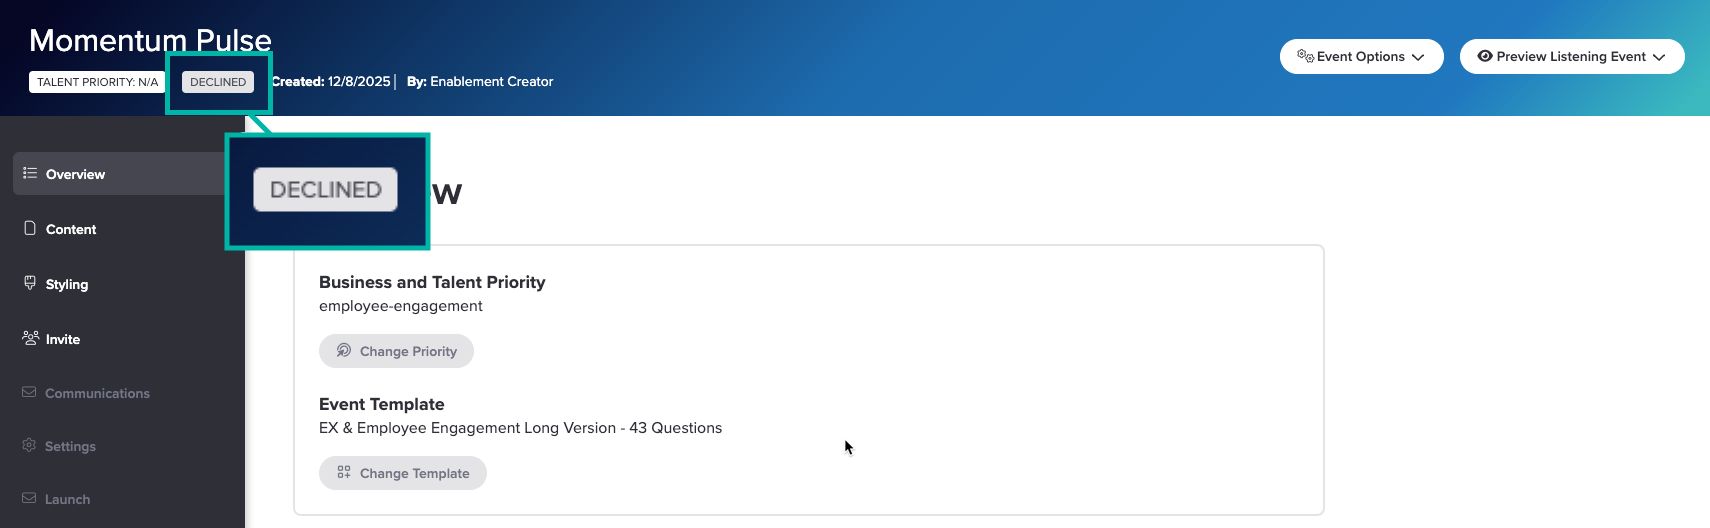
To make changes, put the event back into draft. That is what clears the Declined status and opens everything up again.
- Click Event Options, then click Revert to Draft.
- Click Confirm. The event goes back to draft and every phase of the Event Builder is available again.
- Make your changes.
- Open the Launch phase and click Send for Approval again.
Note
A declined event was never launched, so putting it back into draft does not cost you any responses. Your Event Administrator can also revert the event to draft for you.
What's next
Approved and ready to go? Launch Your Listening Event | Point-In-Time & Lifecycle walks you through scheduling your emails and turning your event on.
Was this article helpful?
That’s Great!
Thank you for your feedback
Sorry! We couldn't be helpful
Thank you for your feedback
Feedback sent
We appreciate your effort and will try to fix the article