Develop
Every Develop course is built from two things: your source material and your answers to a few questions about your audience. Your source material can be your own files, credible web sources Develop finds for you, or both. Here is how to pick good material and walk through the course builder.
This article walks through
Why your source material matters
Develop builds your course from the files you upload and the web sources you choose to keep. It does not pull in anything else to fill the gaps. If a concept is not in your source material, it will not be in your course.
That stays true once learners are in the course. Develop keeps referring back to your material as it talks with them, so your sources are not a rough starting point that gets rewritten. They are what people are actually being taught from, which makes them worth a few minutes of thought.
No content of your own?
That's fine. In step 3 of the builder, Develop can search the web for credible sources on your topic and let you pick which ones to use. Read Find Web Sources for Your Course for how it works.
Picking material that works
Your content does not need to have been built for training. Process guides, product manuals, policy documents, and case studies all work well, often better than material written to be training. Four things make the biggest difference:
Depth beats breadth A more in-depth, well-written source document on your topic produces better results than four loosely related ones that only skim the surface of your topics. |
Practical beats abstract Real examples and step by step processes give Develop something concrete to build activities around. Conceptual material still works, but one real example goes a long way. |
Scope it to the course Uploading a long manual when your course covers one chapter will not break anything, but the closer the match, the more focused the result. You can also point Develop at the relevant part in the last Audience & Outcomes question, which asks about constraints and special instructions. |
Video works better than you would expect Develop takes in both the picture and the audio, so a narrated presentation is understood as a whole. If your best explanation lives in a short recorded session, upload the recording. |
What Develop accepts
- Documents: PDF, DOCX, TXT, HTML
- Presentations: PPT, PPTX
- Video: MP4, WEBM, AVI, MOV
Files can be up to 50 megabytes each. If something is too big, splitting out the sections that actually relate to your course usually beats compressing it, because it improves the course at the same time.
Worth knowing
Only upload content you own or have a license to use. And because anything in a file can end up in front of a learner, read or watch each one all the way through first. Recorded meetings are the usual culprit for names, faces, and screen shares you did not mean to share.
Create your course
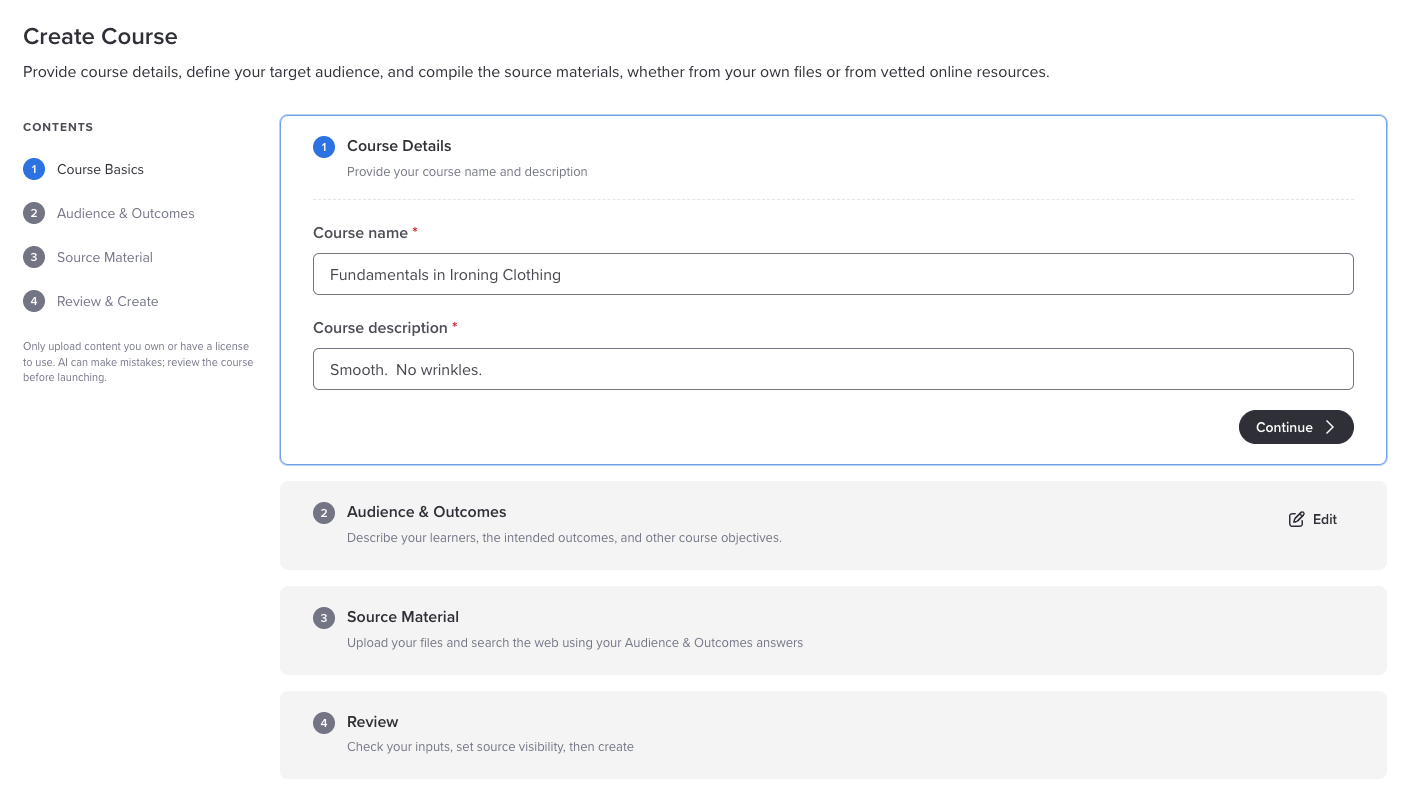
The course builder walks you through four steps, listed down the left side of the screen. Each one collapses once it is done, and you can click Edit on any finished step to go back and change it.
Step 1: Course Basics
- In the platform navigation bar, click Develop.
- Click + Create Course.
- Enter a Course name and a Course description. Both are required.
- Click Continue.
Step 2: Audience & Outcomes
Four questions tell Develop who the course is for and what learners should be able to do afterward. The first two are required and the last two are optional, though answering them makes a real difference. These answers also drive the web search in the next step. For what to write in each box, see Answering the Course Details Questions.
When you have answered them, click Continue.
Step 3: Source Material
This step has two optional sections. Use either one, or both.
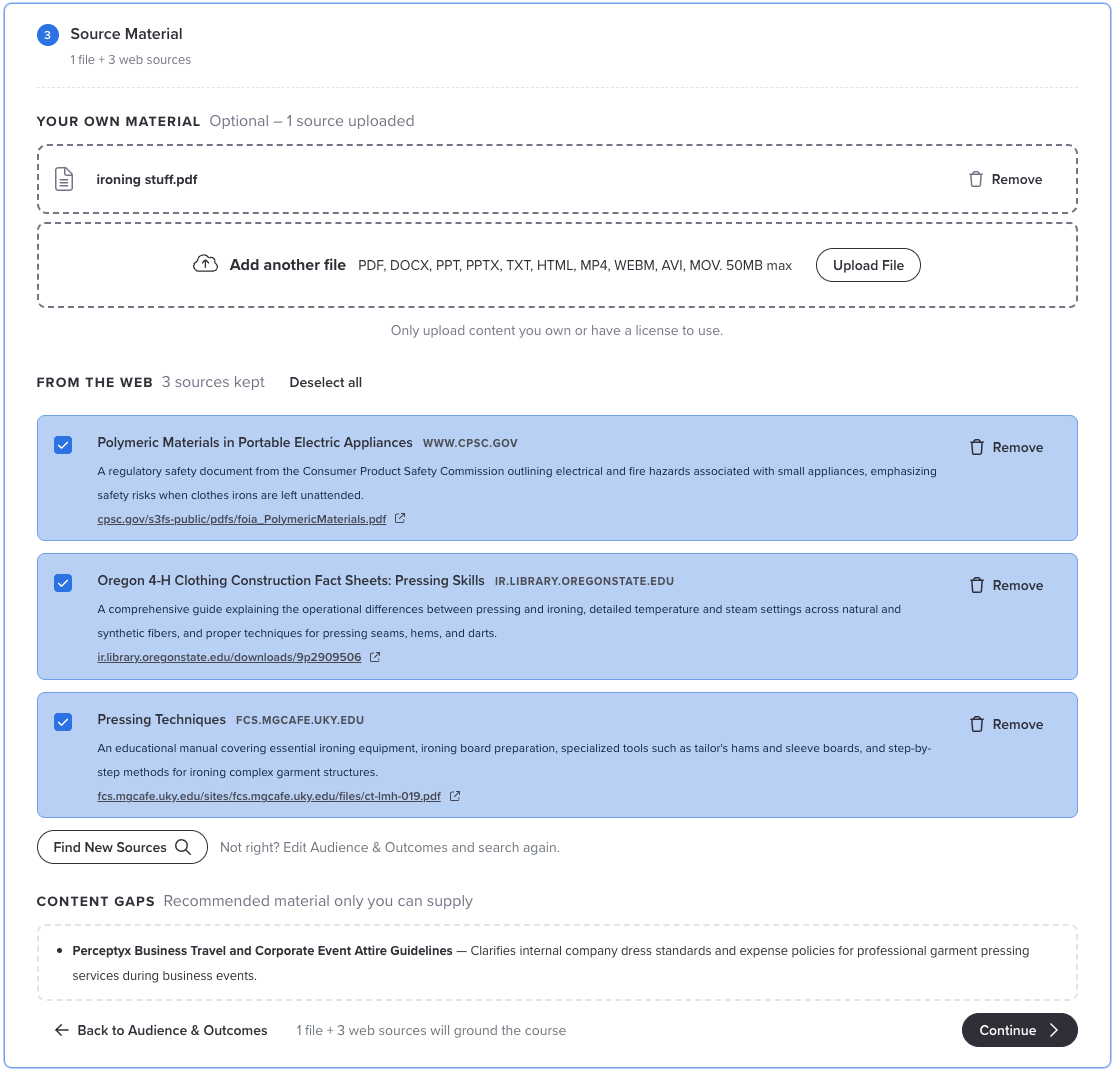
- Your Own Material: drag and drop your files into the upload area, or click Upload File to browse for them. You can add several files.
- From the Web: click Find Web Sources and Develop searches for credible sources based on your answers and any files you uploaded. You check the ones you want to keep. If the results are not right, change your Audience & Outcomes answers before you search again, since searching again with the same answers may bring back much the same list. If you have no files, click Skip under the upload area to go straight to the web search. The details are in Find Web Sources for Your Course.
You need at least one uploaded file or one kept web source before you can click Continue.
Step 4: Review & Create
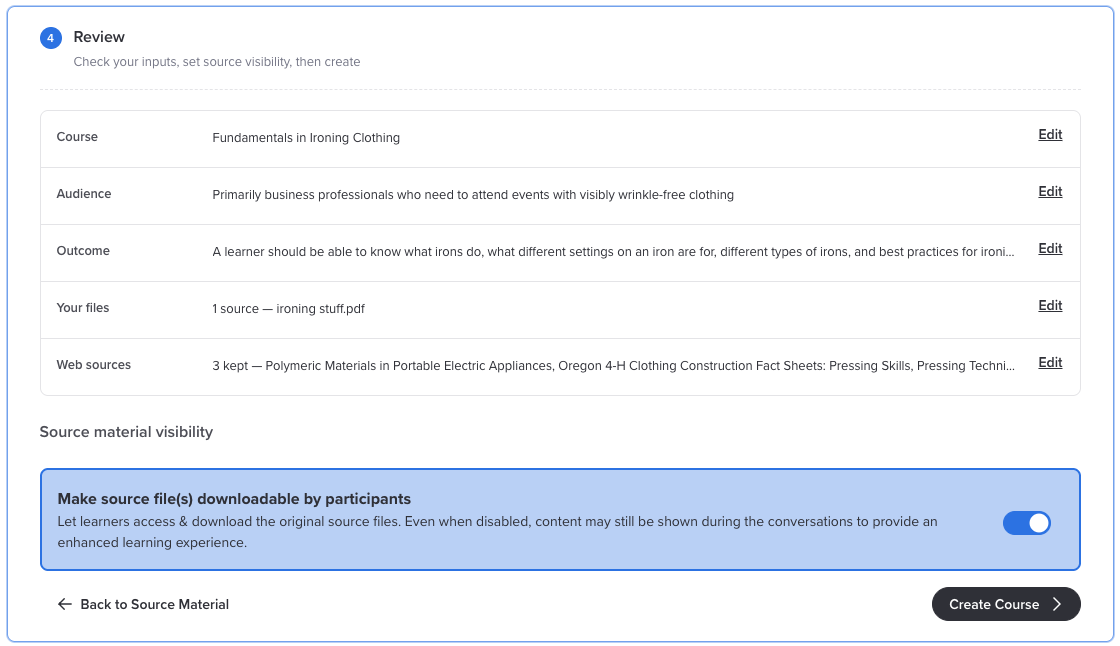
You will see a summary of everything you entered: the course name, audience, outcome, your files, and the web sources you kept. Click Edit next to any line to change it.
- Decide what to do with the Make source file(s) downloadable by participants toggle. More on that below.
- Click Create Course.
Should learners be able to download your files?
The download toggle on the Review step is on by default, which means learners can open your original source files as a reference. That is usually a good thing. Turn it off if the material is proprietary, or if you would rather people learn it through the conversation than skim the source.
One thing this toggle does not do
Turning downloads off does not hide the content. Develop still teaches from your source material either way, and can still quote or describe what is in it. The toggle only controls whether learners can grab the file itself.
What's next
Once your course is built, Reviewing and Modifying Your Course walks through checking it and making changes.
Was this article helpful?
That’s Great!
Thank you for your feedback
Sorry! We couldn't be helpful
Thank you for your feedback
Feedback sent
We appreciate your effort and will try to fix the article