Act
How to turn your listening event results into an action plan, whether you pick the item yourself, let Activate suggest where to focus, set one up for a leader you support, or send one to a whole group.
Before you start
An action plan is how you turn what people told you in a listening event into something you'll actually do. You pick one item from your results, like I am recognized in ways that are meaningful to me, and write down what you and your team are going to do about it.
Action planning works best as a team effort. Go through the results with your team, agree on what matters most, and then capture it in a plan together.
This article walks through
What goes in an action plan
Every action plan has the same few pieces, no matter how you start it:
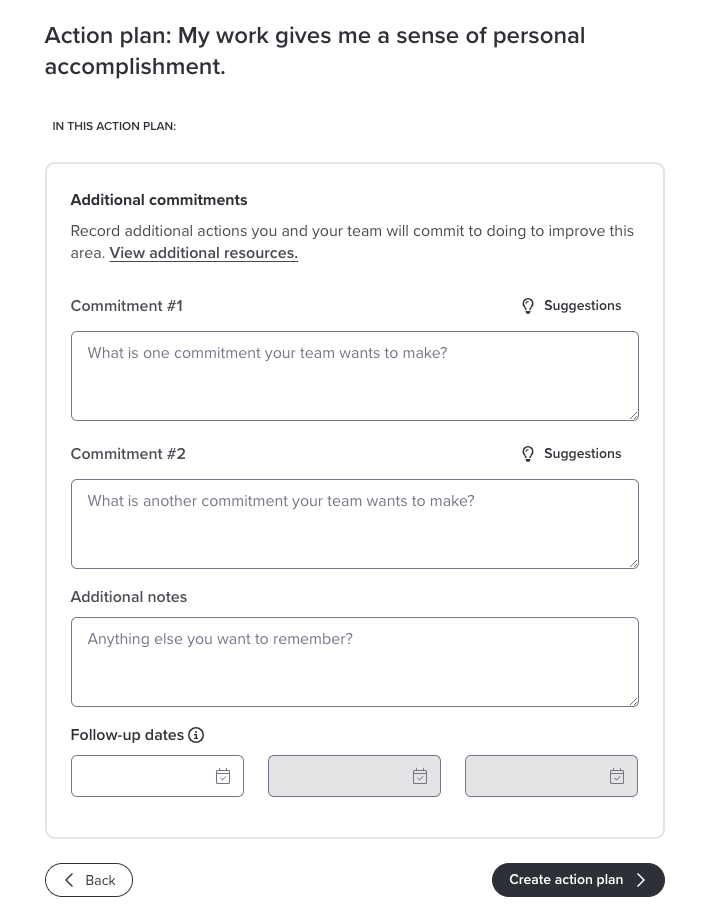
- The item. The survey item you're focusing on. You choose this before the plan opens.
- Commitments. Up to two things you and your team will do. Not sure where to begin? Click Suggestions next to a commitment box for ideas written for that specific item.
- Additional notes. Anything else you want to remember.
- Follow-up dates. Up to three. Click the calendar icon to pick each date.
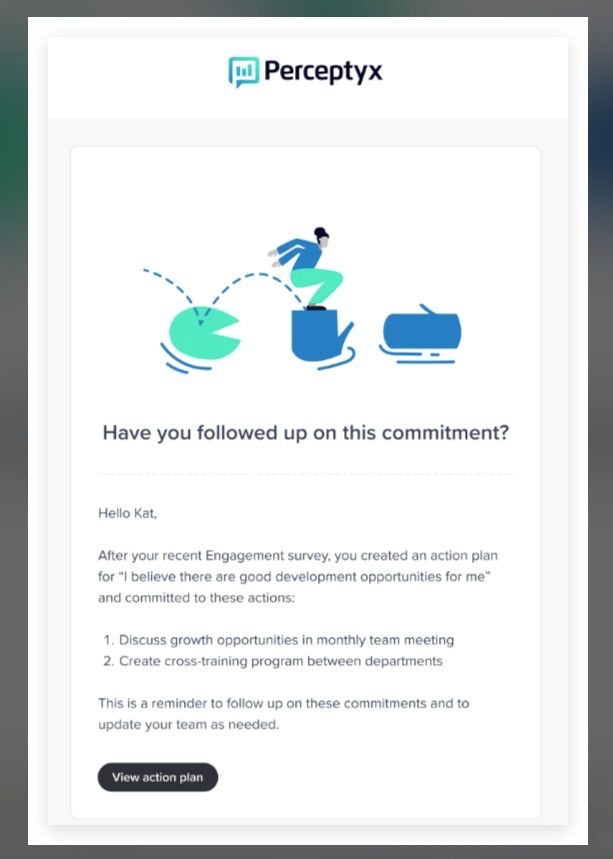
On each follow-up date you get a reminder email asking whether you've followed up on your commitments, with a link back to the plan.
Where to start
You can start an action plan from two places:
- Your event report in Advanced Reporting. This works for everyone, and it's the best place to start when you want to choose the item yourself.
- The Act page. Click Create Action Plan, pick your event, and you land in the same report.
Needs Activate
With Activate, you also get an invitation that suggests which items to focus on. It shows up on the Act page, and depending on how your organization set things up, by email, Microsoft Teams, or Slack too. See Create an action plan from Activate's suggestions.
Create an action plan from your results
Use this when you want to pick the item yourself. It works for Point-In-Time, Lifecycle, and 360 feedback events.
Start from your report
- Log in to the Perceptyx platform and click Analyze in the top navigation bar.
- In the All Reports section, find your event. If you have more than one role on it, click Role and choose the one you want to use.
- In the Actions column, click View Report. Advanced Reporting opens, usually on the dashboard, the Favorability Report, or the Detailed Scores Report, depending on how your site is set up.
- Find the item you want to work on and open the action plan. How you do that depends on where you are:
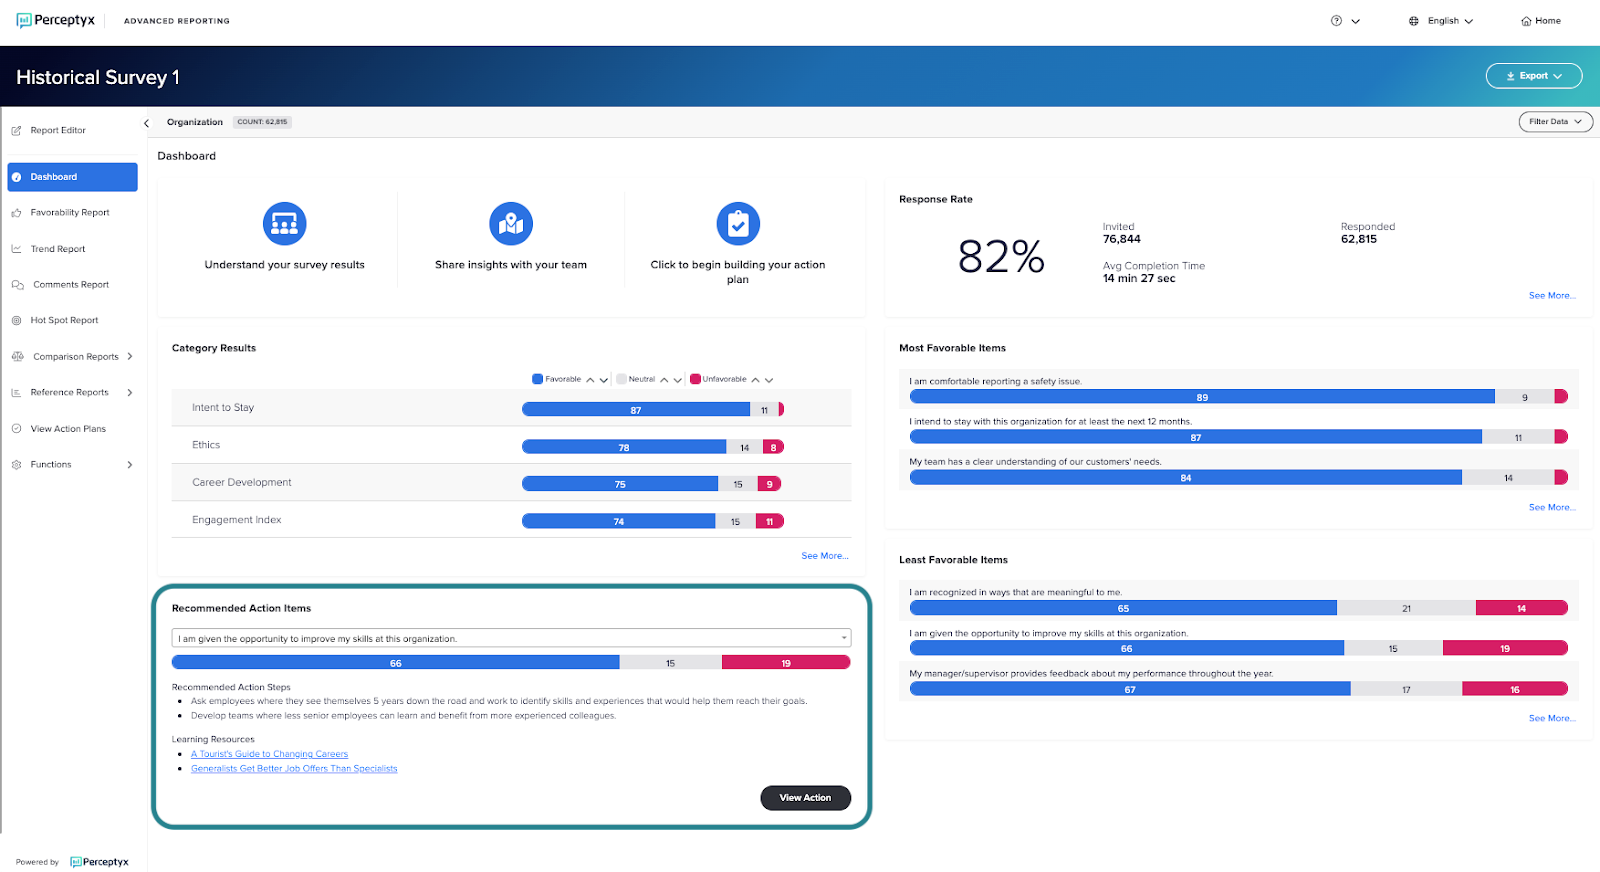
From the dashboard, Point-In-Time or Lifecycle. In the Recommended Action Items widget, choose the item from the dropdown, then click View Action.
From the dashboard, Perceptyx-led 360 feedback. In the Recommended Action Items section, click Take Action next to the item.
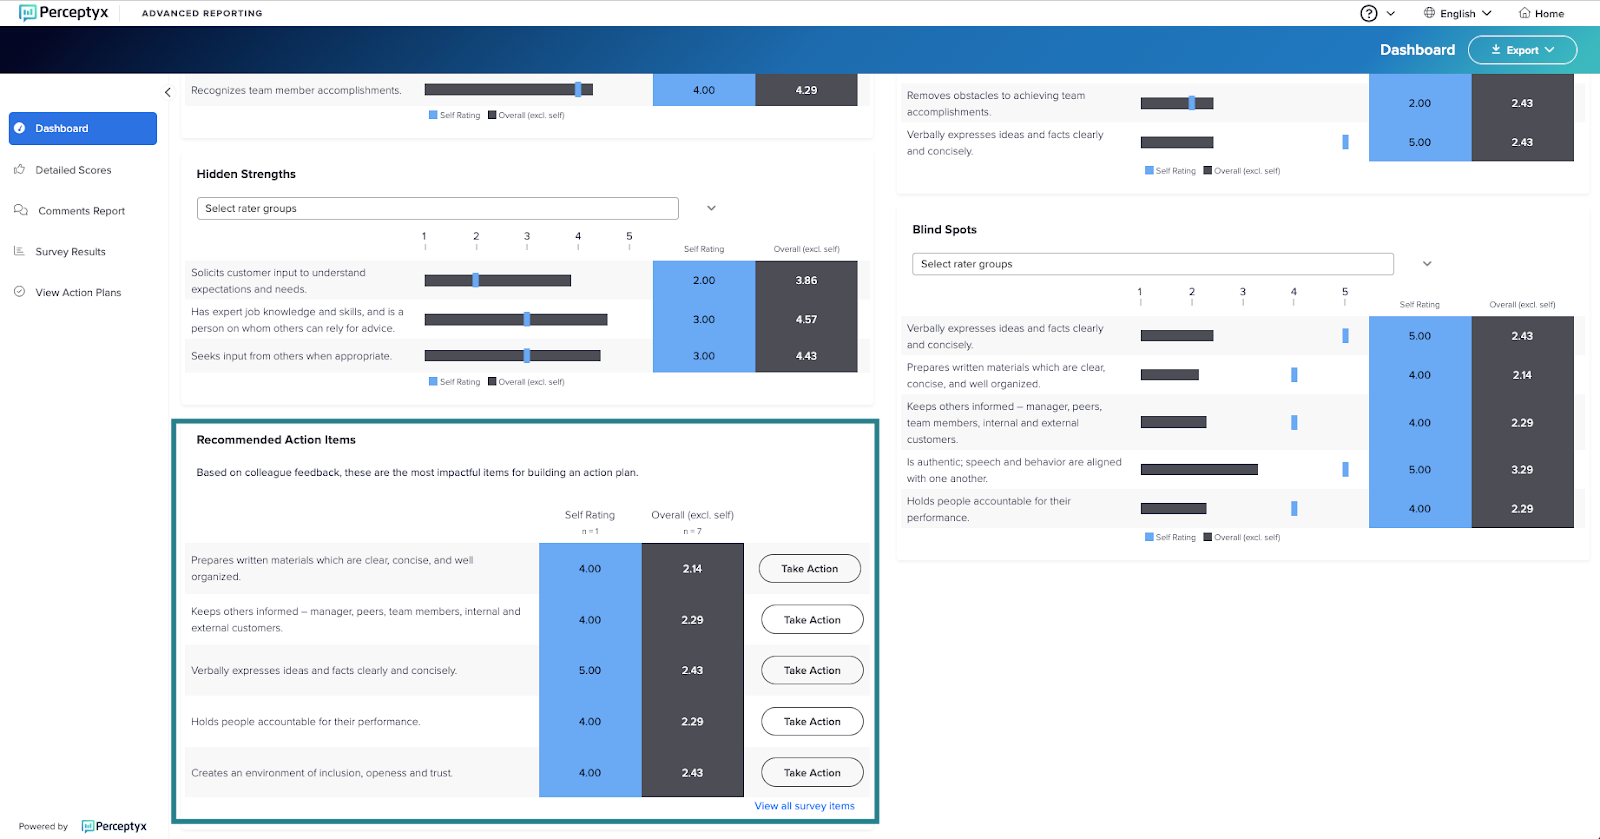
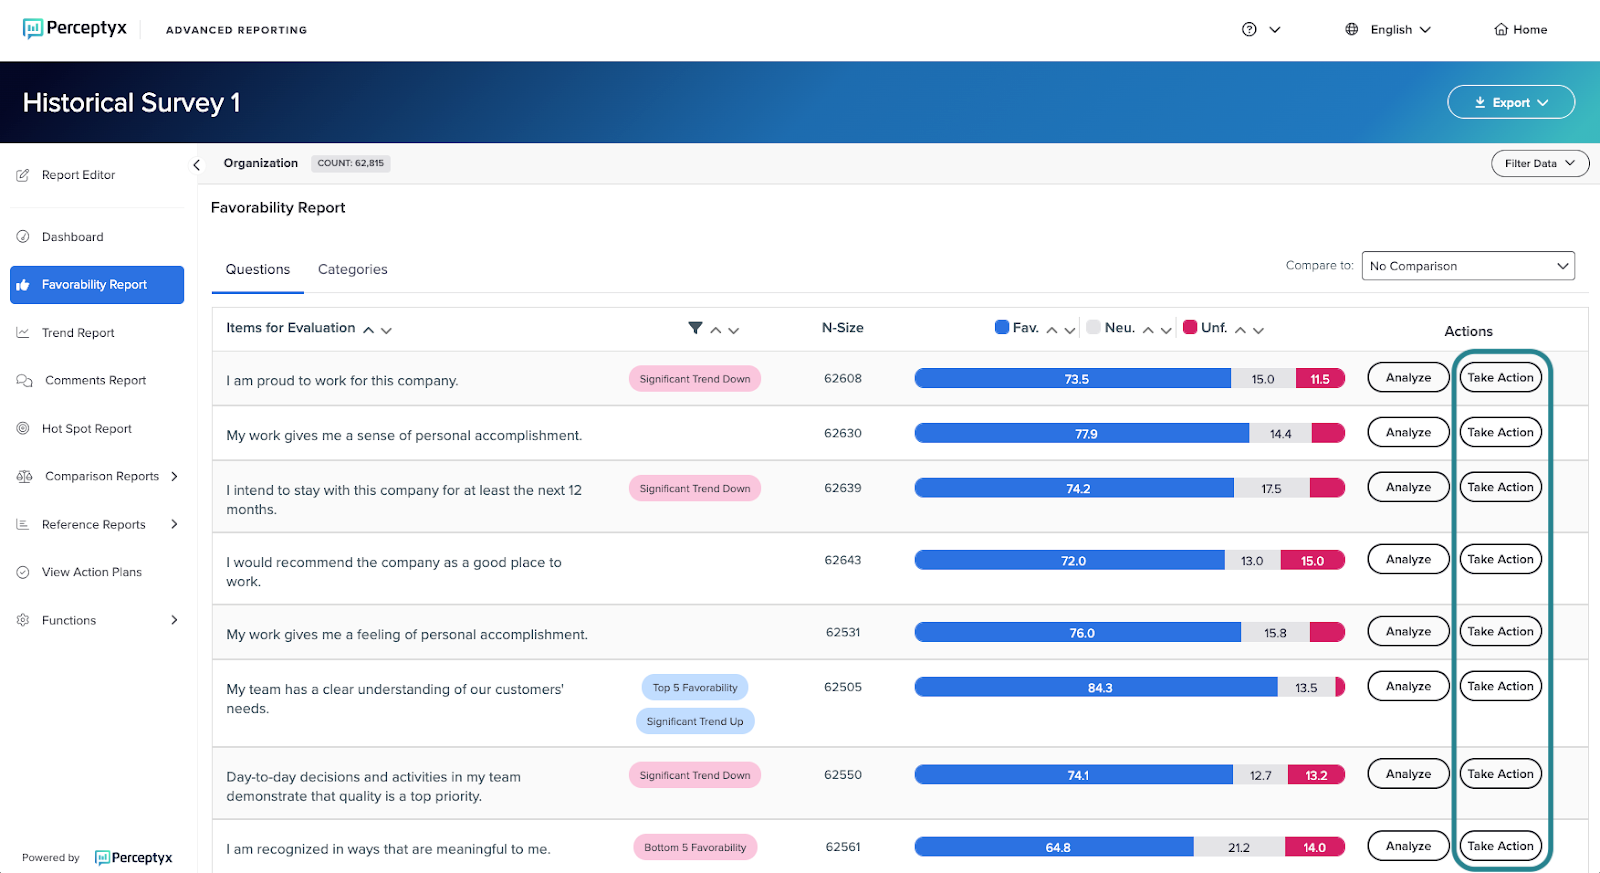
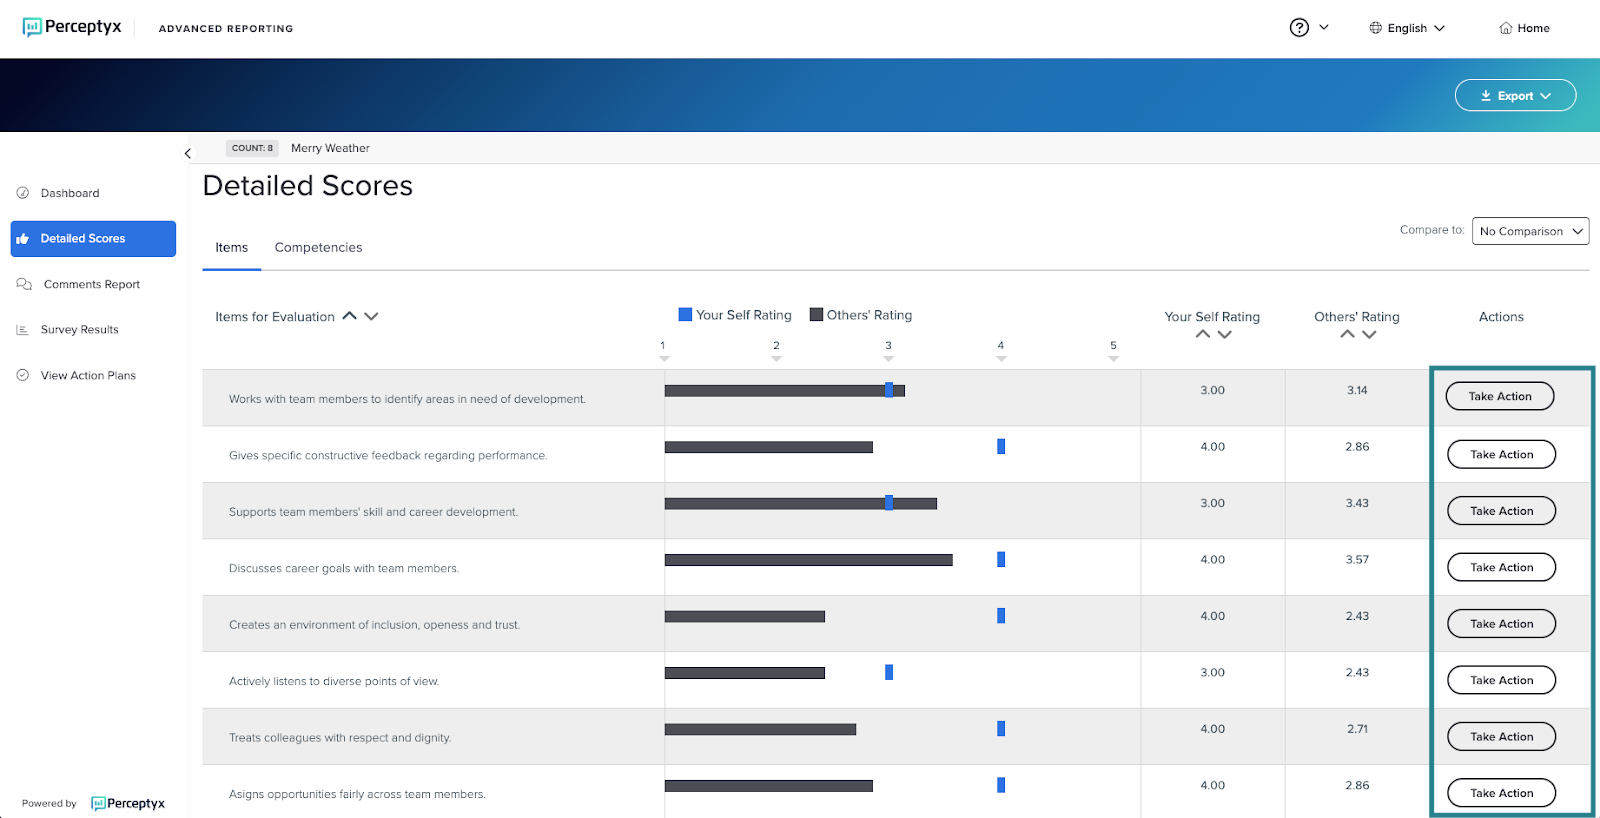
From the Favorability Report (Point-In-Time and Lifecycle) or the Detailed Scores Report (360 feedback). Click Take Action next to the item.
Note
Your dashboard might not match these examples. The widgets and reports you see depend on how your reporting site is configured.
- Fill out your plan with commitments, notes, and follow-up dates. See What goes in an action plan if you want a refresher on each part.
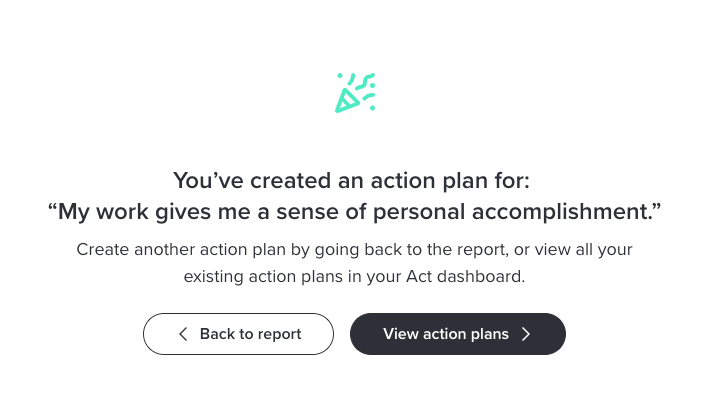
- Click Create Action Plan. A confirmation appears.
- To make another plan, click Back to report and repeat. If you're done, click View action plans to see all your plans on the Act page.
Start from the Act page
- Log in to the Perceptyx platform and click Act in the top navigation bar.
- Click Create Action Plan in the top right. A list of your listening events opens.
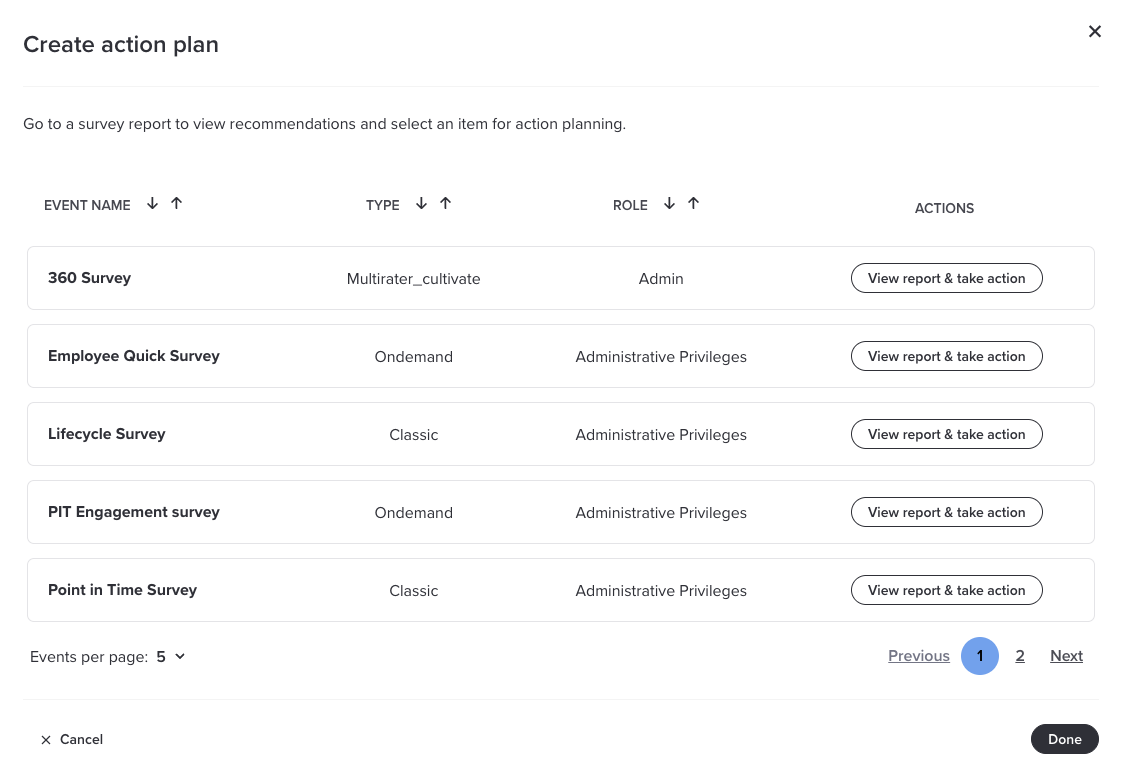
- If you have more than one role on the event, choose the one you want from the Role dropdown.
- Click View Report & Take Action for the event. Your results open in Advanced Reporting.
- Find your item and follow steps 4 to 7 in Start from your report.
Create an action plan from Activate's suggestions
Needs Activate
AI-assisted action planning comes with Activate.
With Activate, you don't have to guess where to start. When your results are ready, Activate looks at your most recent listening data and suggests the items most likely to make a difference for your team. Each suggestion shows why it made the list, like being a driver of engagement or one of your five least favorable items.
You pick an item, fill out the plan, and Activate takes it from there, sending nudges to help you follow through. For Point-In-Time events the nudges go to you and your team.
Your invitation shows up on the Act page. Depending on how your organization set things up, you might also get one by email, Microsoft Teams, or Slack.
Rather watch than read? The video above follows a manager from the Activate invitation in Microsoft Teams through choosing an item, using a coaching session, filling out the plan, and finding it on the Act page.
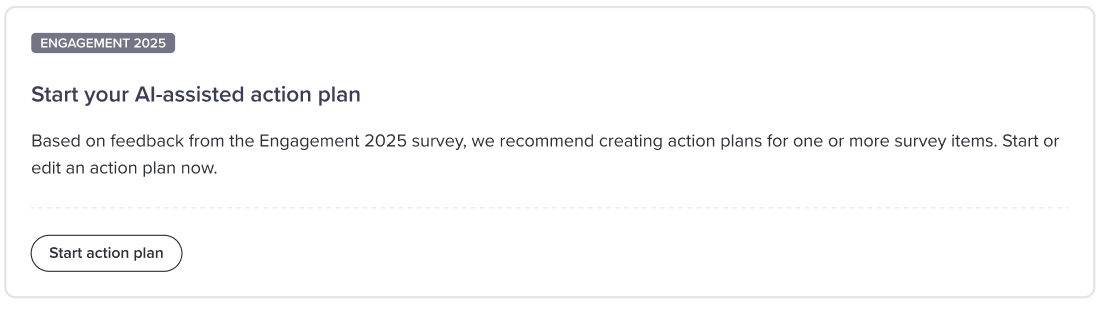
- Go to the Act page, or open the invitation you got by email, Microsoft Teams, or Slack.
- Click Start action plan. Your recommended items appear.
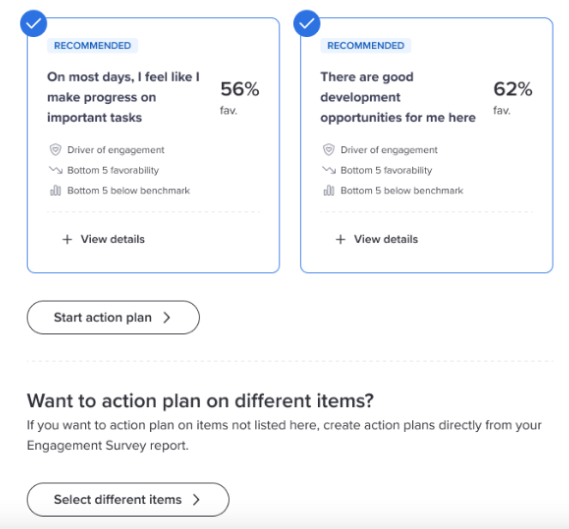
- To learn more about an item before choosing, click + View details under it.
- Click the item you want, then click Start action plan.
- Fill out your plan. For AI-assisted plans, commitments, notes, and follow-up dates are all optional. See What goes in an action plan.
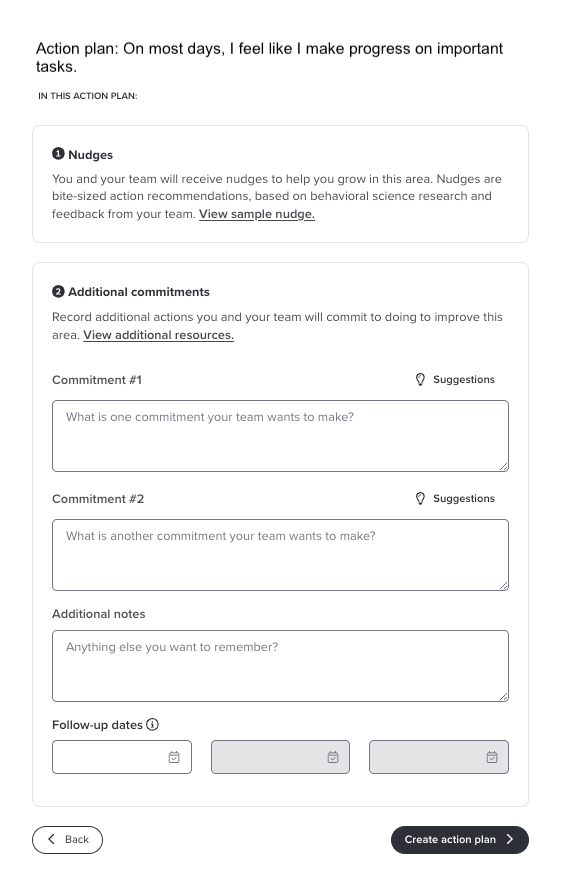
- Click Create action plan. Your plan appears in the Active Action Plans section of the Act page.
Tip
Want to work on something that wasn't recommended? Click Select different items to open your report, then pick any item using the steps in Create an action plan from your results. Some items, like the engagement items themselves, usually aren't available for action planning because they're outcomes rather than things you can act on directly. Working on the drivers of engagement, your lowest scoring items, or items trending down is how you move engagement.
Note
The invitation only shows up until you create your first plan. After that, make more plans by clicking Create Action Plan in the top right of the Act page.
Note
Your organization might set a window for action planning. If you haven't created any plans by the time it closes, Activate creates plans for you from your top recommended items and starts sending nudges.
Note
Nudges come from the action plans on your most recent Point-In-Time event and your most recent 360 feedback event. Plans from older events stay on your Act page, but they don't generate nudges.
Get help from a coaching session
If your organization has coaching turned on for you, the action plan form includes an option to start a coaching session. It opens a chat where you can talk through the item and work out what you want to commit to.
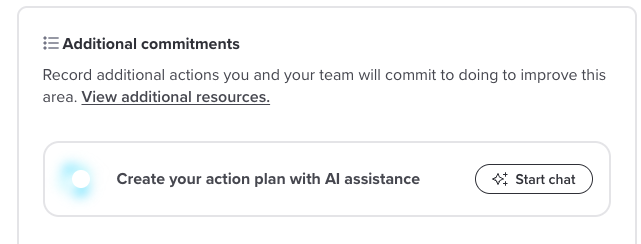
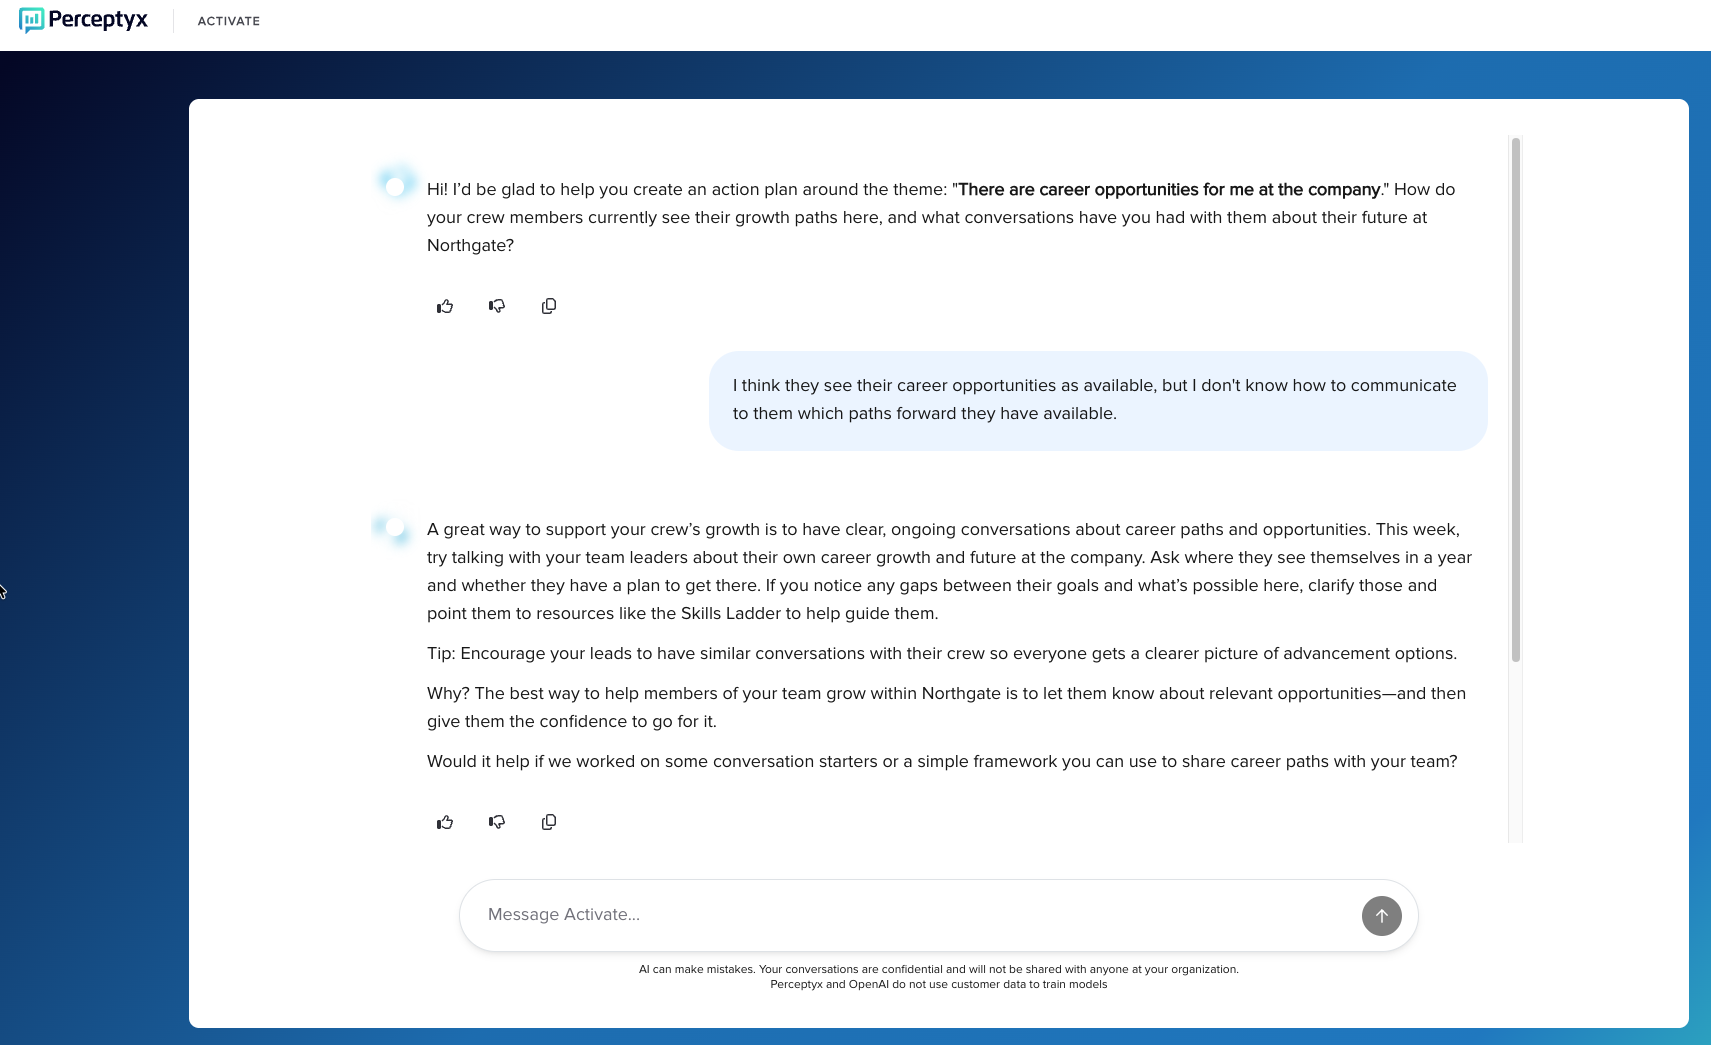
For privacy, the coaching session doesn't connect to your listening data. It draws on a library of about 3,000 science-backed nudges, so the guidance is practical and grounded in behavioral science. It works in about 60 languages and switches automatically to whatever language you write in.
For step-by-step help, see Use On-Demand Coaching.
Create an action plan from Activate's suggestions for a self-led 360
Needs Activate
AI-assisted action planning for 360 feedback comes with Activate.
For a self-led 360, you create action plans right from your participant report instead of from an invitation on the Act page. The nudges that follow go to you, not your team.
Once the event closes and you're eligible to see your report, you have 30 days to start. If you haven't created any plans by then, Activate creates them for you and starts sending nudges to help you act on your feedback.
- Log in to the Perceptyx platform and click Analyze in the top navigation bar.
- In the Report Eligible section, click View Report for your event. Your results appear, and items recommended for action planning have an R in front of them.
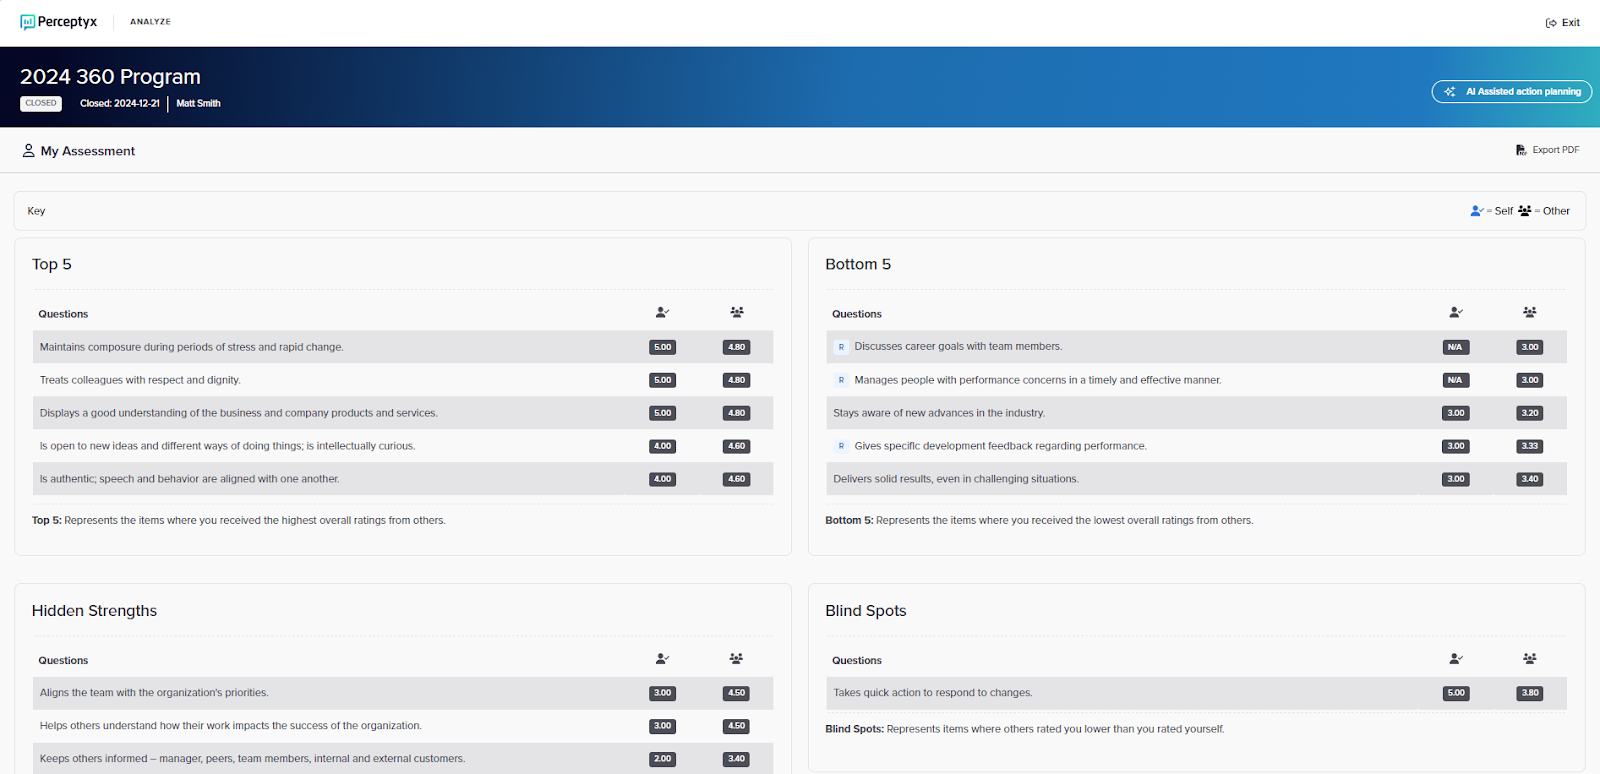
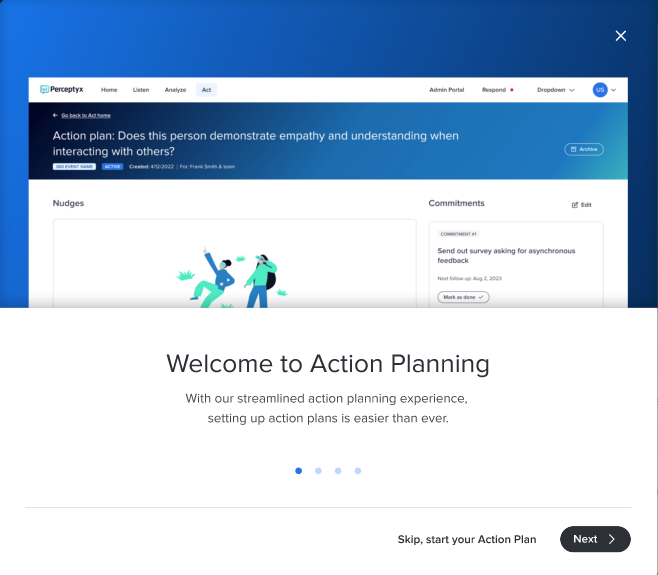
- Click AI Assisted Action Planning in the top right. A welcome window opens with an overview of the process and a few things to think about.
Note
After your first AI-assisted plan is created, whether you made it or Activate did, this button reads Create Action Plan instead.
- Click Next to step through the overview, or click Skip, start your Action Plan to jump straight in. Your recommended items appear.
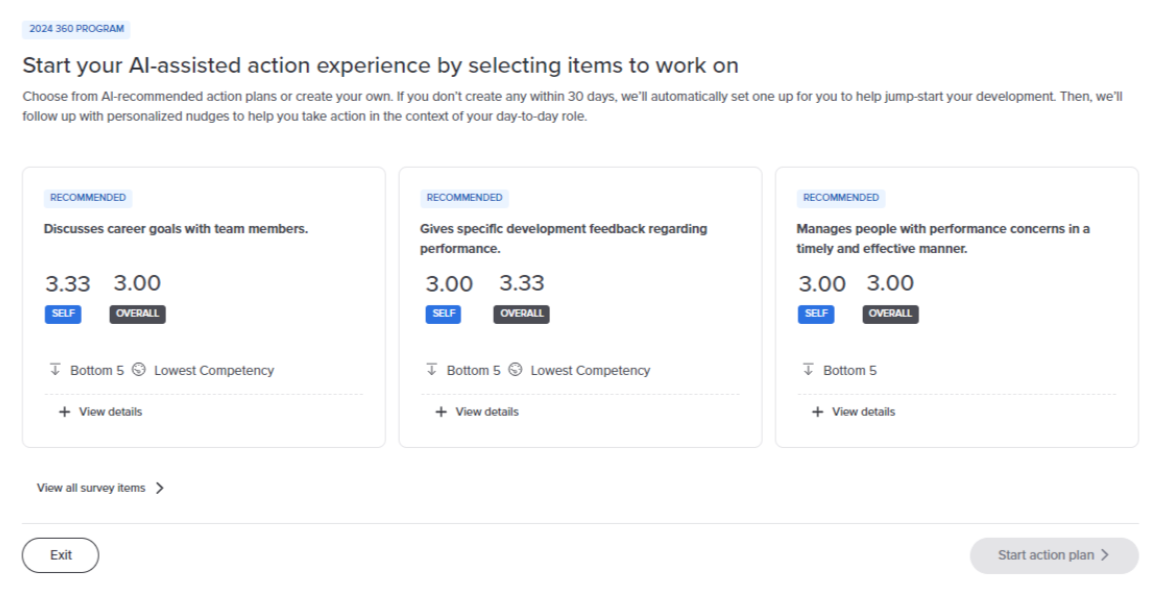
- Click the item you want, then click Start action plan. To see everything, click View all survey items below the recommendations for a list of every item, grouped by competency.
- Fill out your plan. Commitments, notes, and follow-up dates are all optional. See What goes in an action plan.
- Click Create action plan in the bottom right. A confirmation appears.
- To make another plan, click Back to report and repeat. If you're done, click View action plans to see all your plans on the Act page.
The coaching session option works the same way here. See Get help from a coaching session.
Create an action plan for someone else
If you're an HR business partner, or anyone else with permission to shadow users in Advanced Reporting, you can create action plans for the leaders you support. Shadowing shows you Advanced Reporting exactly the way that person sees it, so creating a plan works just like creating one for yourself.
- Click Analyze in the top navigation bar, find your event in All Reports, and choose your Role if you have more than one.
- In the Actions column, click View Report. Advanced Reporting opens.
- In the left navigation panel, click Functions, then select Shadow User. A list of users appears.
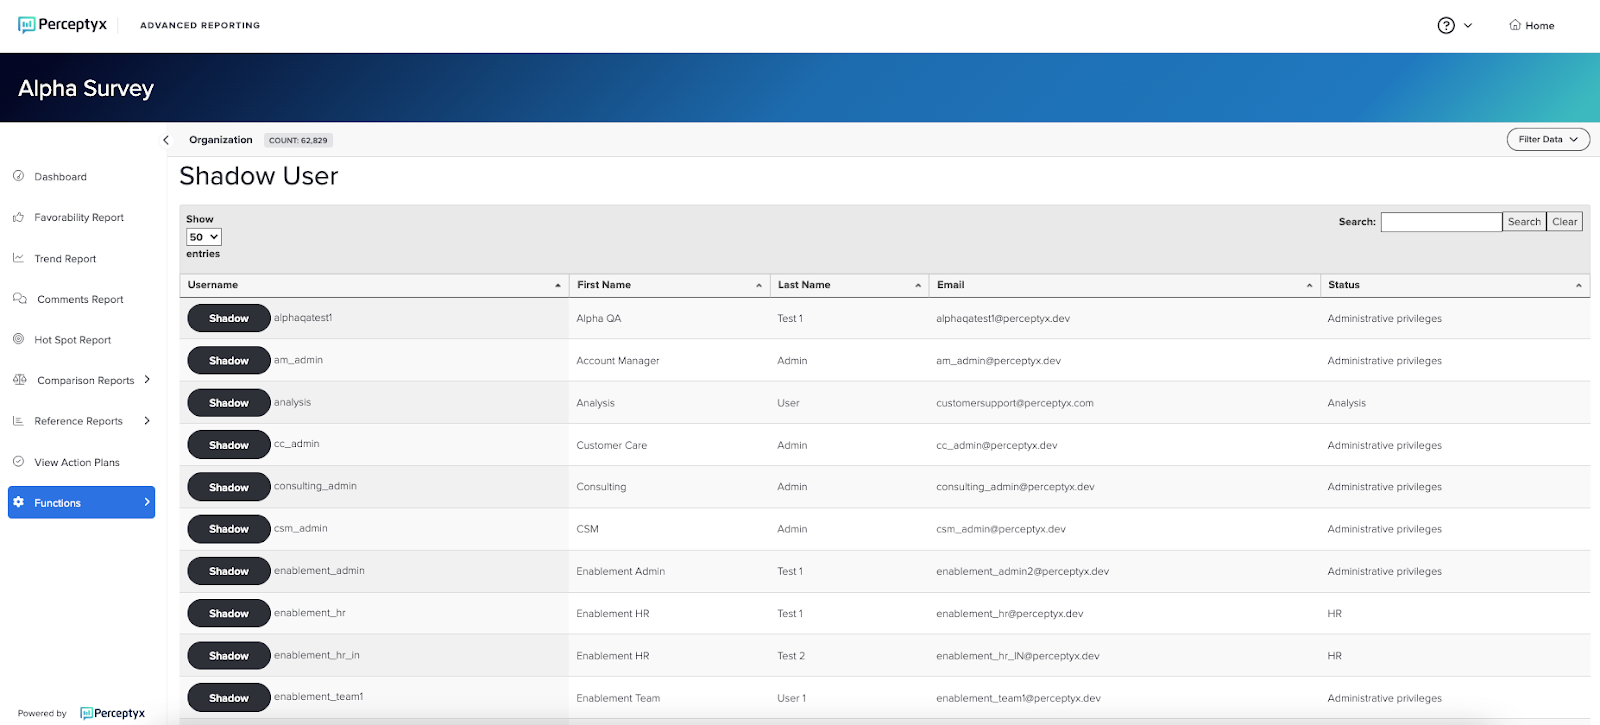
- Scroll the list or use the Search box to find the person, then click Shadow. Their results open, with a banner across the top so you know you're shadowing.
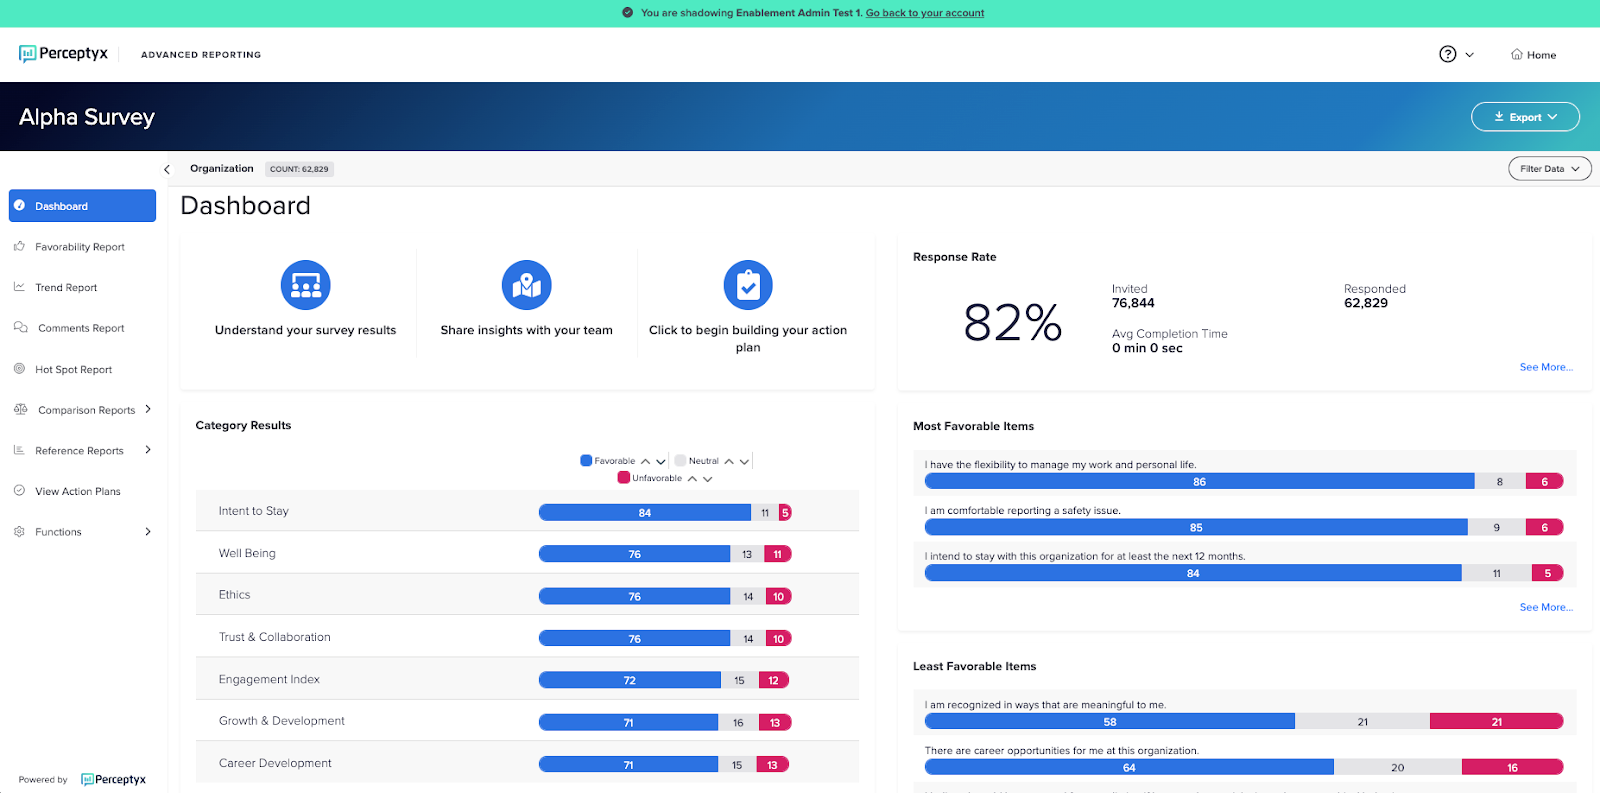
- Create the plan from a dashboard widget, the Favorability Report, or the Detailed Scores Report, the same way you would for yourself. See Create an action plan from your results. When the plan is created, you're taken back to Advanced Reporting.
- When you're finished, click Go Back to Your Account in the banner. The shadow session ends and you're back in your own Advanced Reporting view.
Note
While you're shadowing, you stay inside that person's Advanced Reporting and action plans. You can't move to other parts of the platform, and you can't start a coaching session from the action plan form.
Note
You can also edit, complete, or delete that person's action plans while you're shadowing. It works the same way as it does for your own. See Delete an action plan, Edit & Manage Action Plans, or Complete an Action Plan.
Cascade an action plan to a group
Cascading lets you create one action plan and send it to a whole group of people at once, like everyone in a location or a business unit. It's handy when you want a specific group to act on the same priority instead of waiting for each manager to create their own plan.
Cascading works for Point-In-Time and 360 feedback events, and it's turned on for specific roles. If you don't see the Assign action plan section when you create a plan, reach out to your Perceptyx contact.
Who gets the plan
A person receives your cascaded plan only if all of these are true:
- They're within your data access for the listening event.
- They match every filter you choose for the audience.
- They're report eligible on the event and have action planning turned on.
- They don't already have an action plan for that item. Anyone who does is skipped.
Send the plan
- Click Analyze in the top navigation bar, find your event, and in the Actions column click View Report.
- Open an action plan for the item from a report or dashboard widget, the same way you would for yourself. See Create an action plan from your results.
- In the Assign action plan section, open the Assign action plan to dropdown and select Others. The Audience section appears.
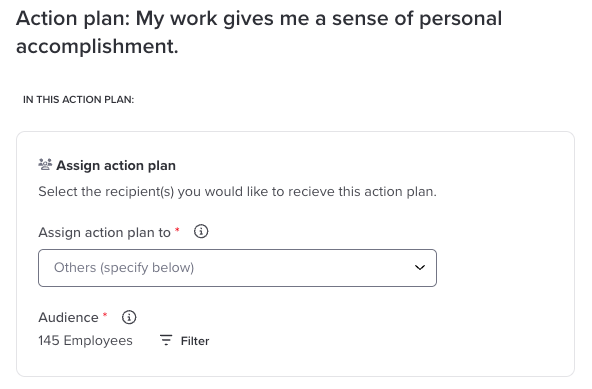
- Click Filter. Choose a demographic, like Location, then click the values you want to include, and click Save.
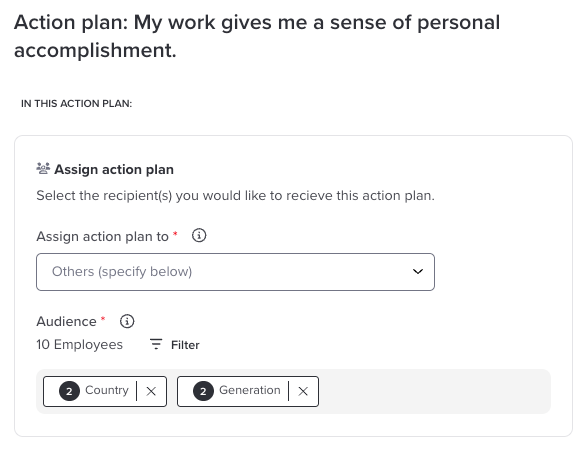
- Add more filters if you need them, then click Apply Filters. The filters show up in the Audience section along with an updated count. People have to match all of your filters to get the plan.
- Add commitments, notes, and follow-up dates if you want to. See What goes in an action plan.
- Click Assign Action Plan(s). A success message confirms the item and the audience, with options to view your action plans or go back to the report.
After you send it
- Nobody gets notified. People don't get an alert when a plan lands, so let them know it's coming. The plan is labeled on their Act page, so they can tell it apart from plans they made themselves.
- Each person owns their copy. They can change anything in it, or delete it.
- You can't edit everyone's plan at once. To change one person's plan, shadow them and edit it. See Create an action plan for someone else.
- It's a one-time send. People who join the group later don't get the plan.
- With Activate, the item drops out of their suggestions, since they already have a plan for it. Their direct reports can also see the plan on Point-In-Time events, the same as any plan their manager creates.
Tip
If your organization uses Activate and sets an action planning window, cascade your plans after Activate has created its automatic plans. Activate skips anyone who already has a plan for the event, so cascading first can mean people miss out on the plans Activate would have made for them.
Delete an action plan
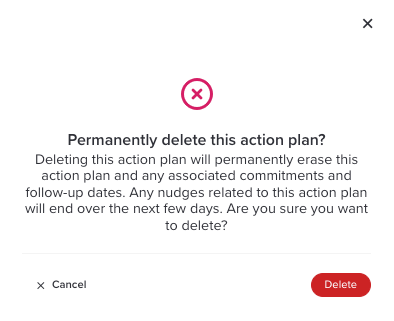
Changed your mind, or made a plan by accident? You can delete it. Deleting is permanent. It erases the plan along with its commitments and follow-up dates, and any nudges tied to it stop over the next few days.
- Log in to the Perceptyx platform and click Act in the top navigation bar.
- In the Active Action Plans section, find the plan's card and click View Details.
- Click Delete in the top right. A confirmation appears.
- Click Delete to confirm.
Note
Once a plan is deleted, you can create a new one for the same item. That's also how you reopen a plan you've marked complete: delete it, then create a new one.
What's next
Your plan is set. View Action Plans shows how to find it and check in on your team's plans, and Edit & Manage Action Plans covers updating it as you go.
Was this article helpful?
That’s Great!
Thank you for your feedback
Sorry! We couldn't be helpful
Thank you for your feedback
Feedback sent
We appreciate your effort and will try to fix the article