Admin Portal
Set up access once, then hand it out. A permission group decides what a set of people can do in the event builder, so you are not ticking the same boxes for every new person who joins.
Configuring people one at a time is how somebody quietly ends up with more access than they should have. Groups fix that. You build a group once, decide what it can do, then drop people into it. Everyone in the group gets the same thing. Take somebody out and the access goes with them.
This is a Platform Administrator job, and it lives in the Admin Portal.
This article walks through
What a group actually controls
A permission group covers two separate things:
- What people can do. Creating events, reaching particular features, seeing particular data views.
- Who they can invite. Which employees they can pull into a listening event, based on demographics or where people sit in the manager hierarchy.
There are two kinds of group. Protected groups come with the platform: Platform Administrator, Event Administrator, and Event Creator. Perceptyx sets their permissions based on what works well for most organizations, and those permissions are fixed. You can still assign anyone you like to them. Custom groups are the ones you build, where you pick the starting point and, for Event Creator groups, narrow down the population.
What this covers, and what it does not
Groups and permissions apply to event builder access for Point-In-Time and Lifecycle events, for both admins and creators, and to 360 feedback for admins only. Crowdsource is not included.
Three roles are in scope: Platform Administrator, Event Administrator, and Event Creator. Reporting access, meaning who gets to open results, is handled somewhere else entirely. That one lives in the Manage User Roles and Access article.
Finding the groups list
- Log in to the Perceptyx Platform.
- Click the gear icon in the navigation bar to open the Admin Portal.
- In the User Management section of the left panel, click Groups and Permissions.
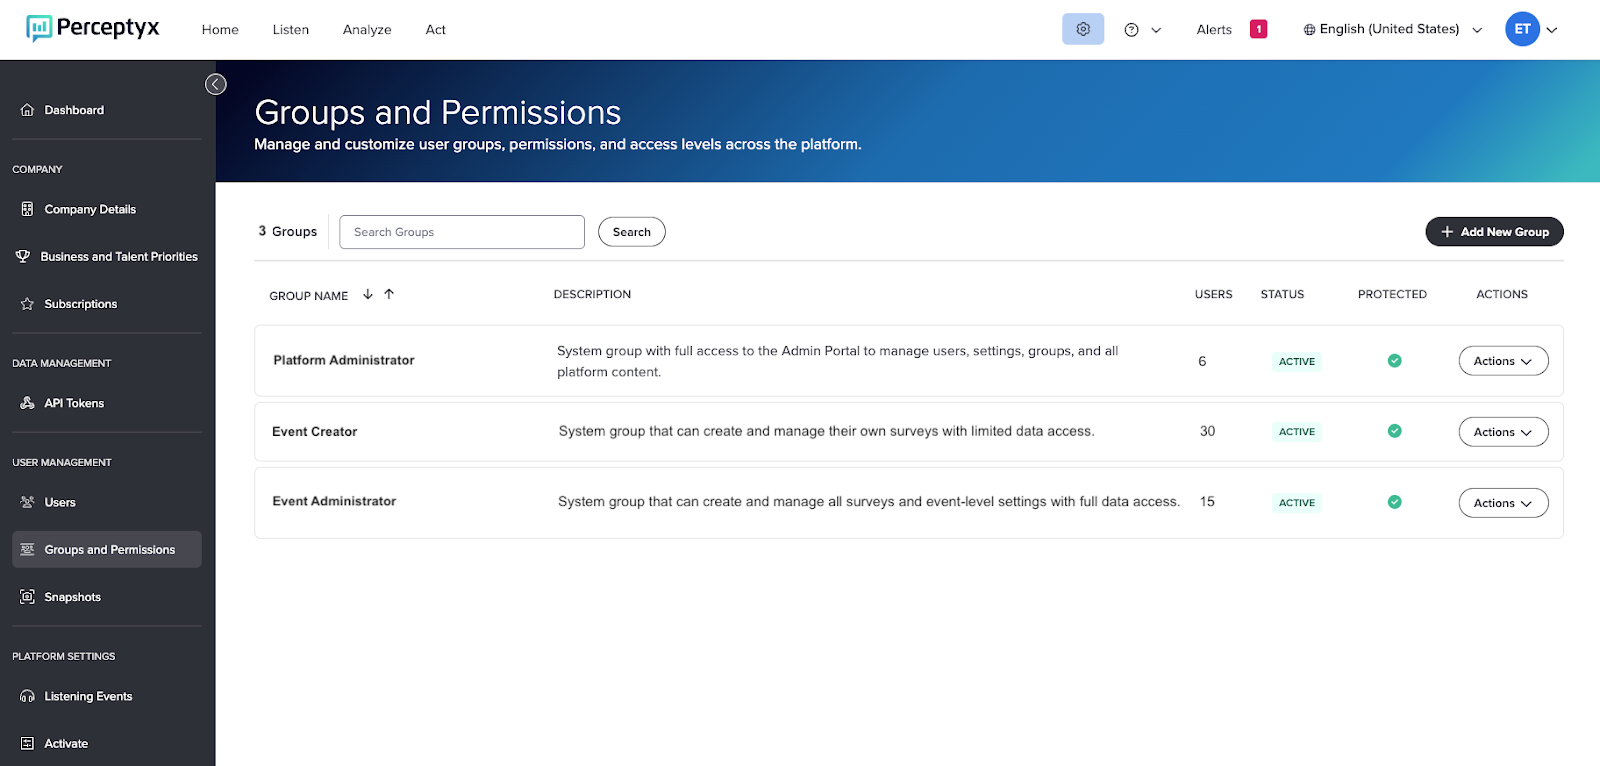
You get a table of every group you have, protected ones included, with the name, description, and whether it is protected or custom. That is usually enough to tell you whether you can just add people to something that already exists or whether you need to build something new. There is a search box if the list has grown, and a button to create a new group.
The Actions button on each row is where the work happens:
- Edit Permissions changes what the group can do. Custom groups only.
- View Permissions shows you what a protected group is set up to do, without letting you change it.
- Edit Assigned Users adds or removes people. Works on protected and custom groups alike.
- Clone Group copies a group, protected or custom. The Platform Administrator group is the one exception, it cannot be cloned.
- Archive Group switches a group off and pulls its permissions from everyone in it. Custom groups only.
What you will see on your first visit
If your organization assigned user permissions before this feature existed, those people were carried over into the matching Platform Administrator, Event Administrator, or Event Creator group, and you can edit them from there. If you are new to the platform, the protected groups start out empty. Assign people to them, or build your own groups, whichever suits.
Building a custom group
A custom group starts from the permissions of either the Event Administrator or the Event Creator protected group. Those base permissions are not yours to rewrite, apart from three switches on the Event Creator side. What you can change is the population the group can reach, if it is an Event Creator group, and who is in it. That is the trade, and it means you can spin up several groups quickly without configuring permissions from scratch each time.
It is a five step workflow.
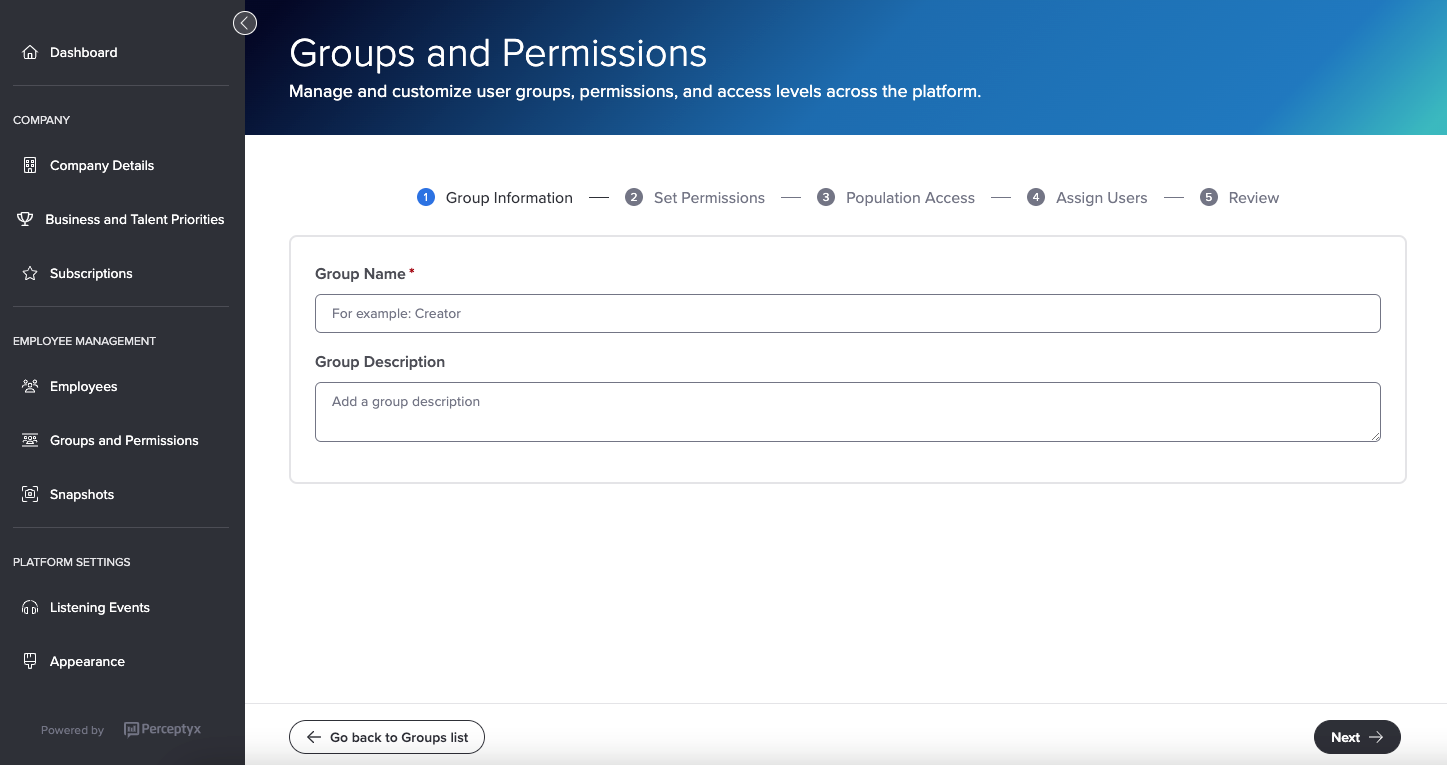
Step 1: Name it
- On the Groups and Permissions screen, click + Add New Group at the top right. The Group Information screen opens.
- Type a name in the Group Name box.
- Type something useful in the Group Description box. Future you will appreciate it.
- Click Next.
Step 2: Pick the permission set
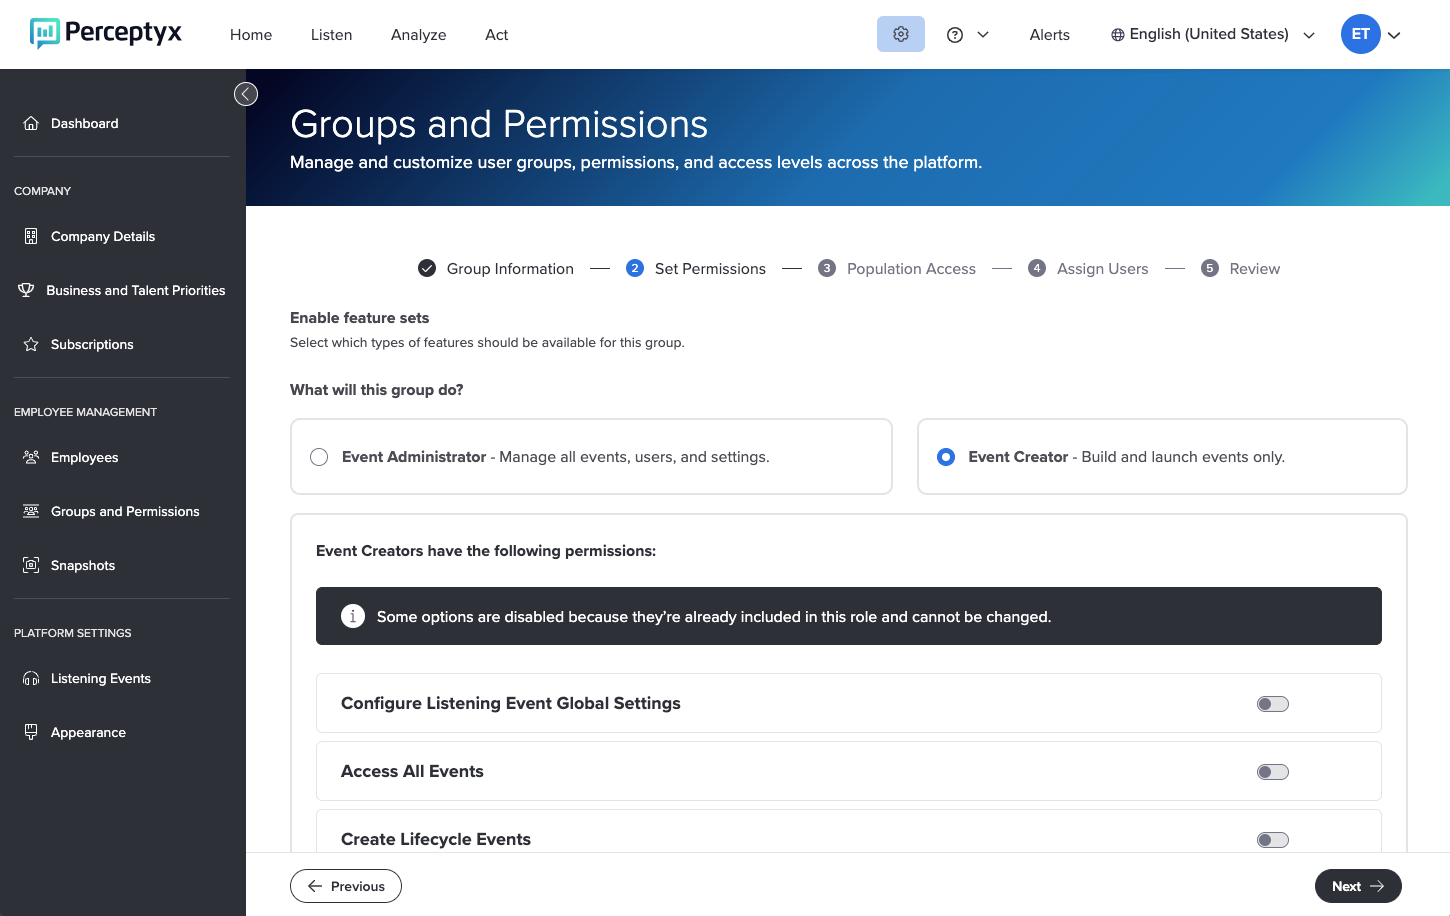
You have two starting points:
- Event Administrator. Creates and manages every event, with full population data access. Nothing here is adjustable.
- Event Creator. Creates and manages only the events they built, with limited data access. Most of these permissions are fixed too, but three are yours to turn off: Distribute Events by Email, Add Content to Question Library, and Allow Survey Launch without Approval. All three start out on.
- Click Event Administrator or Event Creator. The permissions for that type appear.
- If you chose Event Creator and you want any of those three switched off, click the toggle next to it.
- Click Next.
Step 3: Set population access (Event Creator groups only)
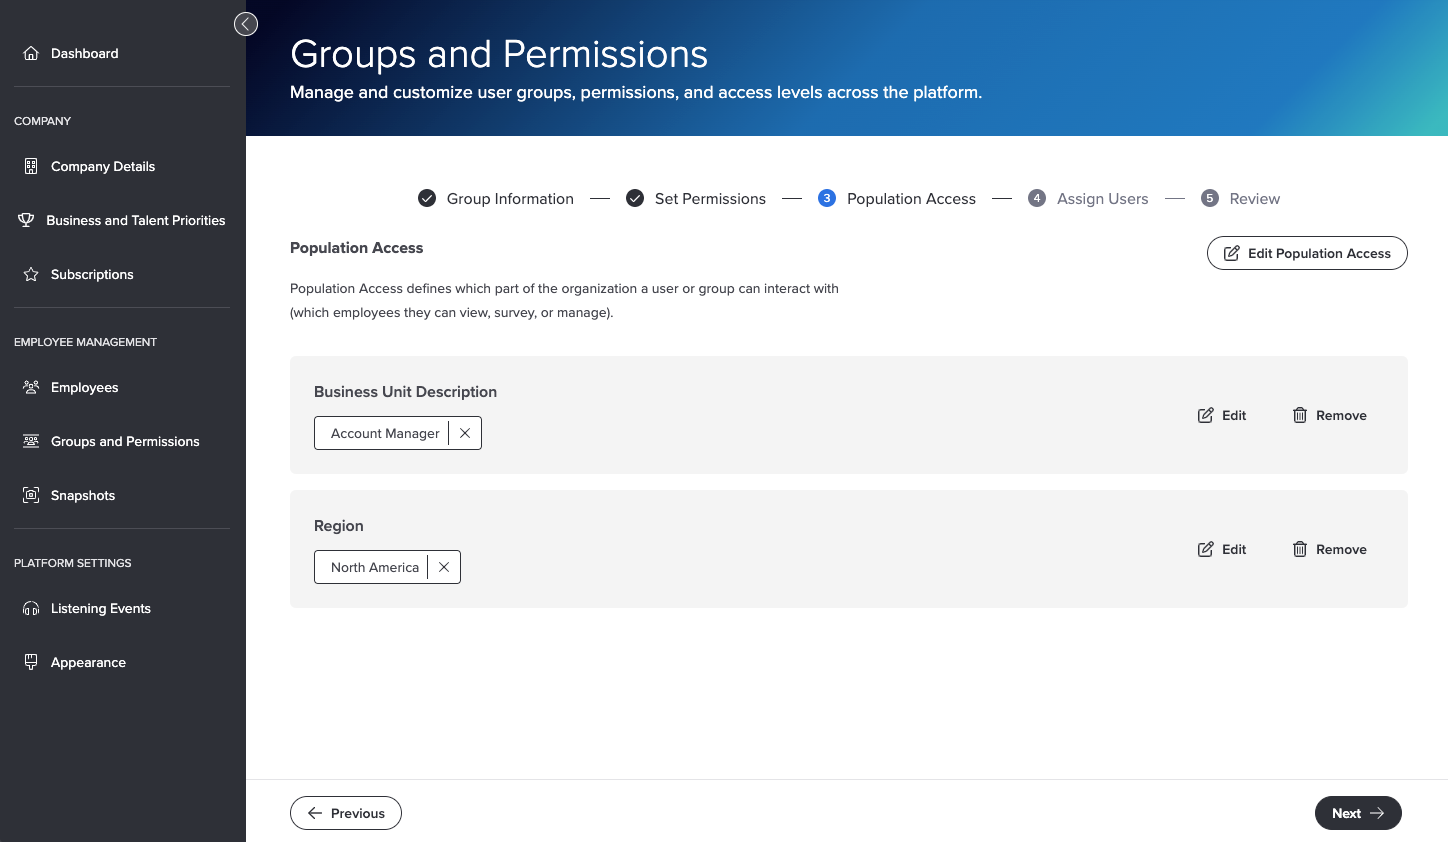
Population access is the pool of employees this group can invite to a listening event. Leave it alone and the group gets the whole organization. The list of people available to you comes from your most recent data feed, so if someone is missing, that is where to look.
To filter by demographics:
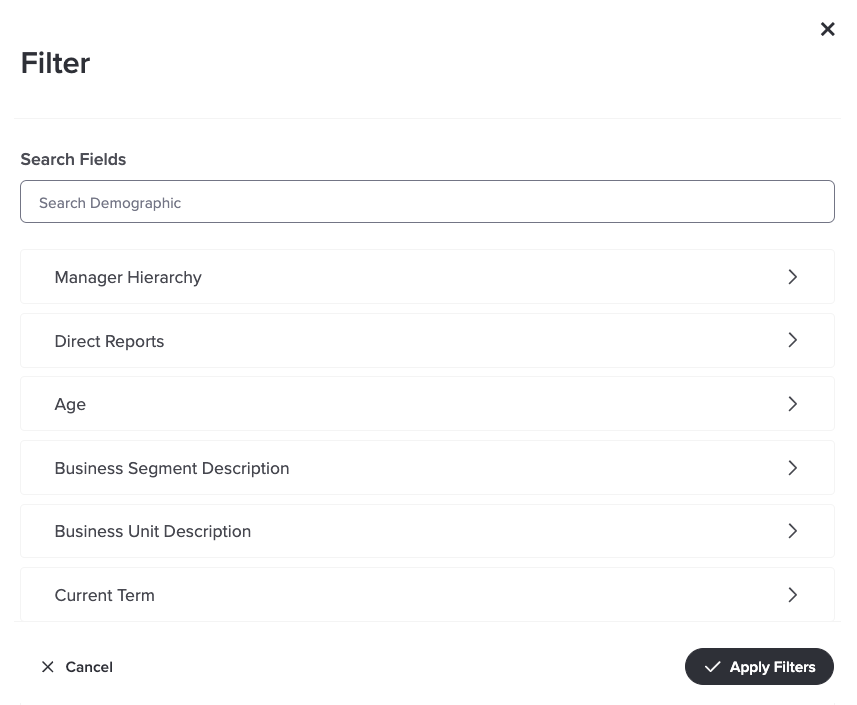
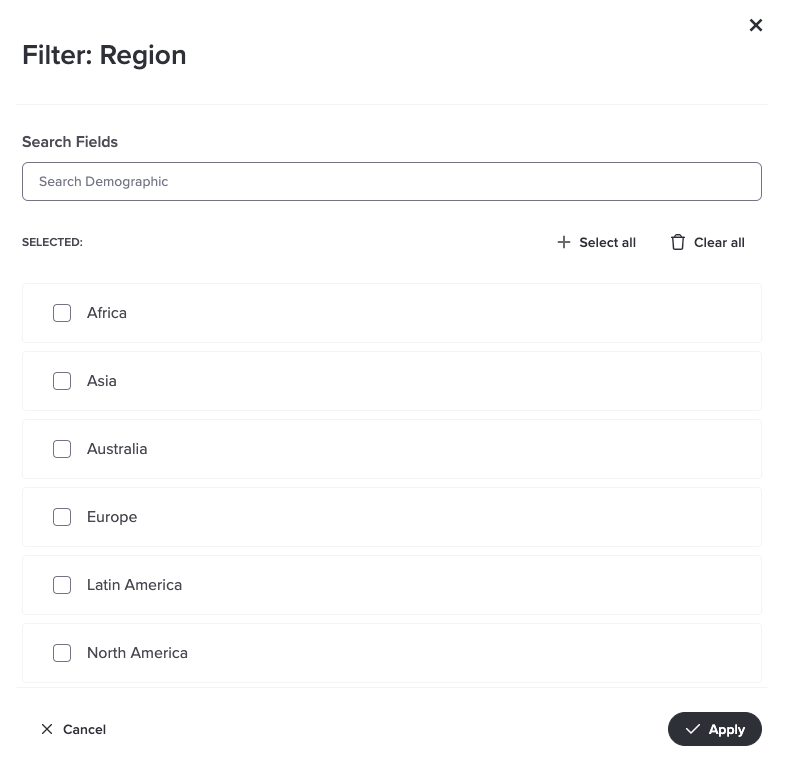
- Click + Edit Population Access. The Filter dialog box opens with your available demographics, plus a Manager Hierarchy option.
- Click the arrow next to a demographic to open it. The search box helps when you have a lot of them.
- Tick each value you want to include, then click Apply. The dialog box updates with what you picked.
- Add more demographics the same way if you need them.
- When you are done, click Apply Filters. The workspace updates to show what you applied.
To filter by manager hierarchy instead:
- Click + Edit Population Access to open the Population Access dialog box.
- Click the arrow next to Manager Hierarchy. Search here too if the structure is deep.
- Tick each level you want, click Apply, then click Apply Filters.
Once the population looks right, click Next.
Step 4: Assign users
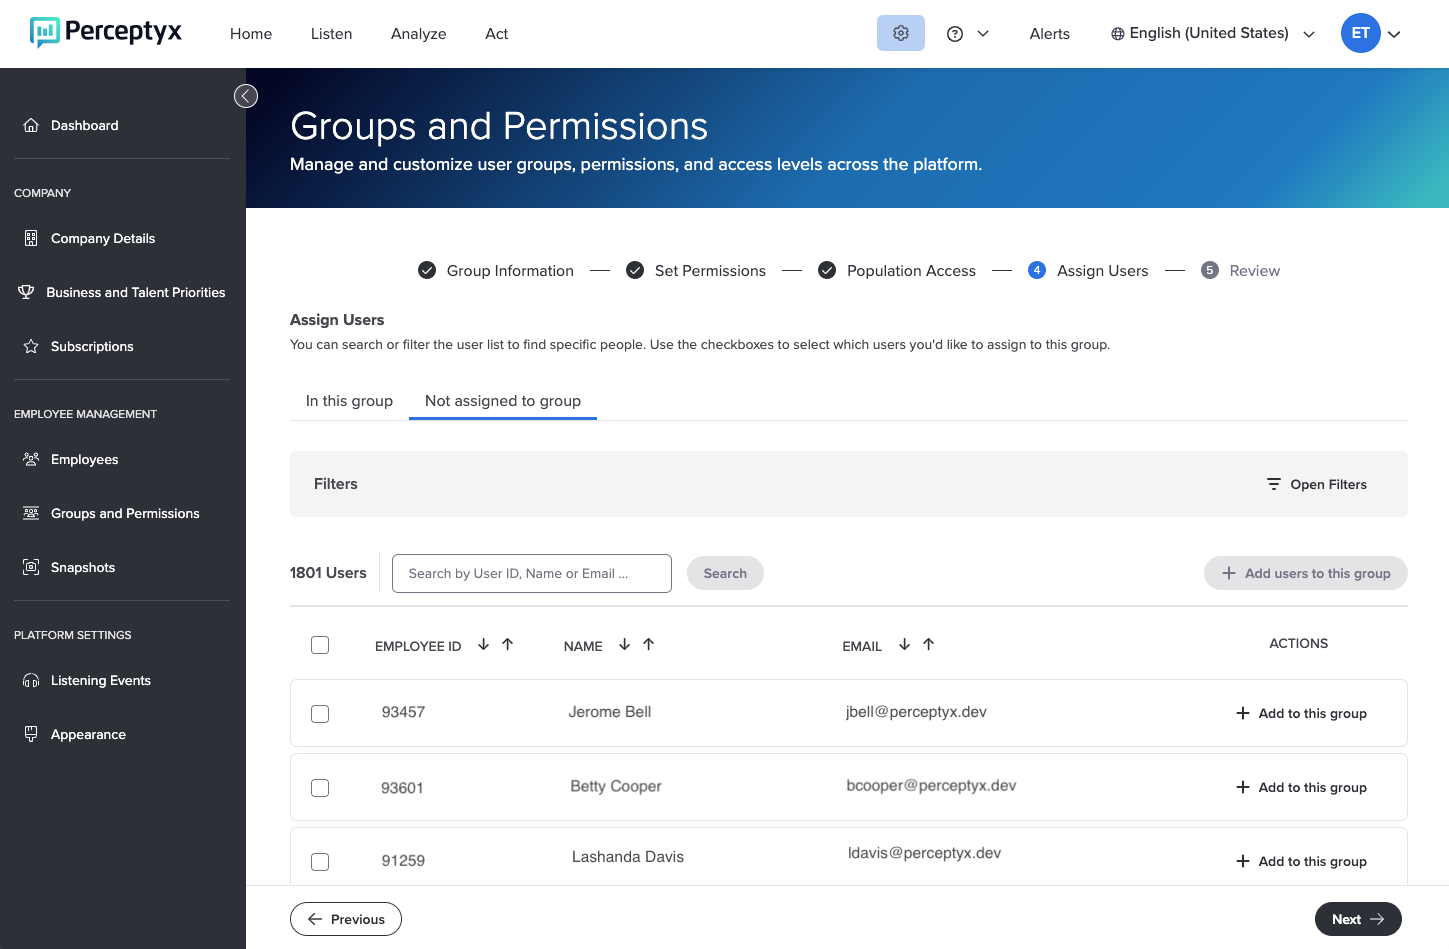
Every available platform user shows up here by default. For a small group, search for people one by one. For a bigger one, filter. You can sort the list by Employee ID, Name, or Email using the arrows at the top of each column.
One at a time:
- Click the Search box, type a user ID, name, or email address, then click Search.
- Tick the checkbox for the person you want.
- Click + Add Users to This Group, then repeat for anyone else. Click the X in the search box to clear it between searches.
In bulk, using filters:
- Click Open Filters at the top right. The Filter dialog box opens with your demographics and a Hierarchy Level option.
- Click the arrow next to a demographic, or next to Hierarchy Level, to open it.
- Tick the values you want, then click Apply. Stack more filters if you need to.
- Click Apply Filters. The list narrows to match.
- Tick individual people, or use the checkbox at the top of the list, to the left of the Employee ID column, to grab everyone currently on screen. That top checkbox works per page, so if the results run long, repeat it on each page.
- Click + Add Users to This Group.
Click the In This Group tab at any point to check who you have collected. When the roster looks right, click Next.
Step 5: Review and activate
- Read through the summary on the Review screen.
- If something is off, click Previous at the bottom left as many times as you need to get back to that step and fix it.
- When it all checks out, click Activate Group at the bottom right.
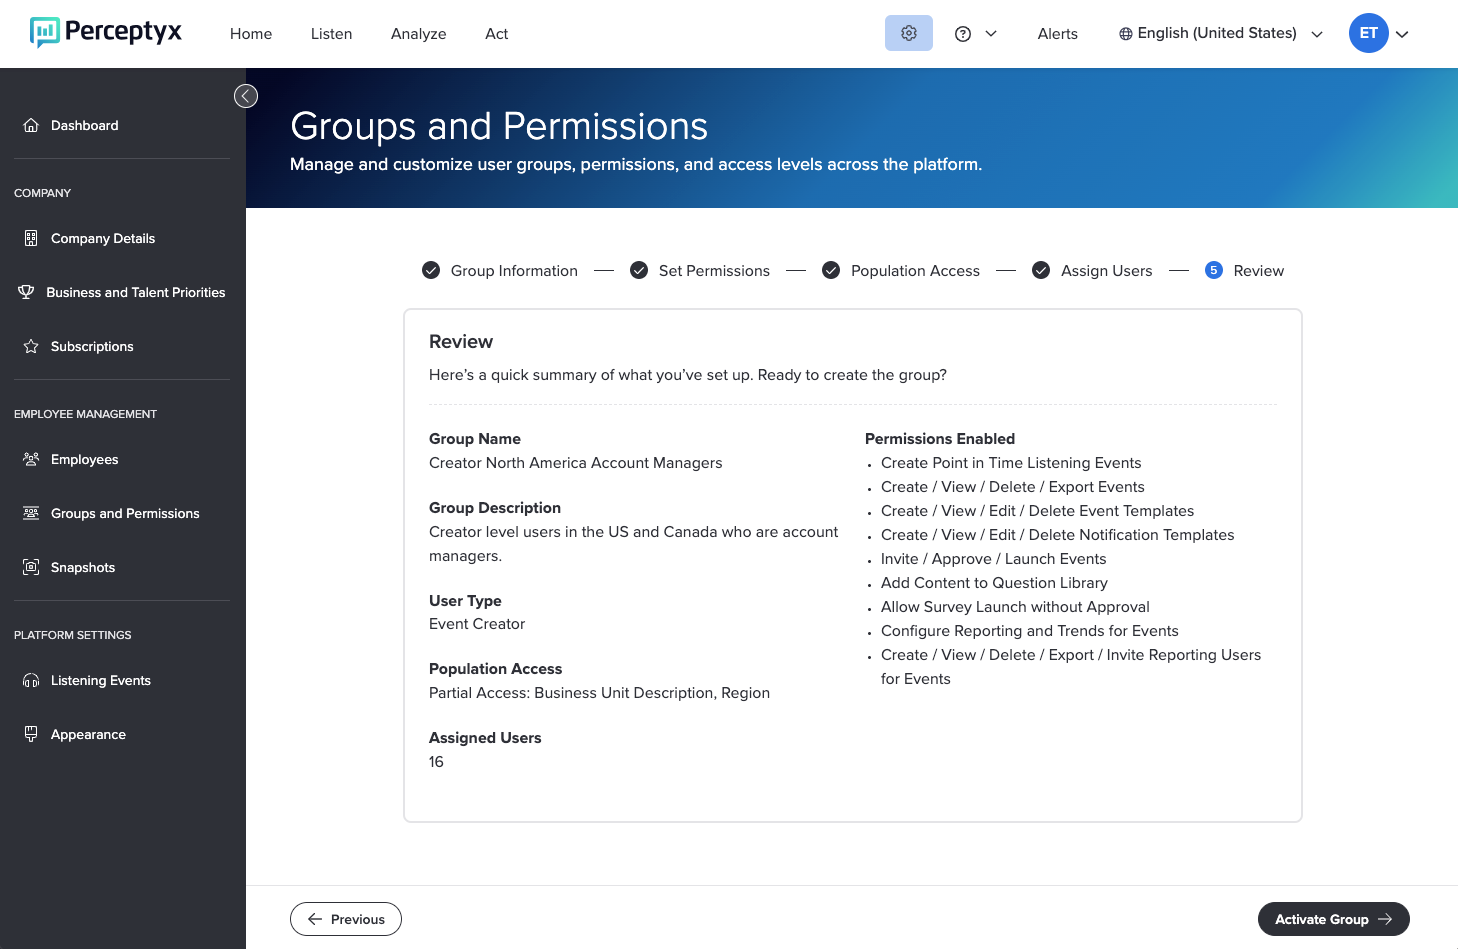
The group appears at the top of the list with an Active status. It is a custom group, so you can go back and change it whenever you like.
Changing what a group can do
Permissions and population access are editable on custom groups. Protected groups are view only.
- Go to the Groups and Permissions screen.
- Click Actions on the custom group you want, then click Edit Group Permissions. You land on the General tab, where you can also retype the name and description.
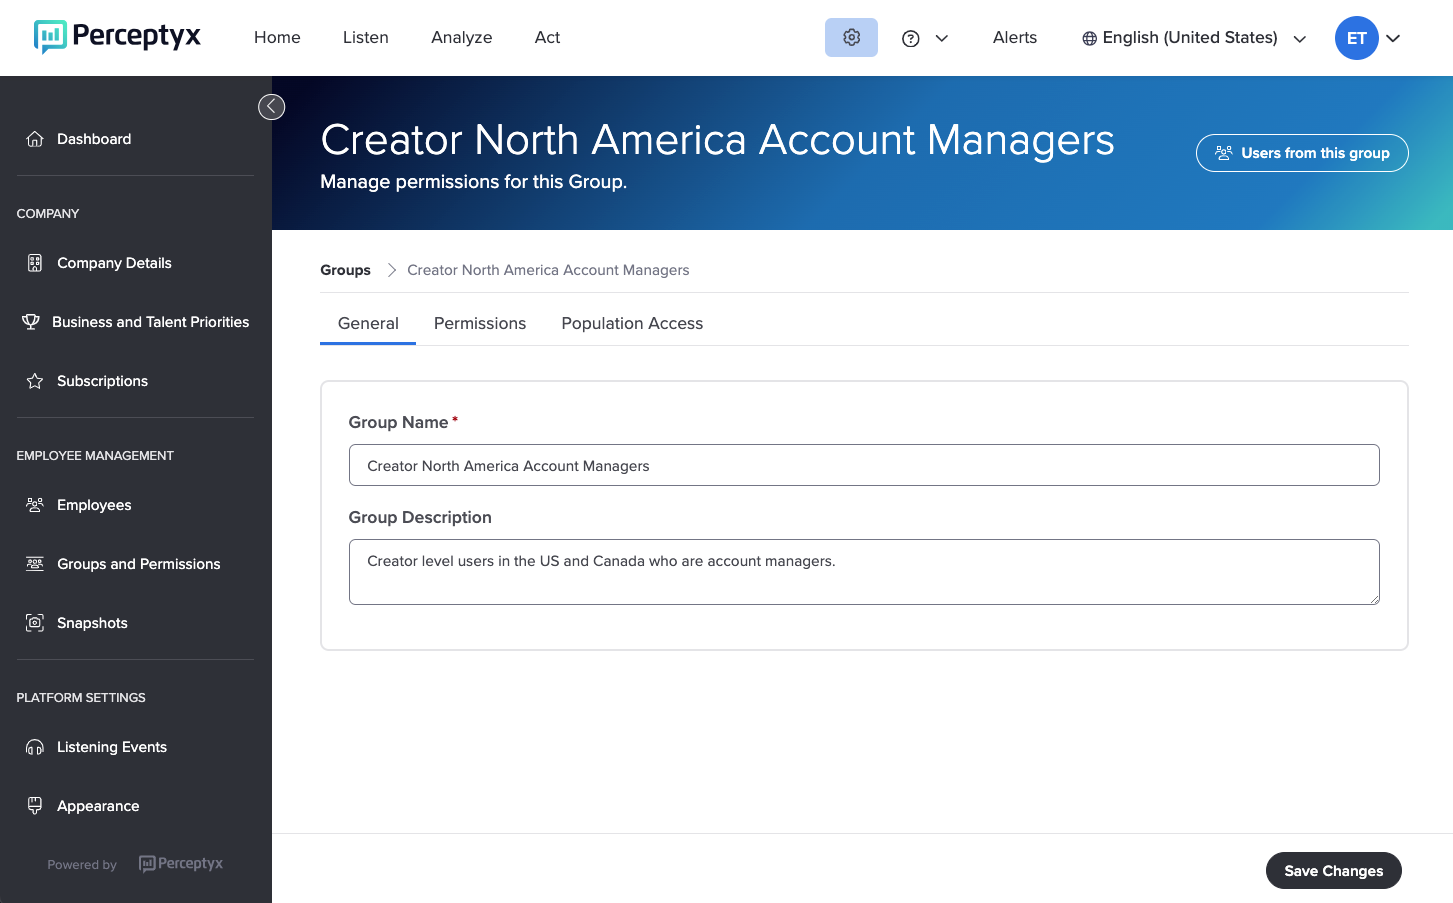
- For permissions, click the Permissions tab and toggle what is available. Some permissions are fixed and cannot be changed.
- For population access, click the Population Access tab, then click Edit on an applied filter to adjust it, Remove to drop it, or Edit Population Access to start a different filter.
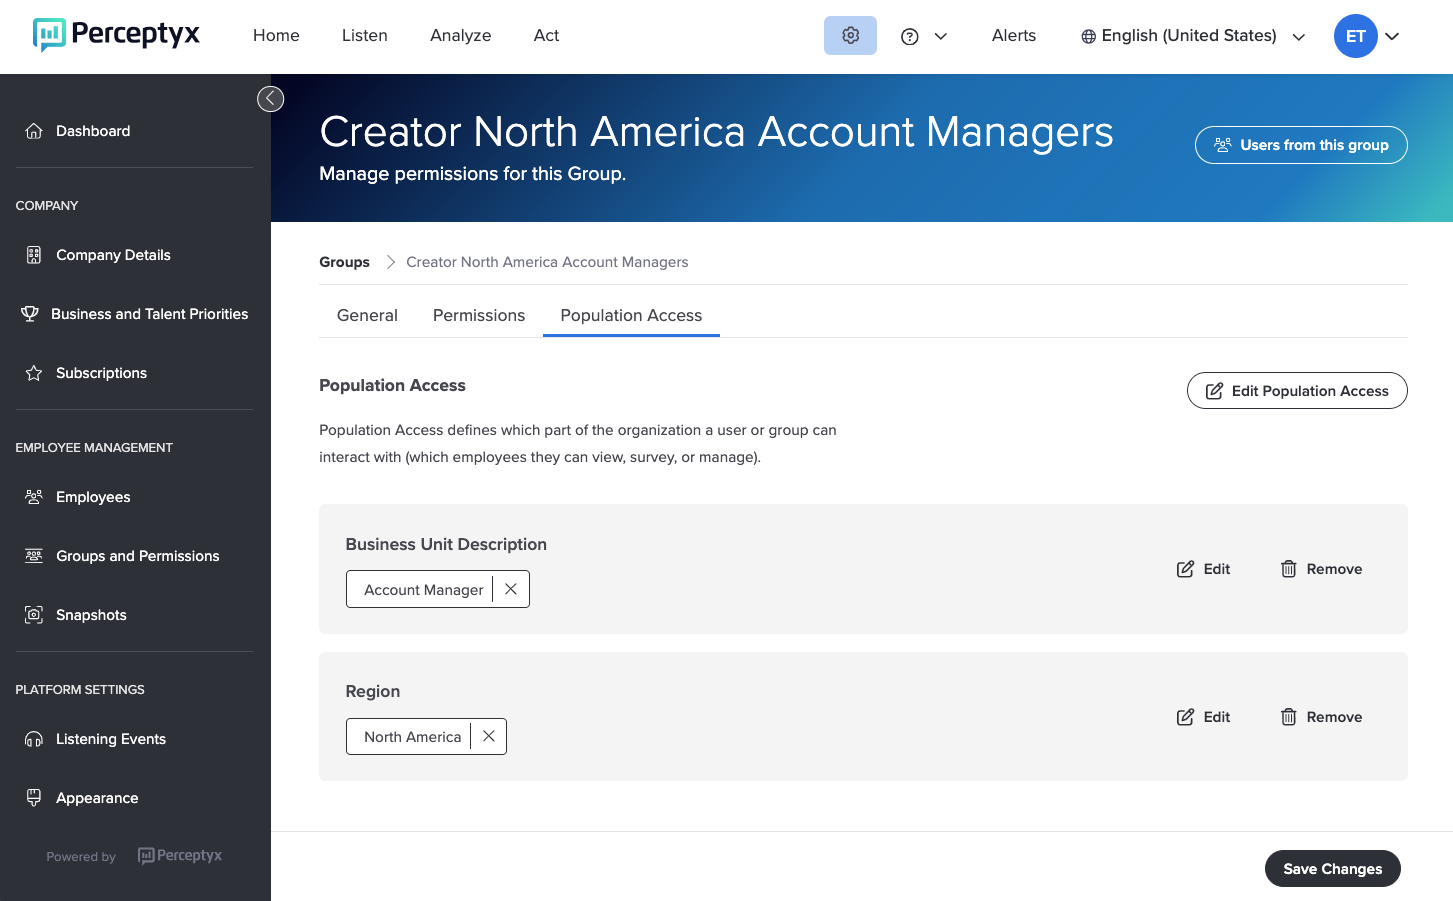
- Click Save Changes.
Heads up
Removing a filter happens straight away. There is no confirmation step, so make sure you are removing the one you meant to.
Adding and removing people
This one works on any group, protected or custom, and it is the thing you will come back to most. Somebody joins, somebody changes teams, somebody leaves. It is also how you fill the protected groups if your organization is new to the platform, and how you populate a group you just cloned.
- Go to the Groups and Permissions screen.
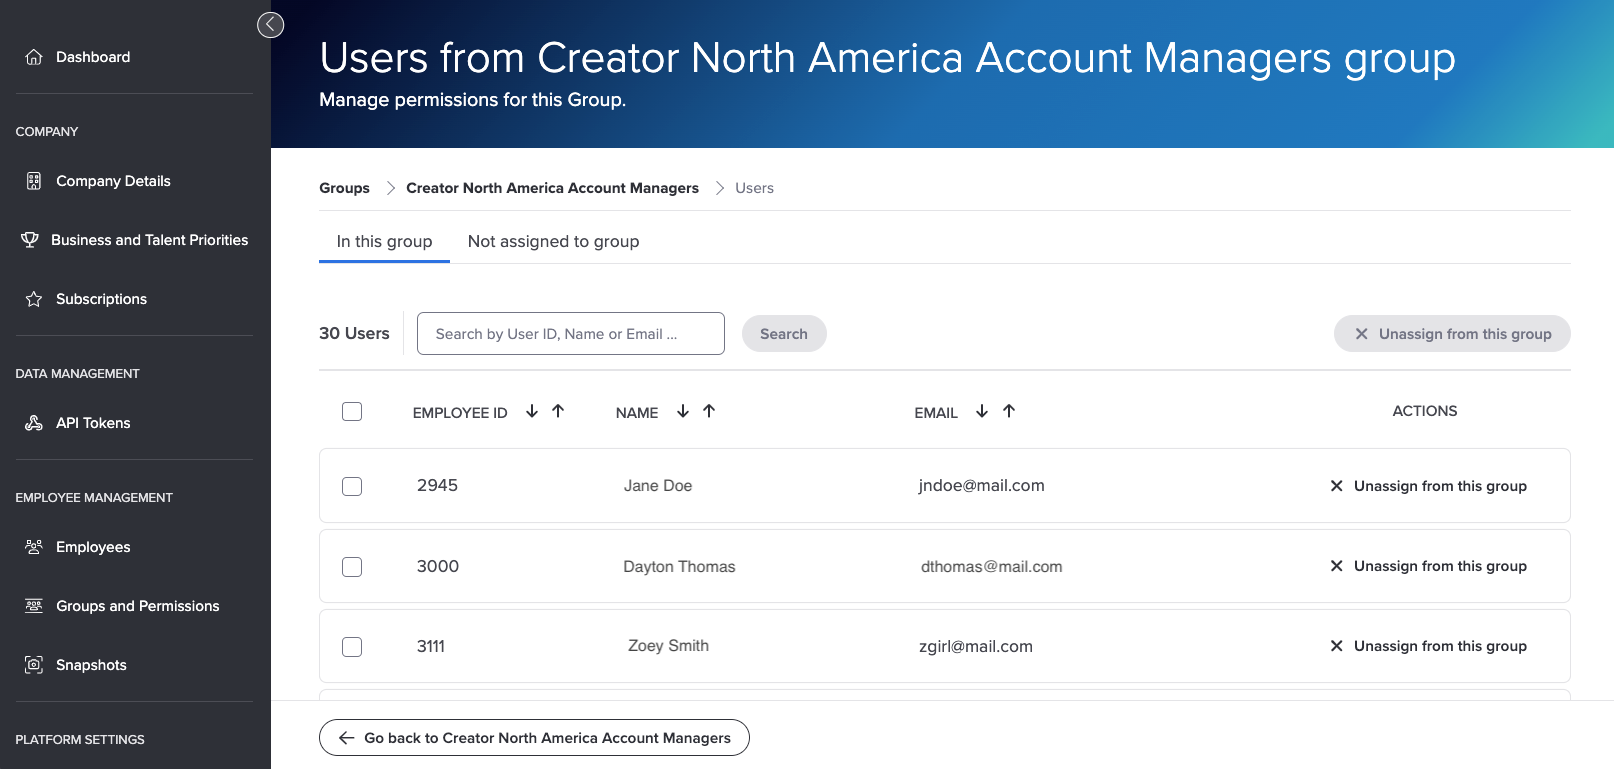
- Click Actions on the group, then click Edit Assigned Users. The In This Group tab opens.
Taking people out
- For one person, click X Unassign from this Group next to their details. Use the search box to find them if the group is large.
- For several, tick the checkbox next to each one, or the top checkbox to select everyone on screen, then click X Unassign from this Group at the top right.
Adding people
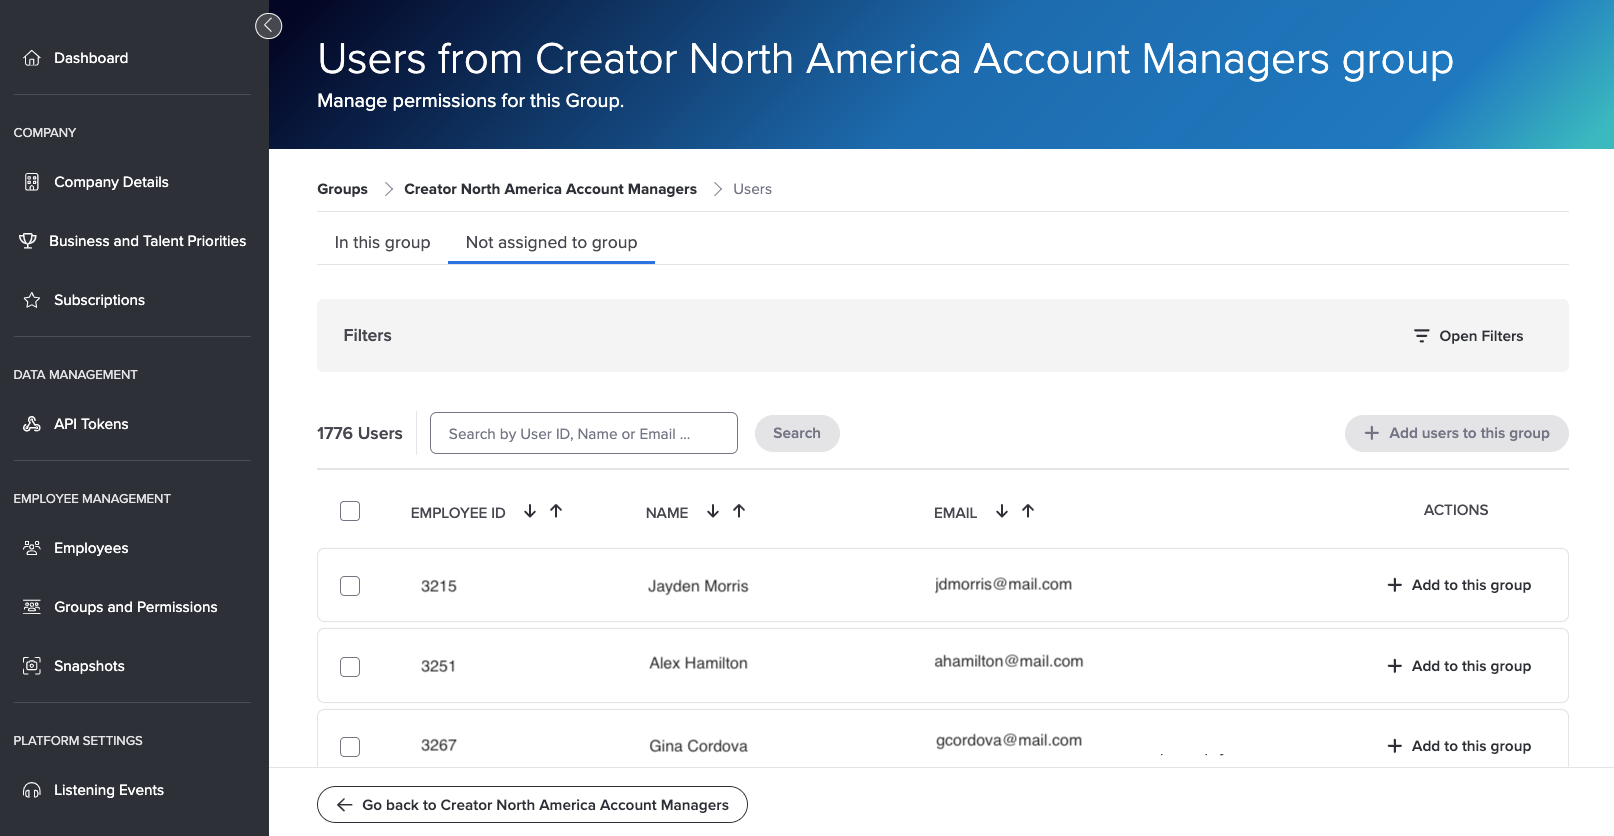
- Click the Not Assigned to Group tab to see who is available.
- Narrow it down with the search box or Open Filters.
- For one person, click + Add to this Group next to their details.
- For several, tick each one, or the top checkbox to select everyone on screen, then click + Add Users to this Group at the top right.
Cloning a group
If you need a group that is close to one you already have, copy it rather than rebuilding it. The permissions and population access come along. The users do not, so you will assign those yourself. You can also change the permissions or the population on the way through if the copy needs to be a bit different.
- Go to the Groups and Permissions screen.
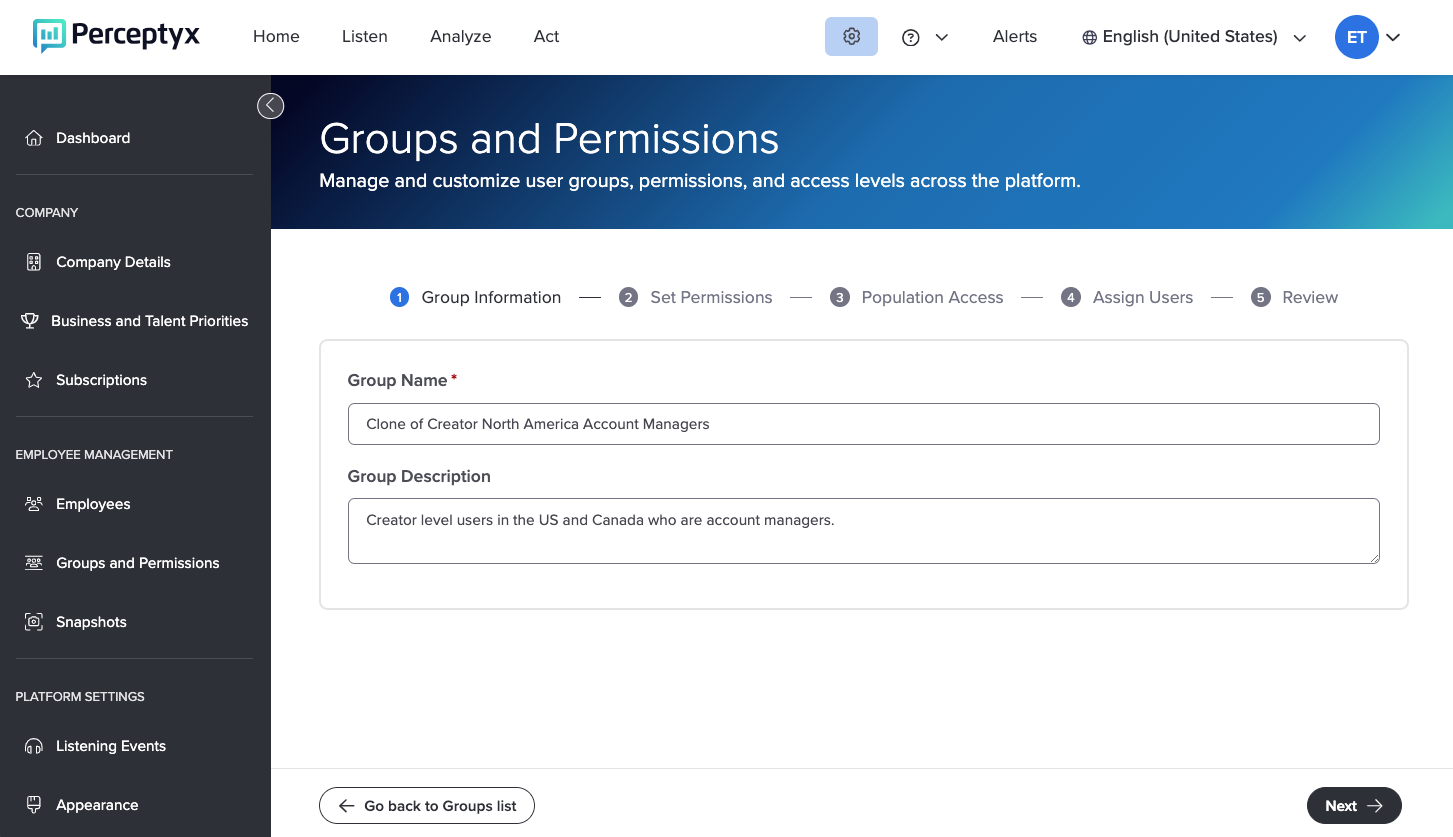
- Click Actions on the group, then click Clone Group. The workflow opens at Step 1, with Clone of stuck on the front of the name.
- Type a proper name in the Group Name box, and a new description if the old one no longer fits.
- Click Next and work through the rest of the five steps, adjusting as you go. The steps are the same ones described above.
Two things worth knowing. The Platform Administrator protected group cannot be cloned. And cloning is the only way to get a version of a protected group whose permissions you can actually change, since the original is locked.
Archiving a group
When a custom group has outlived its purpose, archive it. That deactivates the group, and everyone in it loses the permissions it was granting. Before you do it, check that those people have what they need from another group.
- Go to the Groups and Permissions screen.
- Click Actions on the group, then click Archive Group. Its status changes to Archived.
Bringing one back is not a simple undo. A Platform Administrator has to clone the archived group into a new one and assign the users again. Worth a second thought before you archive something a lot of people depend on.
Was this article helpful?
That’s Great!
Thank you for your feedback
Sorry! We couldn't be helpful
Thank you for your feedback
Feedback sent
We appreciate your effort and will try to fix the article