Claude Desktop (macOS), Connected / Article reporting groups 5 manage a group freshdesk branded · HTML
Analyze
Nothing about a reporting group is locked in. Come back whenever you need to change who is in it, what they can open, or what the group is called.
People change teams, new leaders show up, and somebody always needs one more report than you gave them. All of it is editable after the fact. You can add and remove people, change which reports the group can open, change which demographics it can filter by, and rename the group itself.
This article walks through
Getting to the group
- Open the Report Editor, then click the Permissions tab.
- Find your group. If you have a lot of them, use the search box at the top of the tab.
- Click Manage Group.
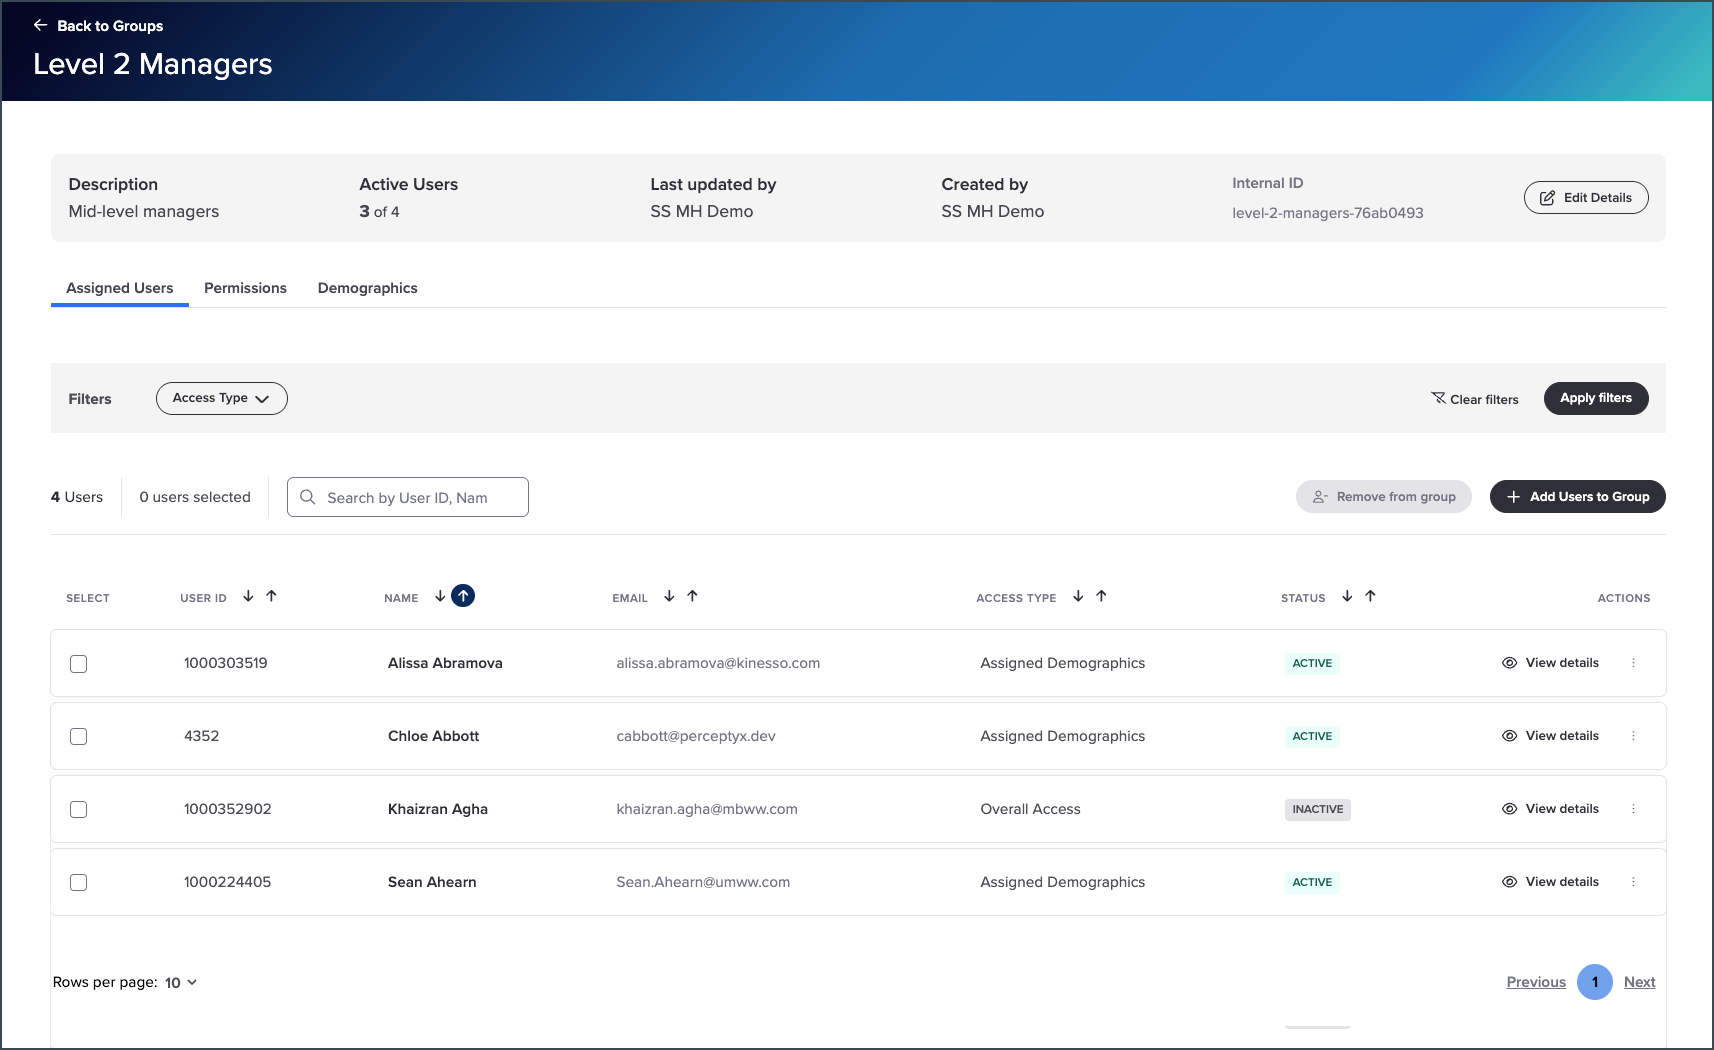
You land on a screen with three tabs, and between them they cover everything you can change:
- Assigned Users is the people. Look at their details, add or remove them, turn their access on or off.
- Permissions is the reports the whole group can open.
- Demographics is the filters the whole group can use.
Working with the people in it
The Assigned Users tab lists everybody currently in the group. To narrow it down, pick from the Access Type dropdown and then click Apply filters, which shows you who has overall access versus who is limited to specific demographics. There is also a search box that takes a User ID, name, or email.
Checking what one person can see
- Find the person in the list.
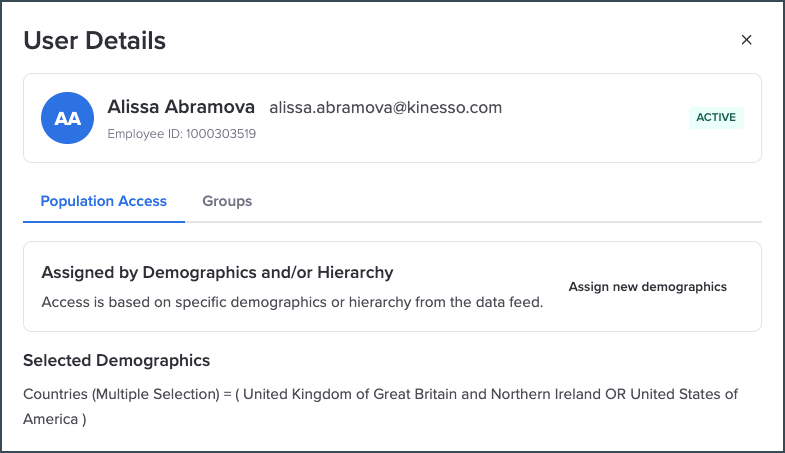
- Click View details, the eye icon link in the Actions column.
- Click the Population Access tab to see their access type and which demographics they were given, or the Groups tab to see every other reporting group they belong to. That second one is handy when somebody is seeing more than you expected, since access from another group could be the reason.
Turning access on or off
- Find the person.
- Click the three dots icon under Actions, then choose Activate or Send Group Invite for somebody who is inactive, or Deactivate for somebody who is active. Deactivating pulls their access without removing them from the group, so everything you set up for them stays in place.
To do a batch, tick the checkbox next to each person, then click Activate to turn them on, or Send Group Invite to turn them on and email them at the same time. Anyone already active in your selection is skipped. Deactivating is one person at a time. Activate Reporting Group Access has the details.
Adding more people
- Click + Add Users to Group at the top right. On a group with nobody in it yet, that button reads just + Add Users.
- For one person, find them, click + Add to Group, then set their population access in the window that opens.
- For several, tick the checkbox next to each one, click + Add selected to group, then set population access in the window that opens.
- Look over the Review Population Access window.
- Click Confirm and Back to Group Details, or Confirm and Add More Users if you are not done.
Population access has a few more wrinkles to it than fits here. Add Users to a Reporting Group covers it properly.
Taking people out
To remove one person:
- Find them in the list.
- Click the three dots icon, then choose Unassign from this Group.
- The Unassign from this Group window opens. Click Unassign User to confirm.
To remove several:
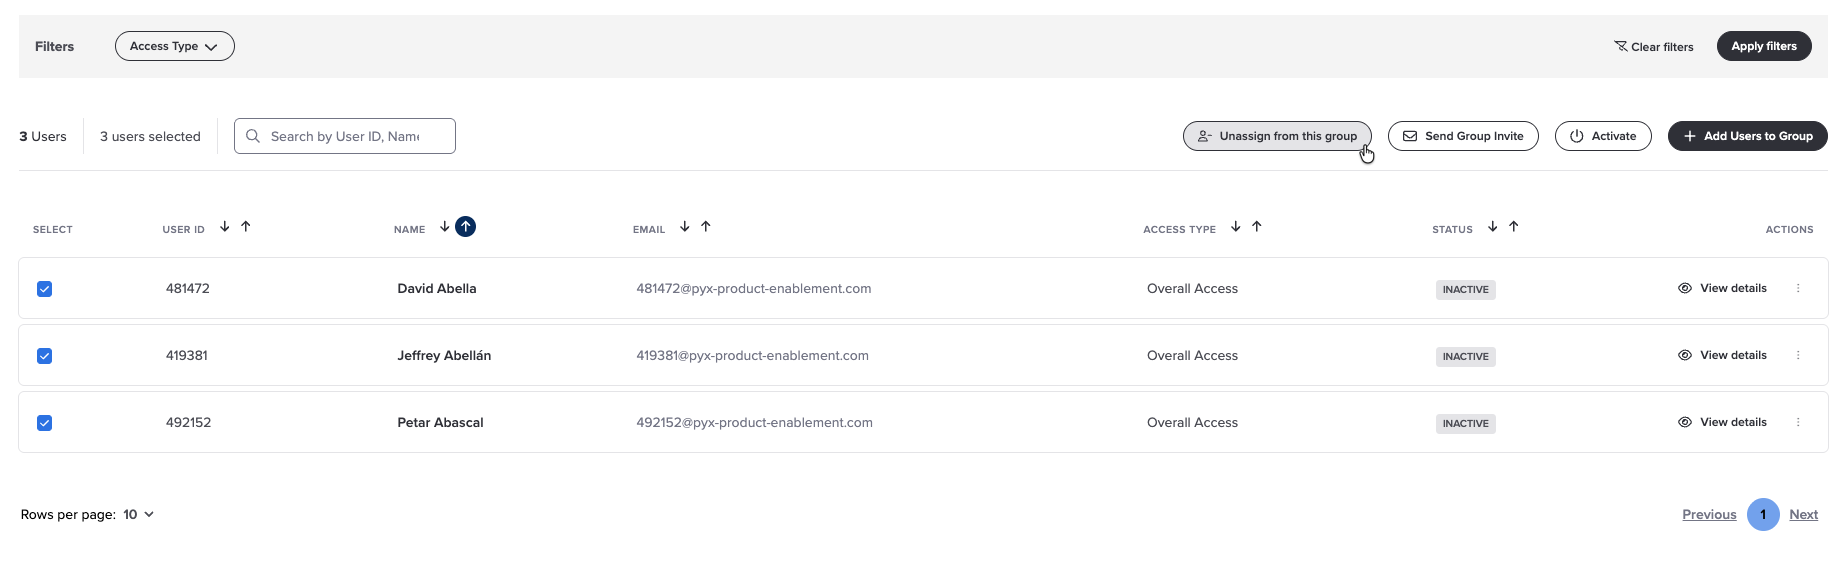
- Tick the checkbox next to each person.
- Click Unassign from this group at the top right.
- The Unassign from this Group window opens and tells you how many people you are about to remove. Click Unassign Users to confirm.
Unassign or deactivate?
Unassigning removes somebody from the group along with the population access you set up for them. If you might want them back later, Deactivate them instead so their setup stays in place.
Changing the reports
Anything you change on the Permissions tab applies to everybody in the group. There is no per person version of this.
- Click the Permissions tab to see what the group has now.
- Click Edit at the top right.
- Make your changes, then click Save Changes.
Changing the filters
Same idea on the Demographics tab. It sets which demographics everyone in the group can filter by.
- Click the Demographics tab.
- Click Edit at the top right.
- Make your changes, then click Save Changes.
Renaming the group
If the group name stopped making sense, the name and description can be updated whenever you like.
- Click Edit Details in the bar at the top of the management screen, alongside the description and the user counts.
- Make your changes, then click Save Changes.
One thing to know if you go looking on the default Administrative privileges group: it does not offer Edit Details, because Event Administrators get the full report regardless of what a group says.
Was this article helpful?
That’s Great!
Thank you for your feedback
Sorry! We couldn't be helpful
Thank you for your feedback
Feedback sent
We appreciate your effort and will try to fix the article