Admin Portal
The Admin Portal is where Platform Administrators look after the company-wide side of Perceptyx: who has an account, what your organization has turned on, how the platform looks, and how long inactive accounts stick around.
Think of this article as a map. It shows you what lives in each part of the Admin Portal, what you can change yourself, and what you need to ask Perceptyx to change. Most areas have their own article with the full steps, and you will find links to those along the way. The one thing covered in full here is setting up data retention policies, since that lives on the Company Details screen.
Some parts of the portal are read-only, and some only show up if your organization uses that feature. If you don't see something described here, it is probably not turned on for your company.
Who can use this
Only Platform Administrators can open the Admin Portal. If you need access, ask someone at your organization who is already a Platform Administrator.
This article walks through
Opening the Admin Portal
- Log in to the Perceptyx platform.
- Click the gear icon in the navigation bar at the top of the screen.
The Admin Portal opens on the Dashboard. It gives you a quick count of the people in your user directory, broken down by status, and a count of your live and draft hierarchy snapshots. Take me to the list jumps you to the Users screen, and Manage Snapshots jumps you to Snapshots.
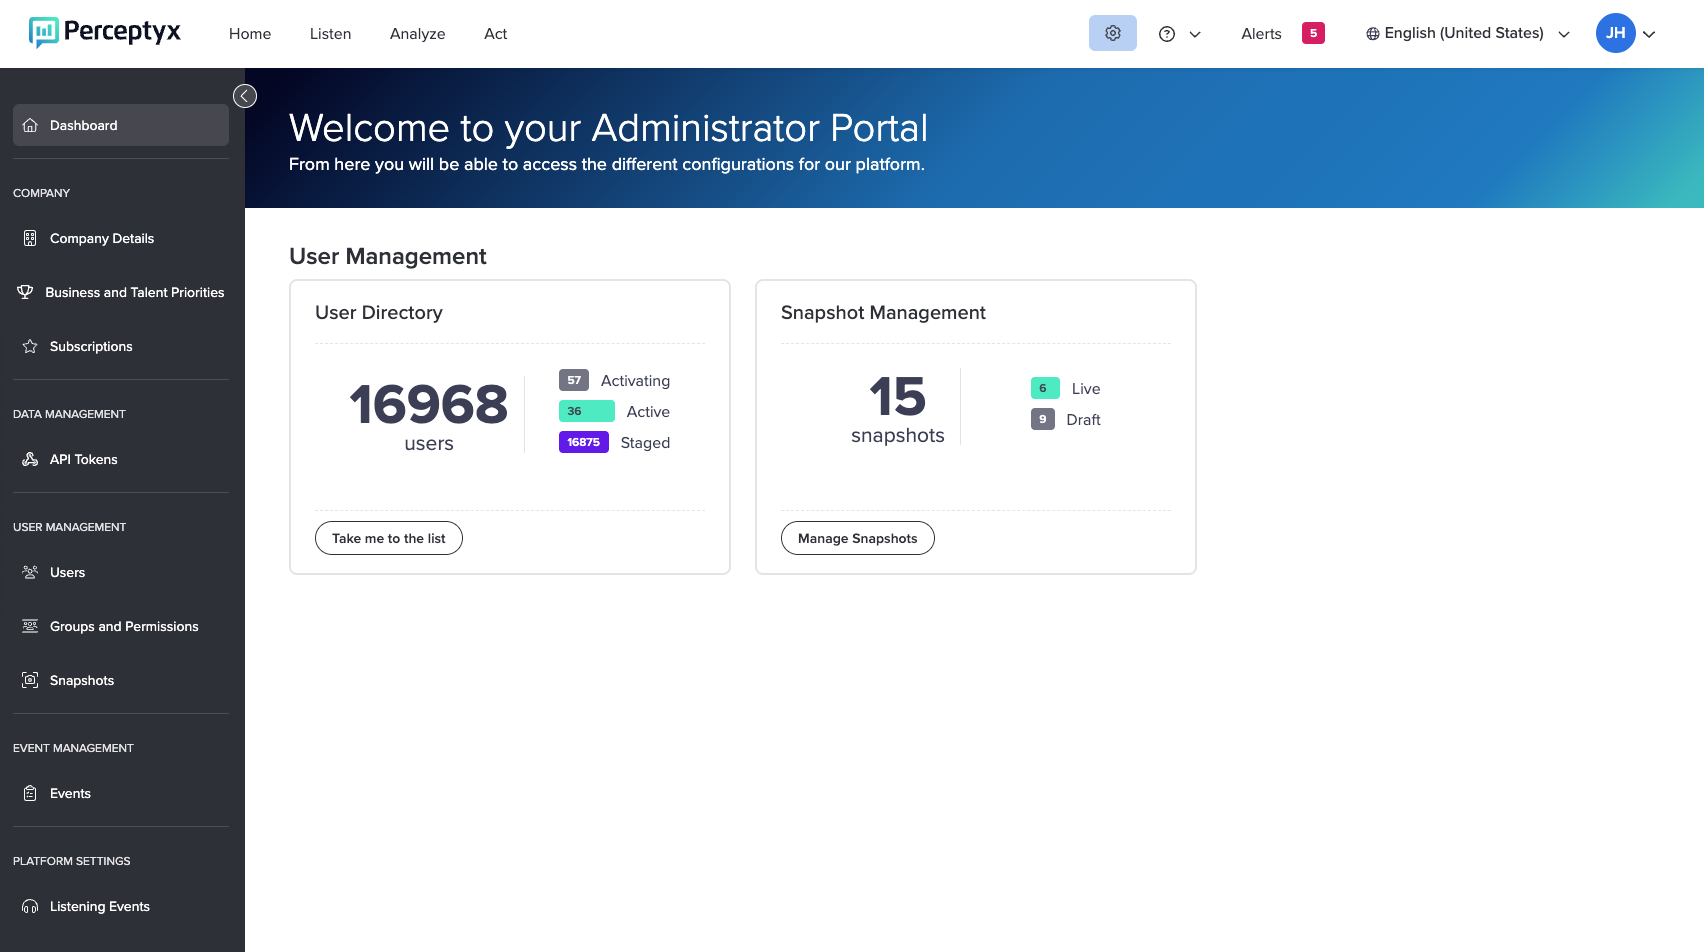
Everything else is in the panel on the left, grouped into sections:
| Section | What's in it | Can you change it? |
|---|---|---|
| Company | Company Details (including data retention policies), Business and Talent Priorities, Subscriptions | Data retention policies, yes. The rest is read-only. |
| Data Management | API Tokens. Only shows if your organization connects to Perceptyx this way. | You can revoke a connection. |
| User Management | Users, Groups and Permissions, Snapshots | Yes |
| Event Management | Events, a list of every listening event in your company | You can turn add-ons off and on per event. |
| Platform Settings | Listening Events, Activate, Appearance | Yes |
Company details, priorities, and subscriptions
The Company section is mostly about what Perceptyx set up for your organization. You can look, but changes go through your Perceptyx team. The exception is data retention, which you manage yourself from the Company Details screen.
Company Details
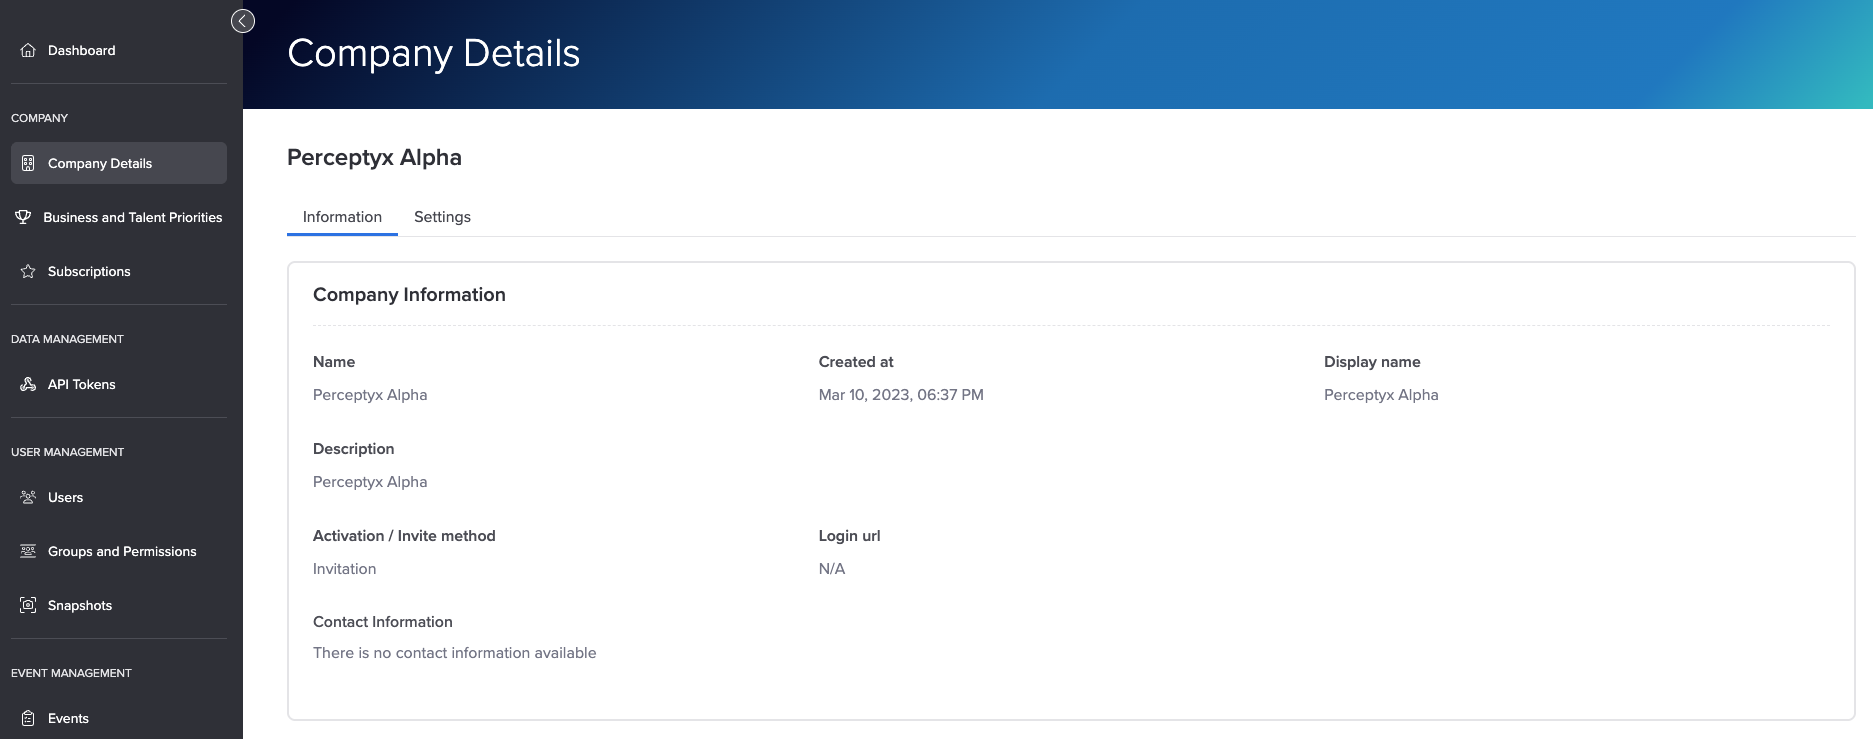
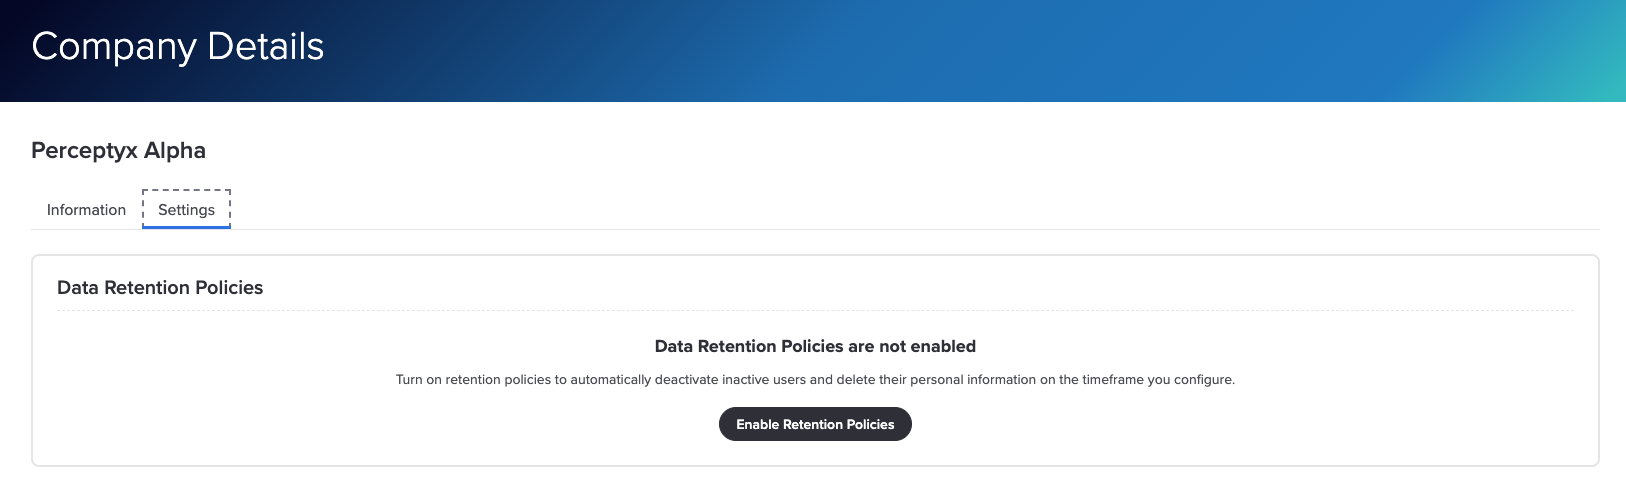
Click Company Details in the left panel. The screen has two tabs:
- Information shows the details used to set up your platform, how people are invited to activate their accounts, and your contact information. This tab is read-only.
- Settings is where you turn on and manage data retention policies. See Setting up data retention policies below.
Business and Talent Priorities
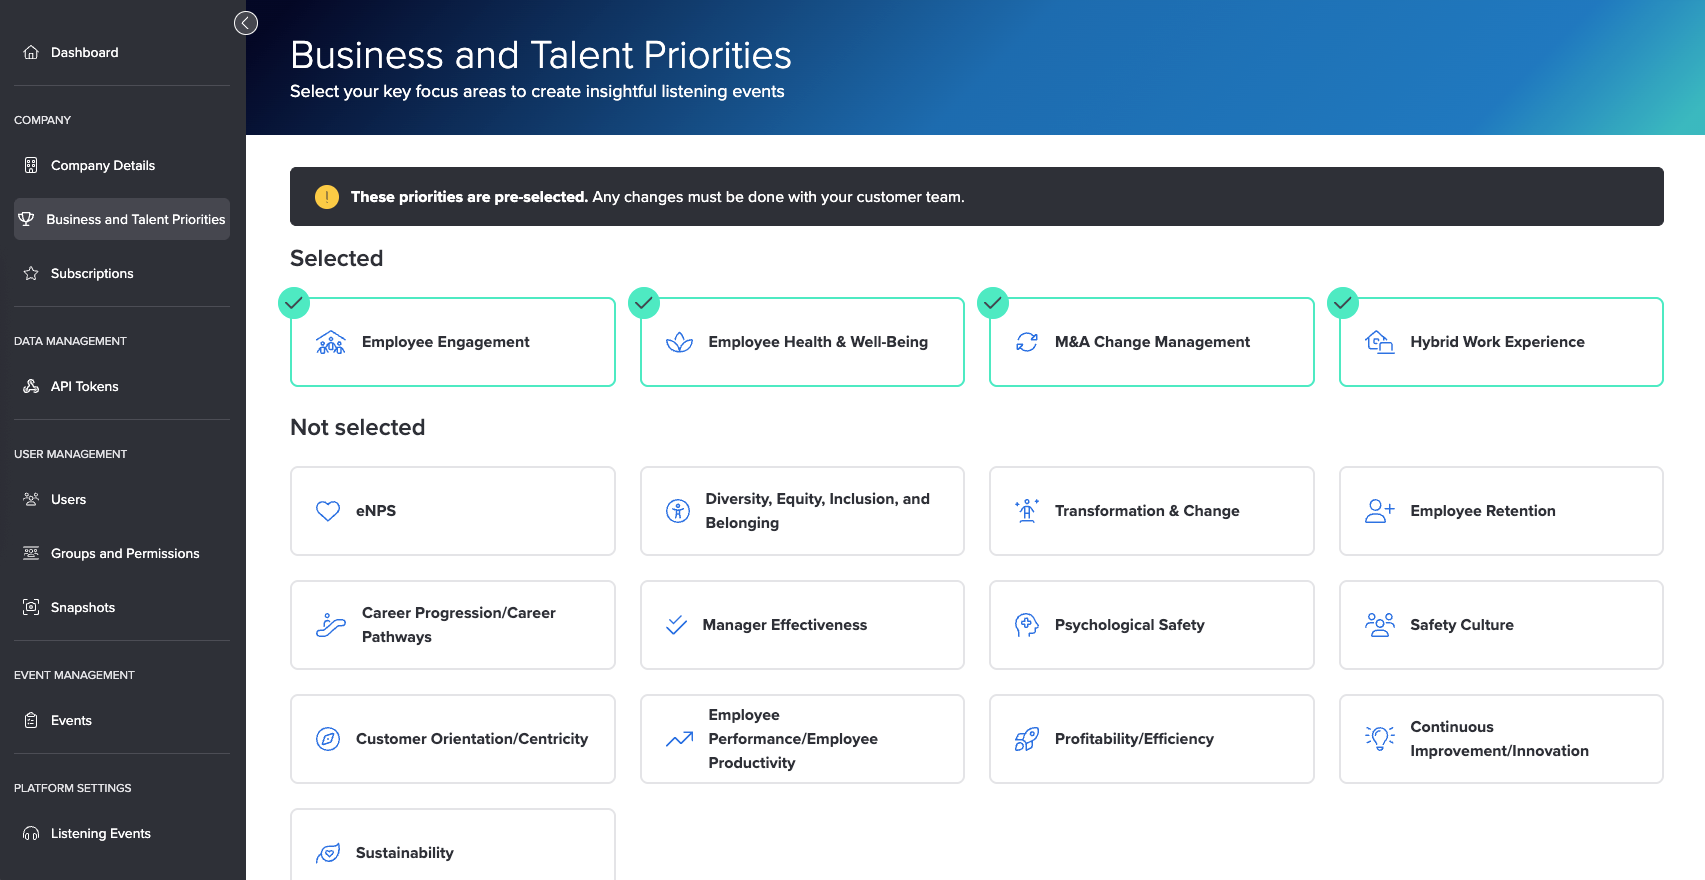
Perceptyx works with your organization to pick the business and talent priorities that matter most to you, then loads them into the platform. They are the starting point for outcomes-based listening events. This screen shows which priorities are selected and which aren't. To change them, contact your Perceptyx customer team.
Subscriptions
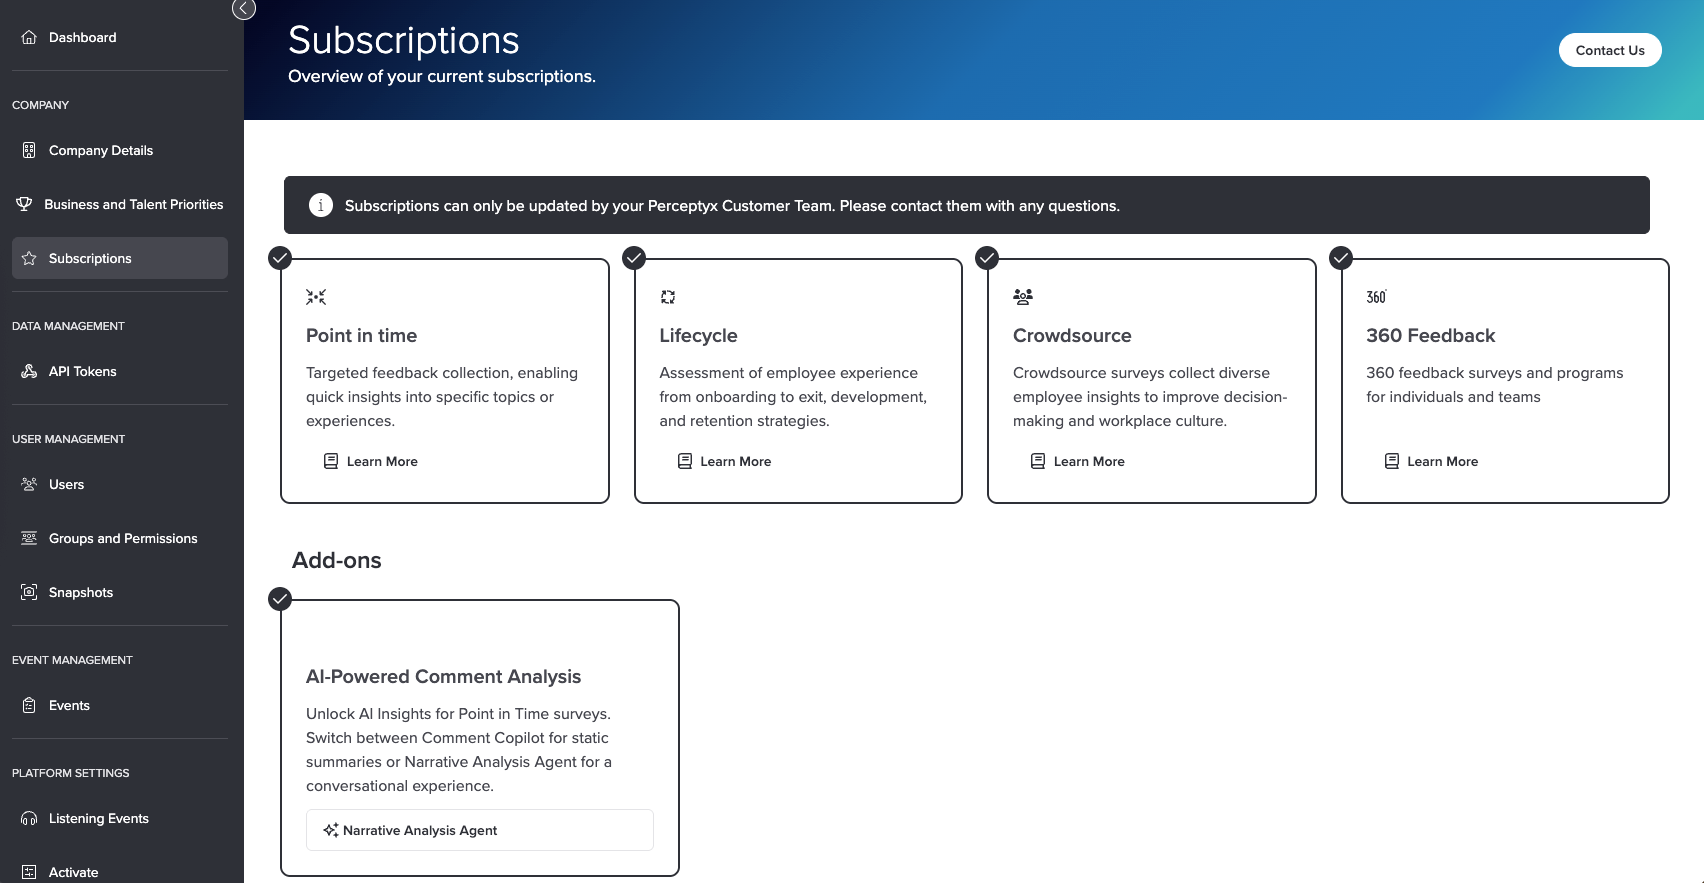
This screen shows which subscriptions your organization has (marked with a checkmark), plus any add-ons that are turned on, like AI-Powered Comment Analysis. Add-ons are turned on by Perceptyx, but you can switch them off and back on for individual events. See the Events section below for that.
To add or change a subscription or add-on, contact your Perceptyx Customer Success Manager.
Setting up data retention policies
When someone leaves your organization, their account doesn't always leave Perceptyx with them. Over time you end up with a pile of accounts for people who aren't around anymore. Data retention policies clean that up for you on a schedule, so your user list stays accurate without anyone doing it by hand.
How it works
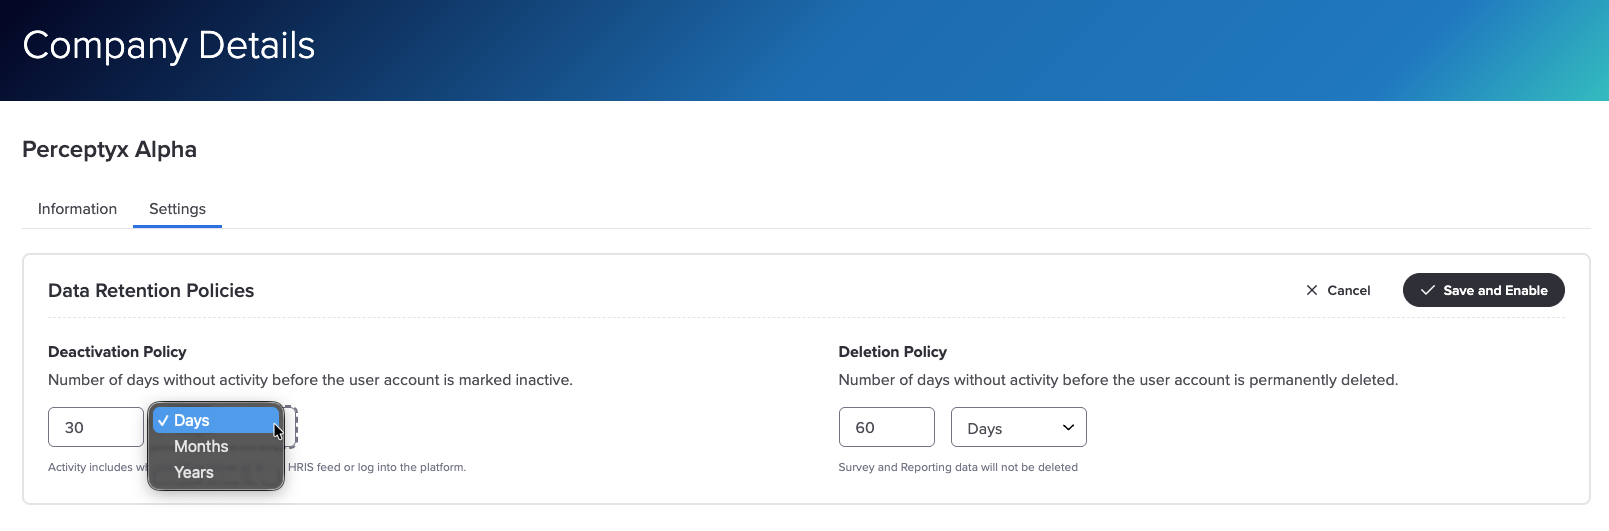
Retention policies are off until a Platform Administrator turns them on, and one set of rules covers your whole company. The rules are two timers, and both count the time since someone was last active. You can set each one in days, months, or years. A person counts as active when they show up in your employee data feed or log in to the platform.
- Deactivation Policy. After this long without activity, the account is marked inactive. Inactive people can't log in, and they are left out of new listening events unless an Event Creator adds them on purpose. They still count in your past results. If they show up in your employee data feed again, they are made active again automatically.
- Deletion Policy. After this long without activity, the account and the person's personal information are permanently deleted. Survey and reporting data is not deleted. If that person shows up in your data feed again later, they come back as a brand-new user, with no link to their old account.
The deletion timer has to be longer than the deactivation timer. That way people are always marked inactive before they are deleted.
Turn on data retention policies
- In the left panel, click Company Details.
- Click the Settings tab.
- In the Data Retention Policies section, click Enable Retention Policies.
- Under Deactivation Policy, enter a number, then pick Days, Months, or Years from the dropdown next to it. This is how long someone can go without activity before their account is marked inactive.
- Under Deletion Policy, enter a number and pick a unit the same way. This is how long someone can go without activity before their account is permanently deleted, and it has to be longer than your deactivation timeframe.
- Click Save and Enable. (To back out without saving, click Cancel.)
- Read the Enable Retention Policies window. It shows roughly how many users will be marked inactive and how many will be deleted, based on the timeframes you set.
- If the numbers look right, click Save and Enable. If they don't, click Cancel and adjust your timeframes.
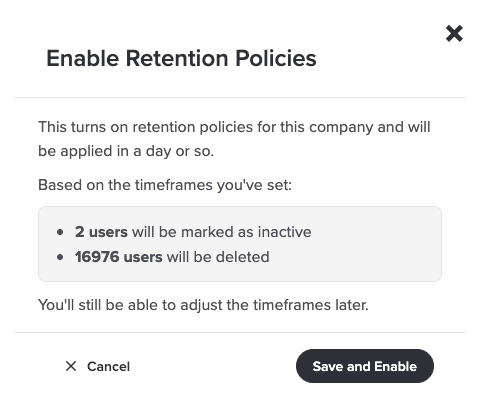
Nothing changes the moment you save. Your policies are applied at the next scheduled run, usually within a day or so. You can come back to the Settings tab and adjust the timeframes whenever you need to.
Before you confirm
Deletion can't be undone. Take a real look at the estimate before you click Save and Enable, especially the number of users who will be deleted. A number much bigger than you expected usually means the timeframes are too short.
People who aren't in your employee data feed, like accounts added by hand, only count as active when they log in. If they go quiet long enough to be marked inactive, they can't log back in on their own. A Platform Administrator can switch them back on with the Status toggle in their user details.
If you ever turn retention policies off, anyone who was already marked inactive or deleted stays that way.
API tokens
This section only shows up if your organization connects its own systems to Perceptyx through an application programming interface. That kind of connection lets your systems pull event data from Perceptyx automatically, so you can process or analyze it on your side.
Click API Tokens in the left panel to see your active connections. The banner at the top links to the guide for working with Perceptyx connections.
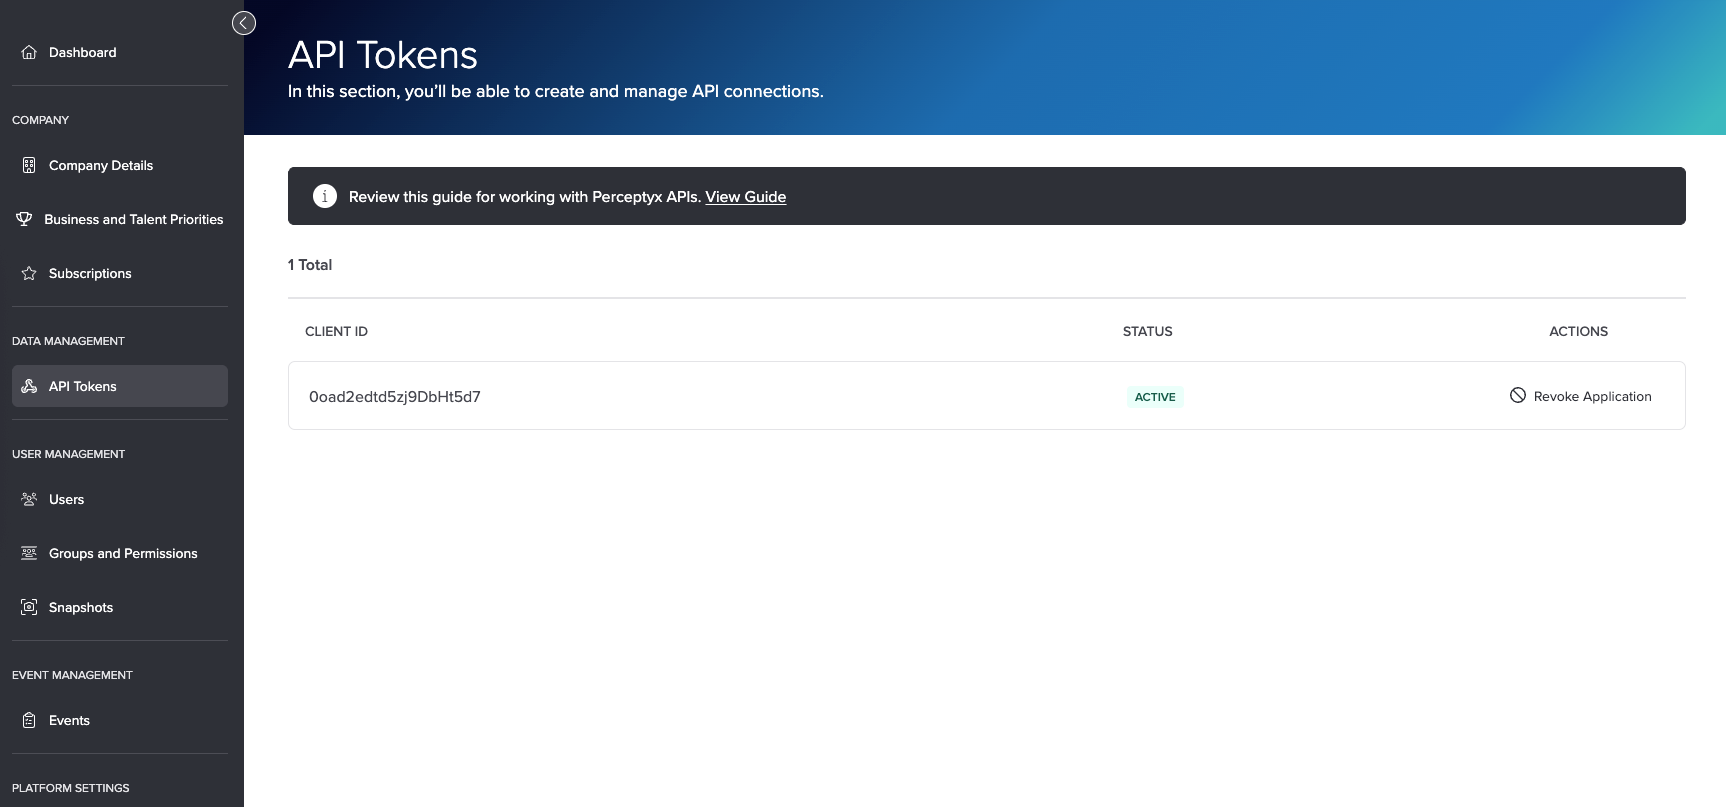
To cut off a connection, click Revoke Application, then click Yes, I am Sure.
Users, groups, and snapshots
The User Management section is where you look after the people in your platform and decide who can build events.
Looking for reporting access?
Who can see results is set up somewhere else, under Listening Events in Platform Settings. See Create & Manage Reporting Groups for an Event - Overview | Point-In-Time & Lifecycle.
Users
Click Users in the left panel, or Take me to the list on the dashboard. For each person you'll see their employee ID, name, email, single sign-on ID (if you use one), last login, assigned groups, status, and an Actions button.
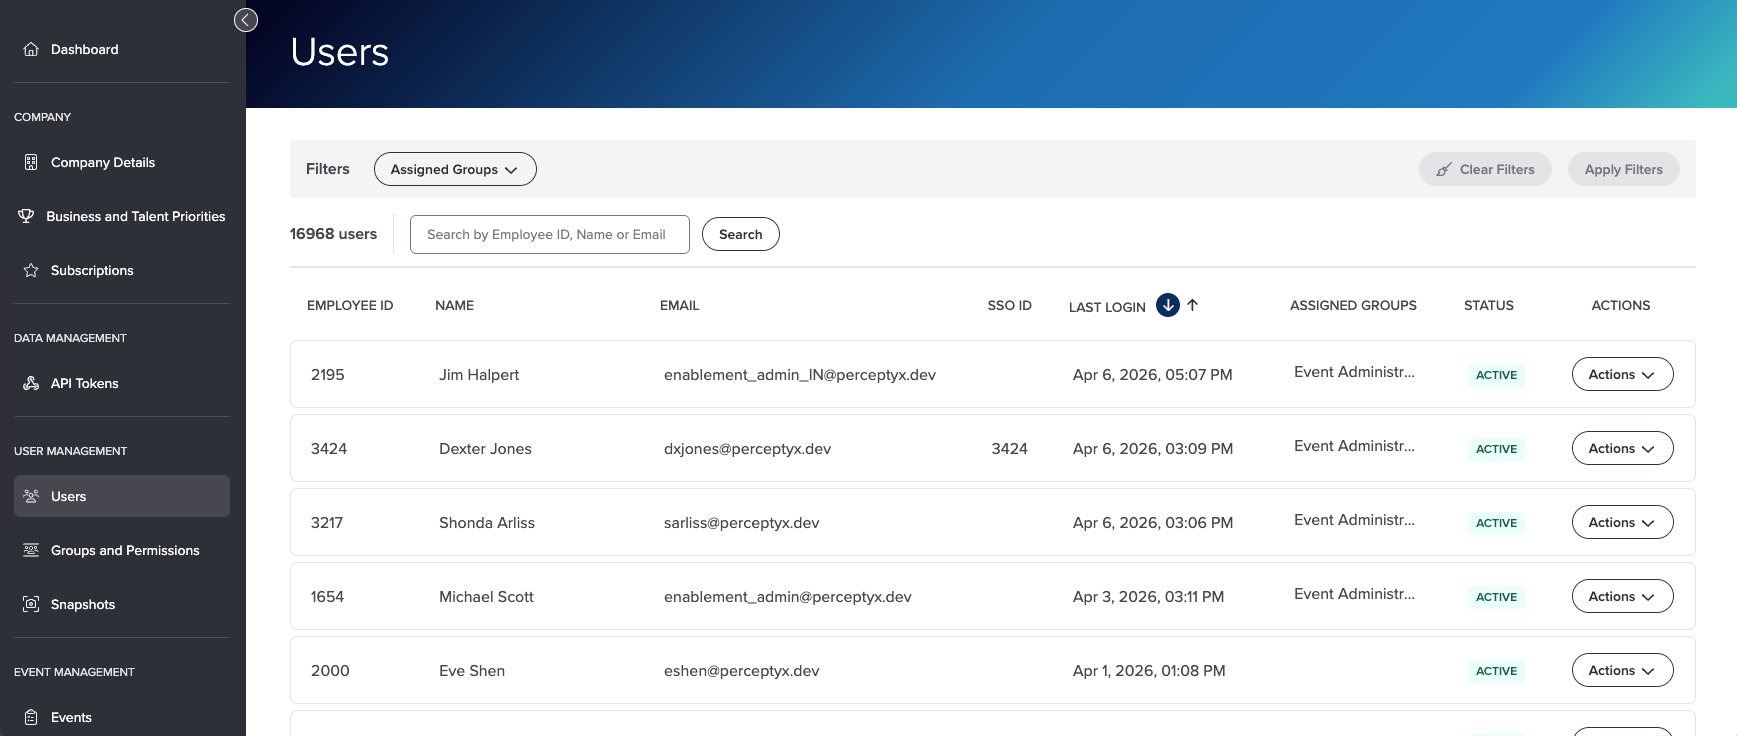
To find someone, type their first name, last name, employee ID, or email in the search box and press Enter. Click the X in the search box to see everyone again.
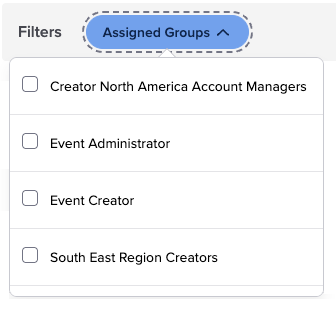
To filter by group, click Assigned Groups, tick the groups you want, then click Apply Filters. Anyone who belongs to at least one of those groups shows up. Click Clear Filters to reset. Groups control what people can do and who they can invite to listening events. Manage Group-Based Access and Permissions | Point-In-Time & Lifecycle covers them in detail.
View and change a user's details
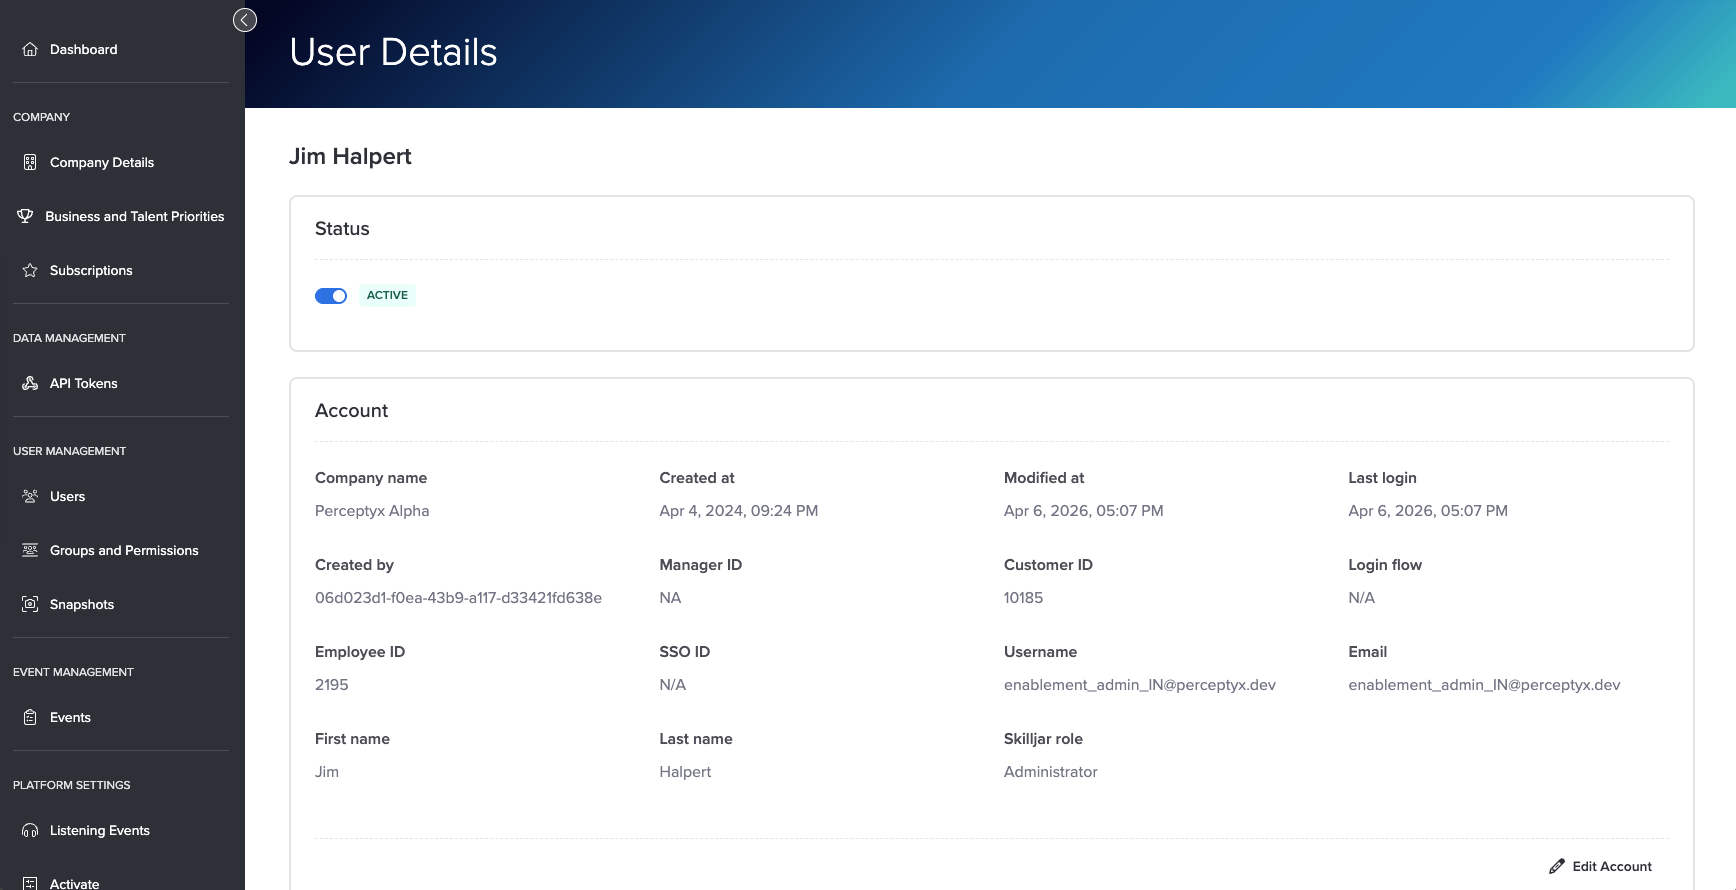
Click Actions next to a person, then click User Details. You'll see:
- Status. Active or inactive. Use the toggle to switch it. If your company uses data retention policies, the platform may also mark people inactive automatically.
- Account. Click Edit Account to change the employee ID, single sign-on ID, username, email, first name, or last name, then click Save Changes.
- Preferences. Click Edit Preferences to change the person's default language or turn their nudge email notifications on or off, then click Save Changes.
- Groups & Permissions. Which groups the person belongs to, if any.
If you have an employee data feed
Changes you make here get overwritten the next time your data feed comes in. To make a change stick, update it in the feed itself.
Delete a user
- Search for the person.
- Click Actions, then click Delete.
- Click Delete again to confirm.
If the person is still in your employee data feed, they'll be added right back the next time it comes in. Take them out of the feed to remove them for good. If you're doing a lot of this by hand, data retention policies can handle it for you.
Groups and Permissions
Instead of setting people up one by one, you build reusable groups that decide what people can do in the event builder, then add people to them. It keeps access consistent and makes it easy to see who can do what.
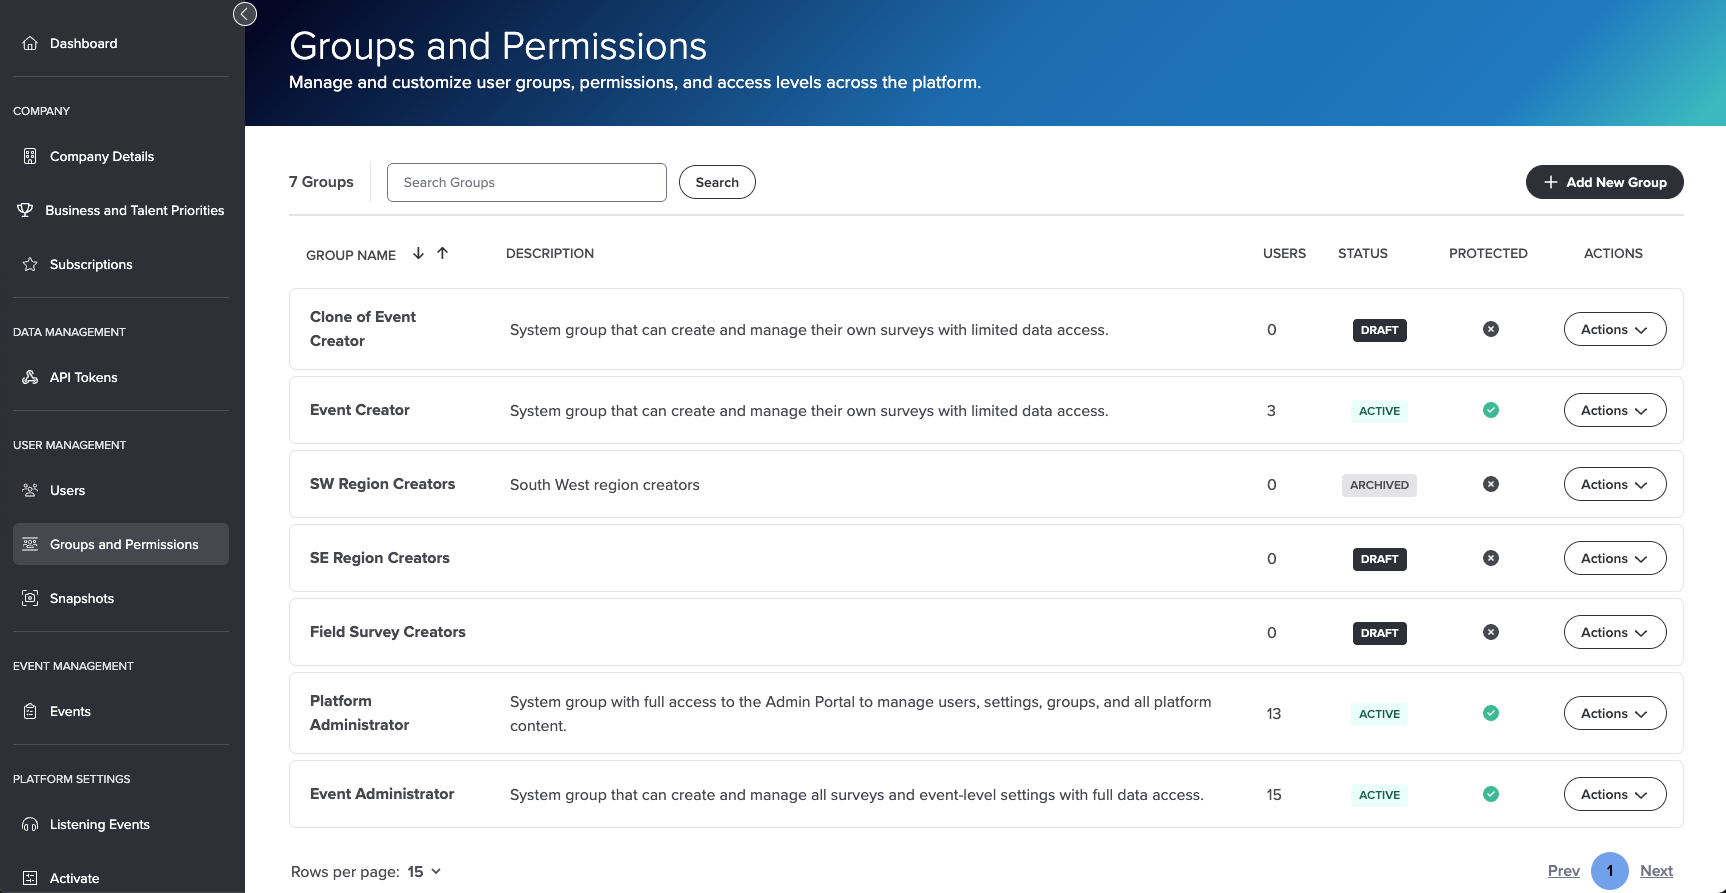
For the full steps, see Manage Group-Based Access and Permissions | Point-In-Time & Lifecycle.
Snapshots
A snapshot is a copy of your organizational hierarchy, meaning who reports to whom, that the platform uses behind the scenes. Click Snapshots in the left panel, or Manage Snapshots on the dashboard, to see the list.
Snapshots are created by Perceptyx, not by you. Each time new employee data is loaded into the platform, a snapshot is generated automatically, and it shows PYX in the Created by column. There isn't a way to create one yourself, so this screen is for looking, not building.
For each snapshot you'll see its name, who created and last modified it and when, how many users it includes, and its status, either Live or Draft. You may also see snapshots named after past listening events. Use the search box to find a snapshot by name, or click a column heading to sort the list.
Your events list
Click Events in the left panel to see every listening event created in the listening event builder across your company, both Perceptyx-led and self-led, in one list. It's a handy way to audit what's out there and check who has access.
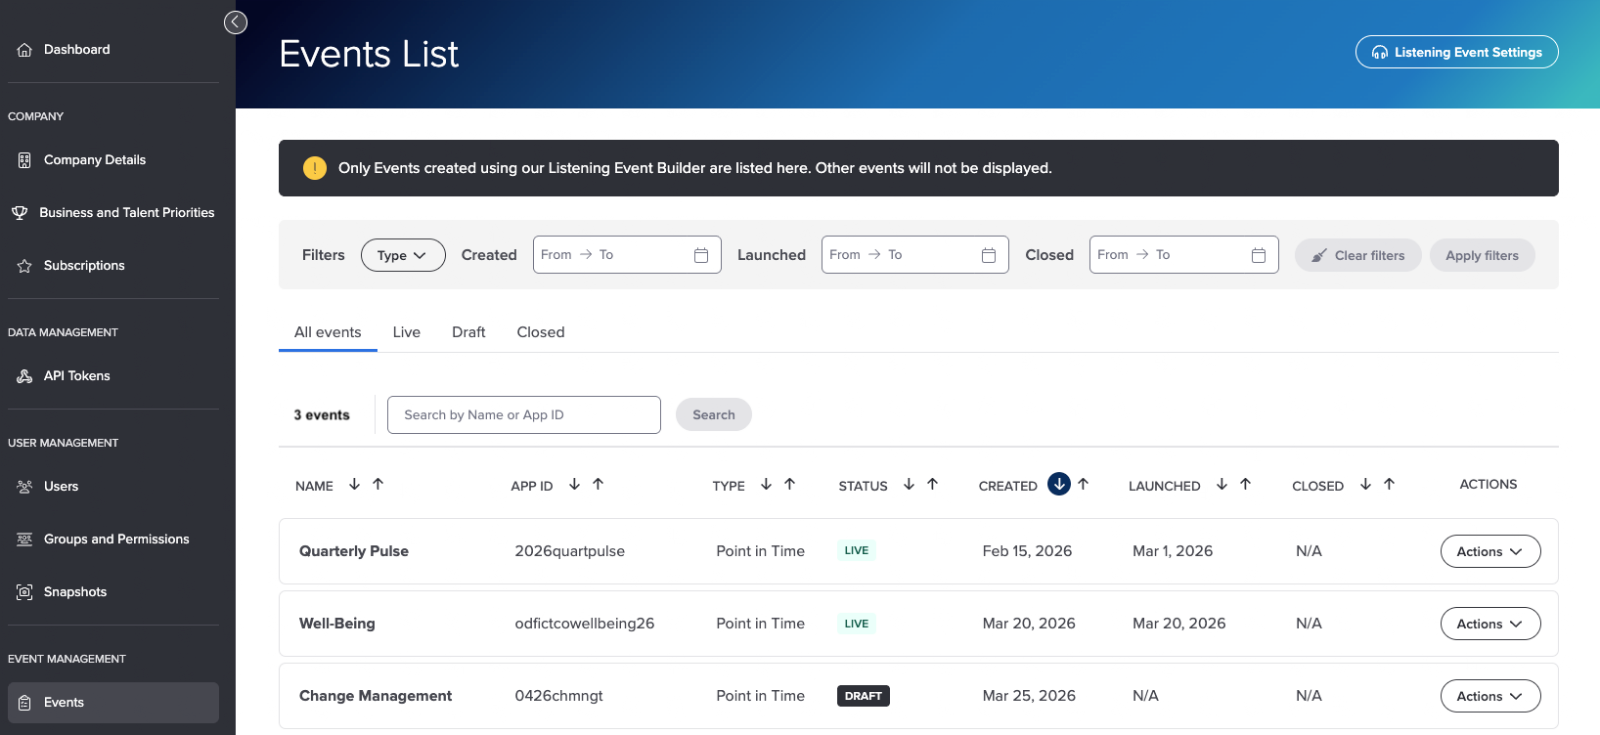
You can browse, filter, and search the list. Open an event to see its name, app ID, status, type, business and talent priority, created date, and launched date.
If Perceptyx has turned on add-ons like Comment Copilot or Narrative Analysis Agent for your company, you'll also see a toggle to switch them off, and back on, for that one event.
For the full steps, see Event Management (Platform Admins Only) | Point-In-Time & Lifecycle.
Platform settings
The Platform Settings section holds your company-wide defaults for listening events, your custom learning links, and the look of the platform.
Listening Events
This is where you'll find the settings and templates your events use. What you see depends on your subscriptions. For Point-In-Time and Lifecycle events, that's System Settings, Demographic Settings, User Management, Event Templates, and Notification Templates. For Crowdsource events, it's Account Settings and Organizations Settings.
Each area has its own article:
- Listening Event Platform Settings Overview (Platform Admins Only) | Point-In-Time & Lifecycle
- Work with System Settings (Platform Admins Only) | Point-In-Time & Lifecycle
- Work with Demographic Settings (Platform Admins Only) | Point-In-Time & Lifecycle
- Create & Manage Reporting Groups for an Event - Overview | Point-In-Time & Lifecycle
- Create and Edit Event Templates (Platform Admins Only) | Point-In-Time & Lifecycle
- Create and Edit Notification Templates (Platform Admins Only) | Point-In-Time & Lifecycle
- Listening Event Platform Settings (Platform Admins Only) | Crowdsource
Activate
If your organization has Activate, this option lets you add custom learning links, so nudges can point people to your own internal resources.
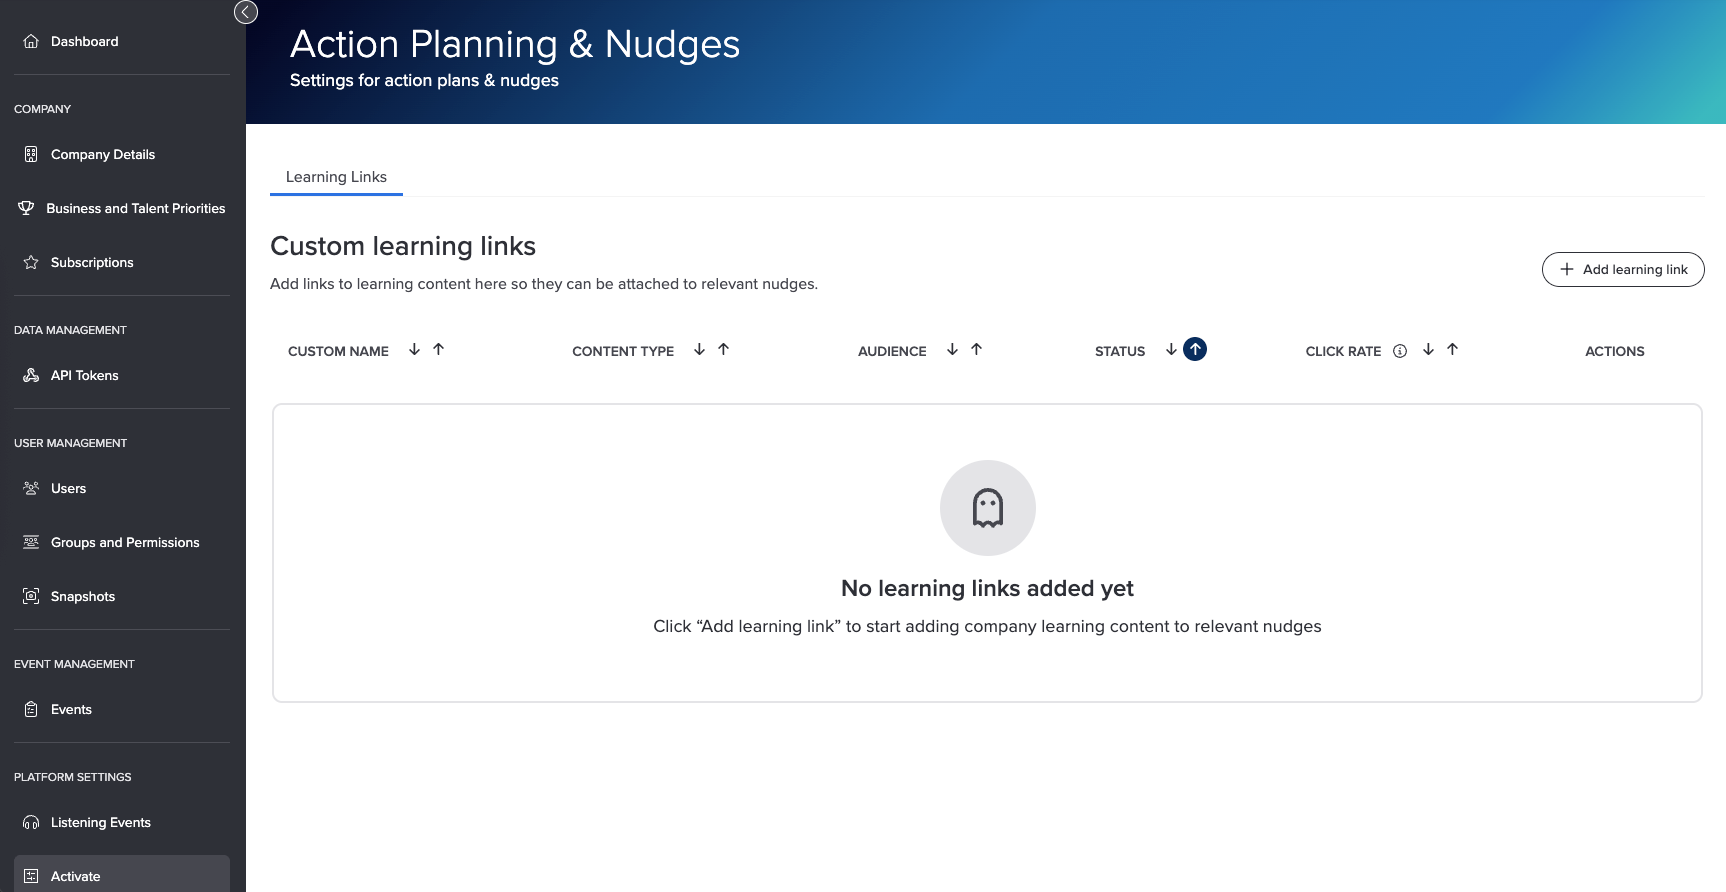
For the full steps, see Add and Manage Custom Learning Links for Nudges (Admins Only).
Appearance
Make the platform look like yours. You can update the logo, primary color, and style to match your brand, and your choices carry over to reports too.
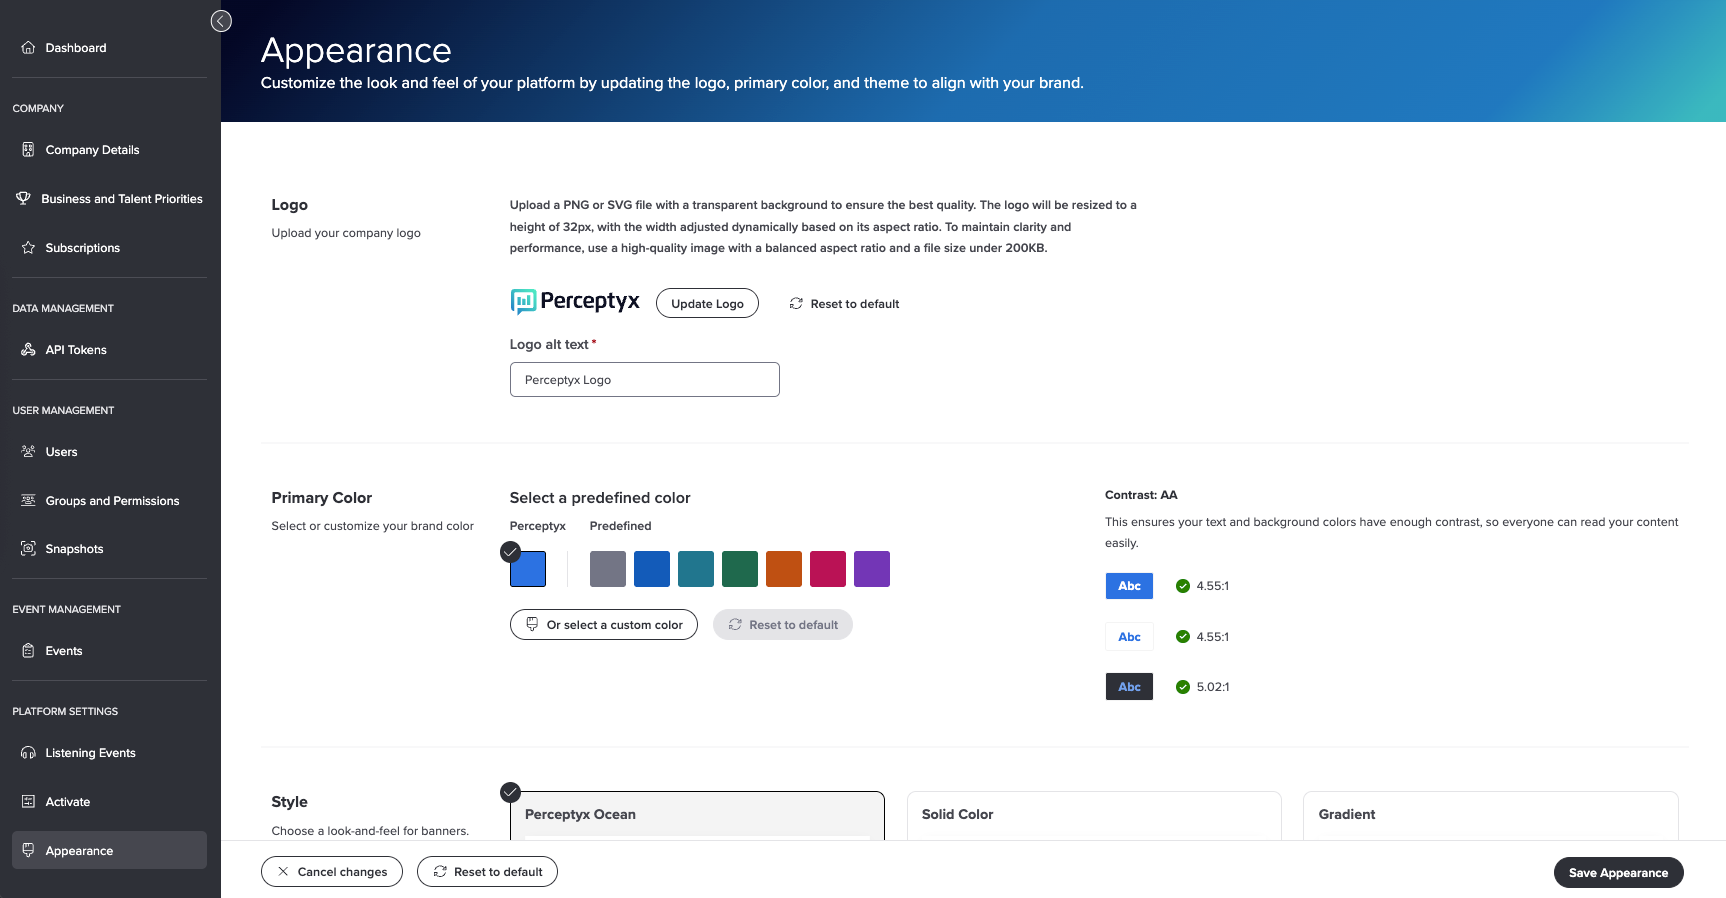
For the full steps, see Platform Branding (Admins Only).
What's next
Once your user list is in good shape, decide who gets to build events. Manage Group-Based Access and Permissions | Point-In-Time & Lifecycle walks you through building groups and adding people to them.
Was this article helpful?
That’s Great!
Thank you for your feedback
Sorry! We couldn't be helpful
Thank you for your feedback
Feedback sent
We appreciate your effort and will try to fix the article