It’s common for participant changes to occur after a survey is live -- for example, a name or email change, a departure from the company, or a request to edit responses. Or sometimes your list of participants grows after the survey is live and you need to send invitations to the new additions. You can easily make these kinds of changes to support your participants.
This article walks through:

Review & Manage Your Participants
After your survey is live, you can use the Invitees tab to review and manage your survey participants (e.g., edit or delete invitees, reopen a survey, etc.).
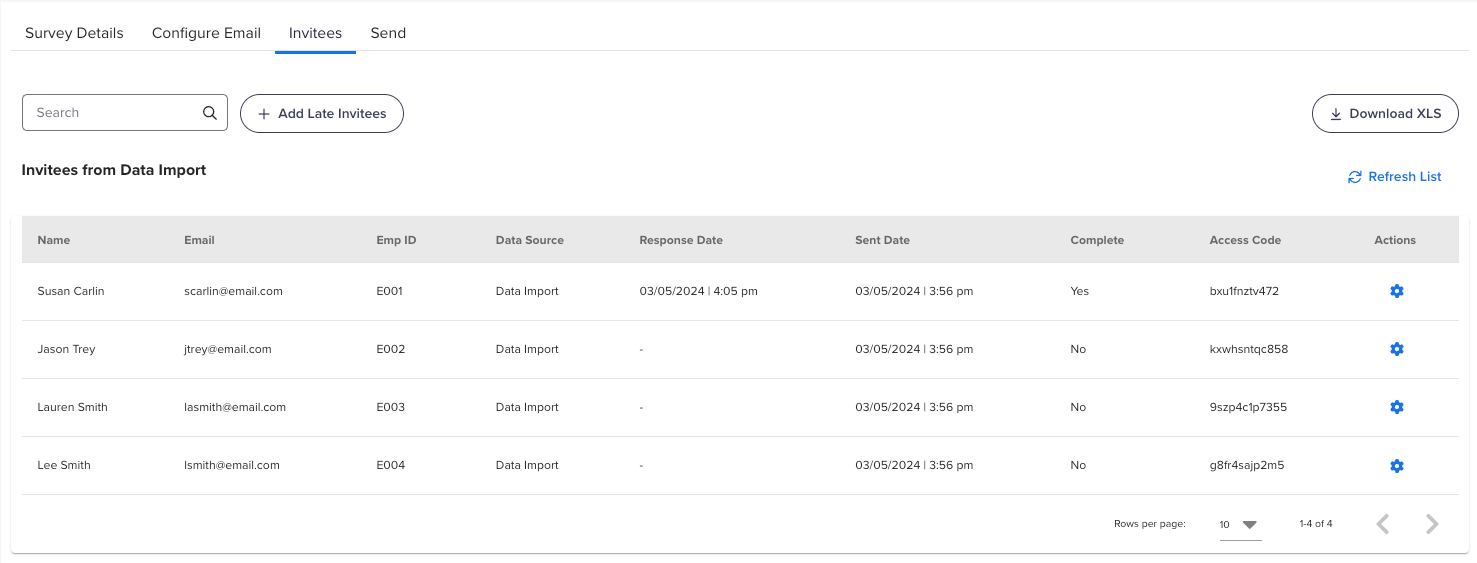
For each invitee, the tab shows user details, the data source, dates for when they received and responded to the email invite, and whether they have completed the survey.
The gear icon displays a list of actions you can take to manage each participant. You can also download the information from the tab to an xls file.
The Refresh List option updates the list in real time to show the response and completion status for invitees.
Navigate to the Launch phase for your survey.
From within the Program Builder:
Click Launch in the progress bar.
From My Surveys:
Click the pencil icon for the survey.
Note: You can also click the gear icon and then select Edit Survey.
The survey opens in draft mode, displaying the Overview page.
Click Launch in the progress bar.
Click the Invitees tab.
Click the gear icon for a user and select an option:
Edit Invitee:
Edit the participant’s name, employee ID, or email address.Delete Invitee:
Remove the participant (and their responses).Reopen Survey:
Reactivate the URL for the participant to edit responses. (Not applicable for surveys that use universal links.)Clear Survey:
Clear all responses. (Not applicable for surveys that use universal links.)Resend Email:
Resend the invitation to the participant.Send Email:
Sends the invitation to the participant (typically used for late invitees).

Add Late Invitees
If you used the Unique Links survey delivery option, you can use the Invitees tab to add late invitees to the survey.
Navigate to the Launch phase for your survey.
From within the Program Builder:
Click Launch in the progress bar.
From My Surveys:
Click the pencil icon for the survey.
Note: You can also click the gear icon and then select Edit Survey.
The survey opens in draft mode, displaying the Overview page.
Click Launch in the progress bar.
Click the Invitees tab.
Click +Add Late Invitees (available only if using the unique links delivery method).
If utilizing your HRIS Data File:
Search:
Search your full data file to find a participant and use the + to add the participant to the survey.Create:
Add a new participant (no demographics will be included).Batch:
Paste in a list of Employee IDs or Emails to add a group (if they are found in the file, you can add them to the survey).Incoming:
Choose participants who were added to the data file after the survey launched (available only if an HRIS file was utilized).
6. Click Add Invitee or Add Invitees, as appropriate.
Was this article helpful?
That’s Great!
Thank you for your feedback
Sorry! We couldn't be helpful
Thank you for your feedback
Feedback sent
We appreciate your effort and will try to fix the article