Creating a reporting group involves a four-step setup workflow: specifying group information, setting permissions, setting demographics, and reviewing your configuration. After the group is created, you assign users and activate their access.
You access the setup workflow from the Report Editor.
New to reporting groups? See Create & Manage Reporting Groups for an Event - Overview for an overview before getting started.

Access the Report Editor
Log in to the Perceptyx Platform.
Access Advanced Reporting for your listening event.
In the left navigation panel, click Report Editor, then click the Permissions tab.

Step 1: Specify Group Information
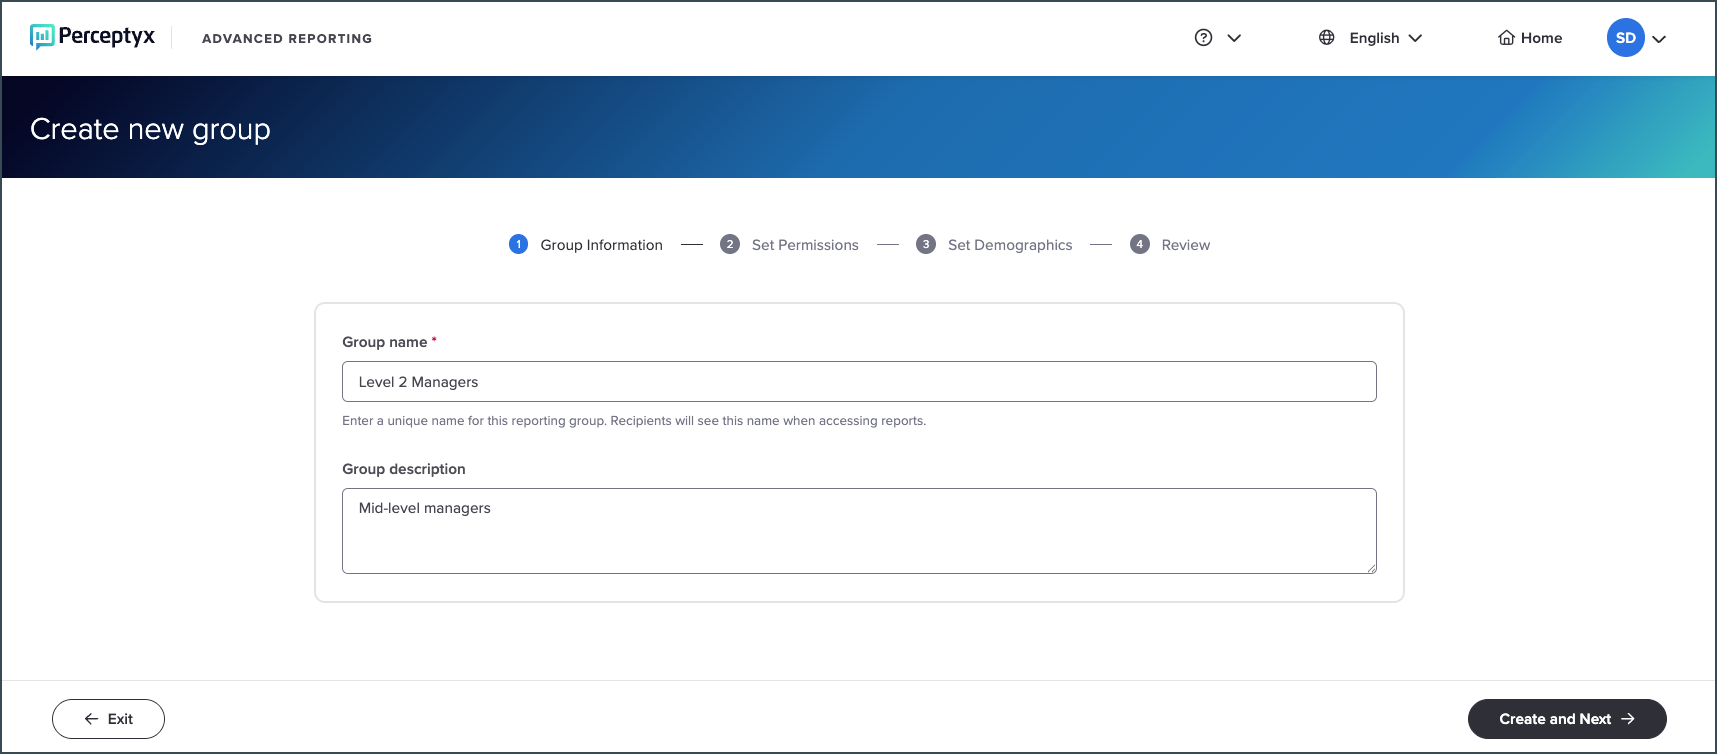
Click + Add New Group (top right) to open the setup workflow.
Enter a unique name in the Group Name field.
Optionally enter a description in the Group Description field.
Click Create and Next.

Step 2: Set Permissions
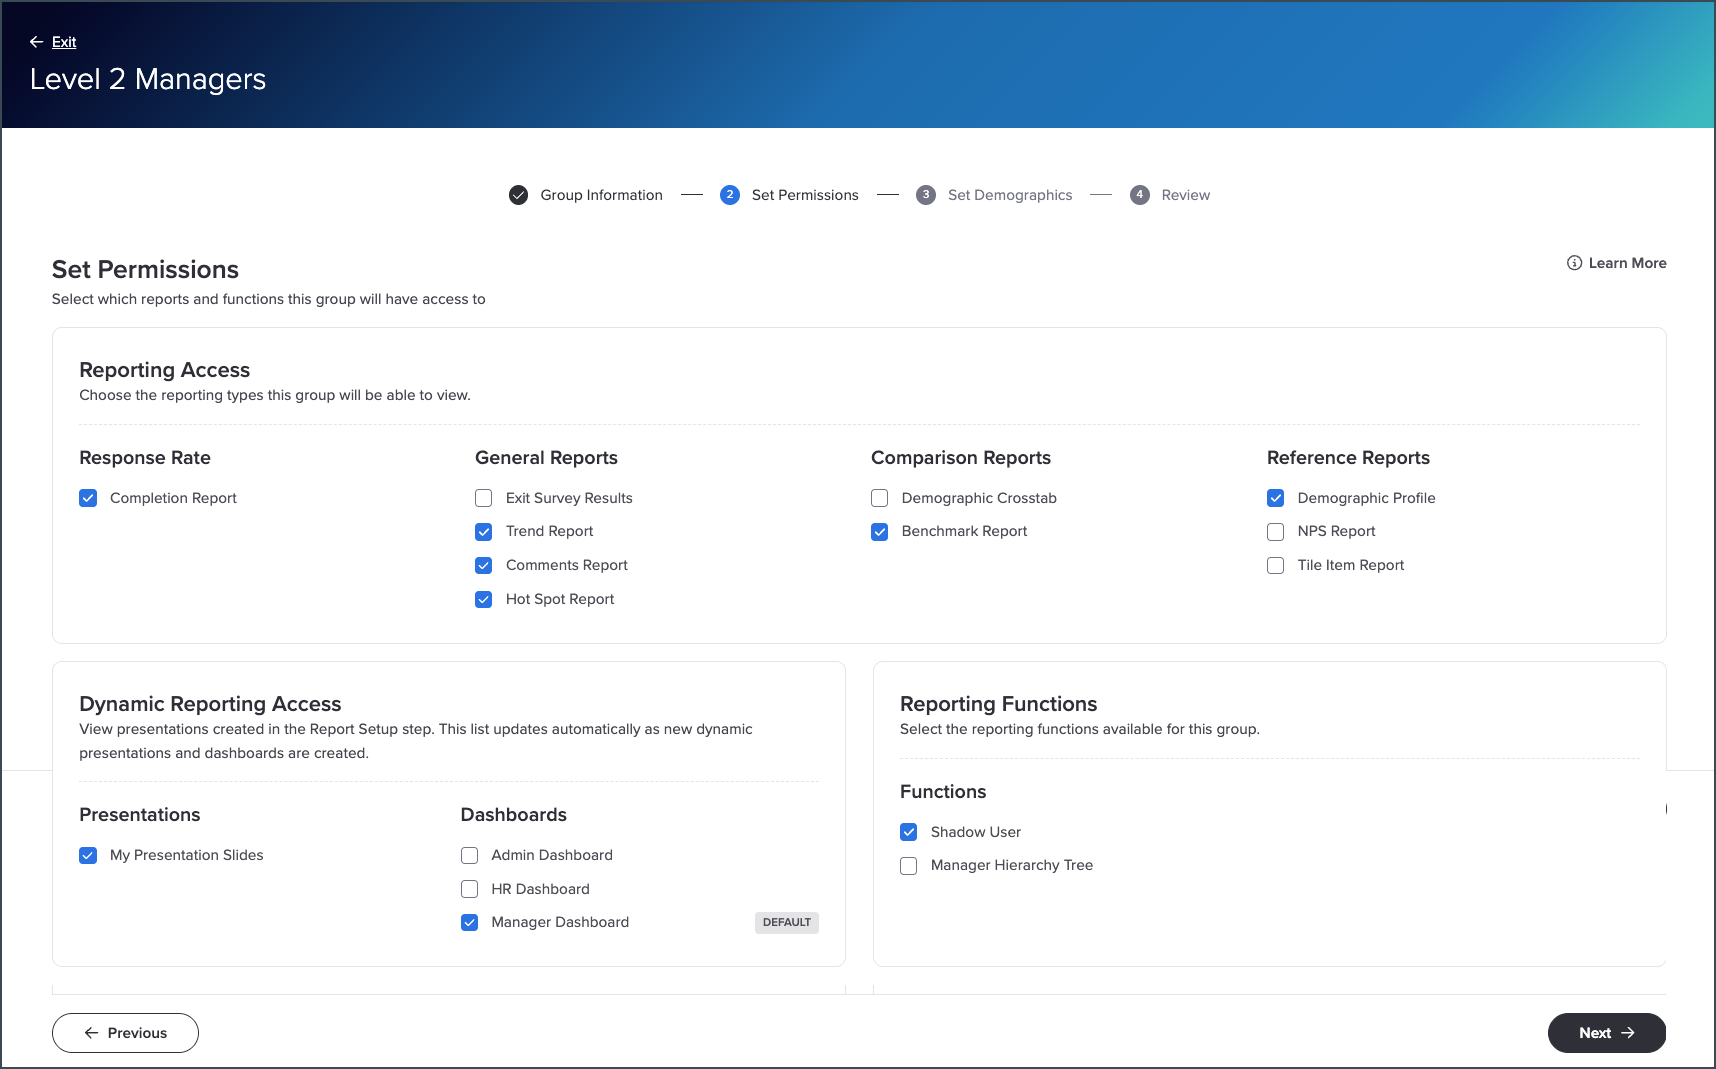
Permissions determine which reports and reporting functions group users can access. Reporting functions include:
Manager hierarchy tree
Shadow user
You can also provide access to dashboards and presentations created with the Dashboard Builder or Presentation Builder. A report dashboard is available by default.
Note: Reporting permissions control feature access. Population access, which is configured later when adding users, determines which response data users can view within those reports.
In the Reporting Access section, select the checkbox for each report the group can access.
In the Dynamic Reporting Access section, select the checkbox for each presentation or dashboard the group can access.
Click Set as Default for the dashboard you want to display when group users access reporting. Any other selected dashboards appear as options in the Advanced Reporting left navigation panel.
In the Reporting Functions section, select the checkbox for each function to assign to the group.
Click Next.

Step 3: Set Demographics
Demographic settings determine which demographics are available for filtering report data.
Note: Demographic permissions control filtering options only. They do not expand a user's assigned population access.
In the Demographics section, select the checkbox for each demographic the group can use for filtering.
Click Next.
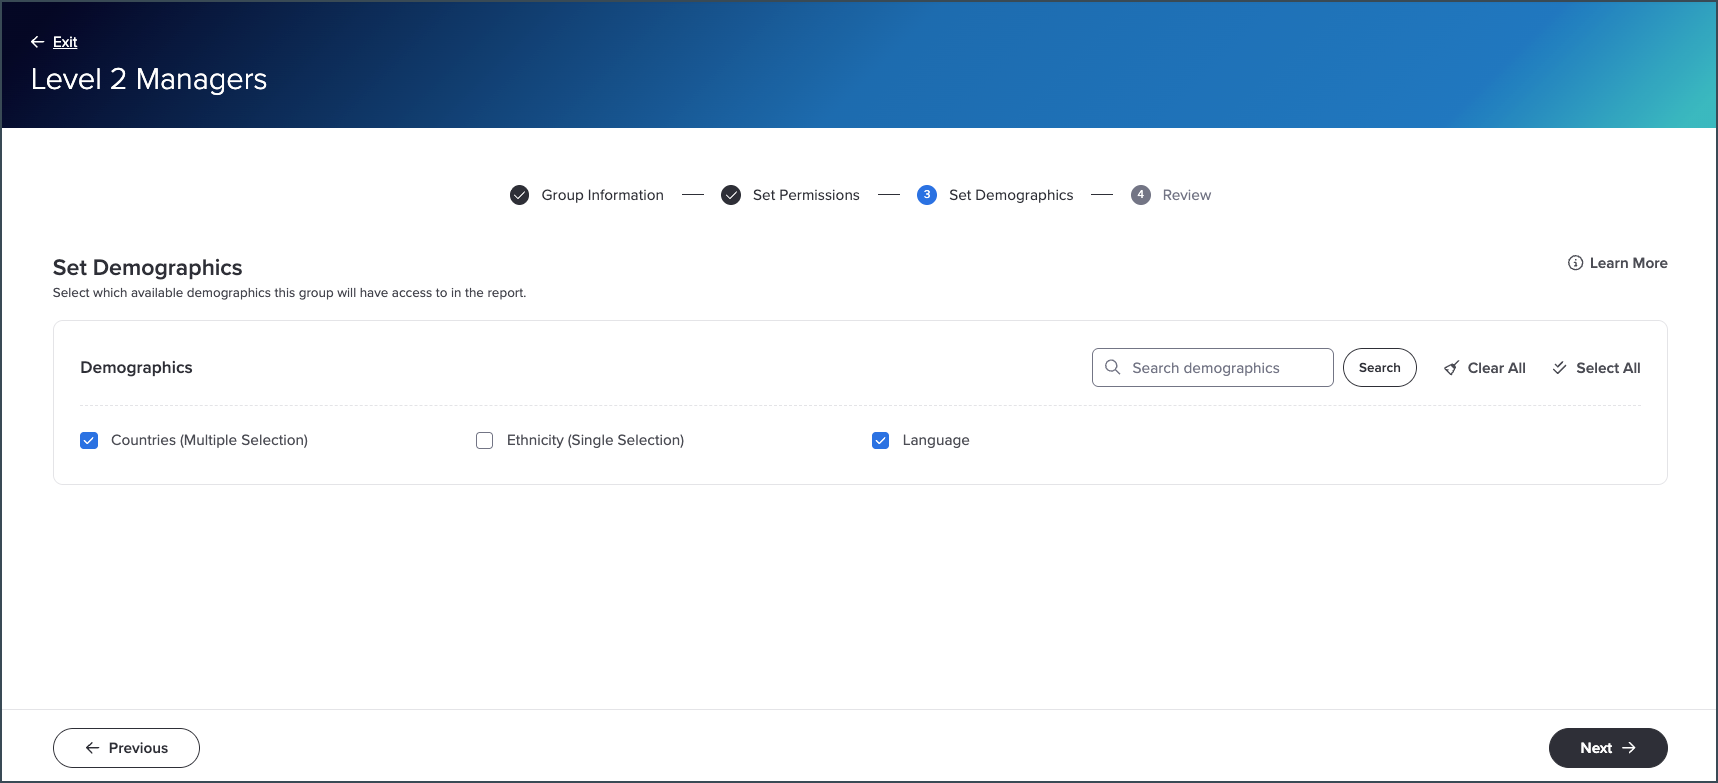
Tip: If there is a large number of demographics, you can click Select All to select all checkboxes and then deselect individual items as needed. You can also search for individual demographics.

Step 4: Review
The setup workflow displays a summary of your reporting group configuration. Review your selections carefully before continuing.
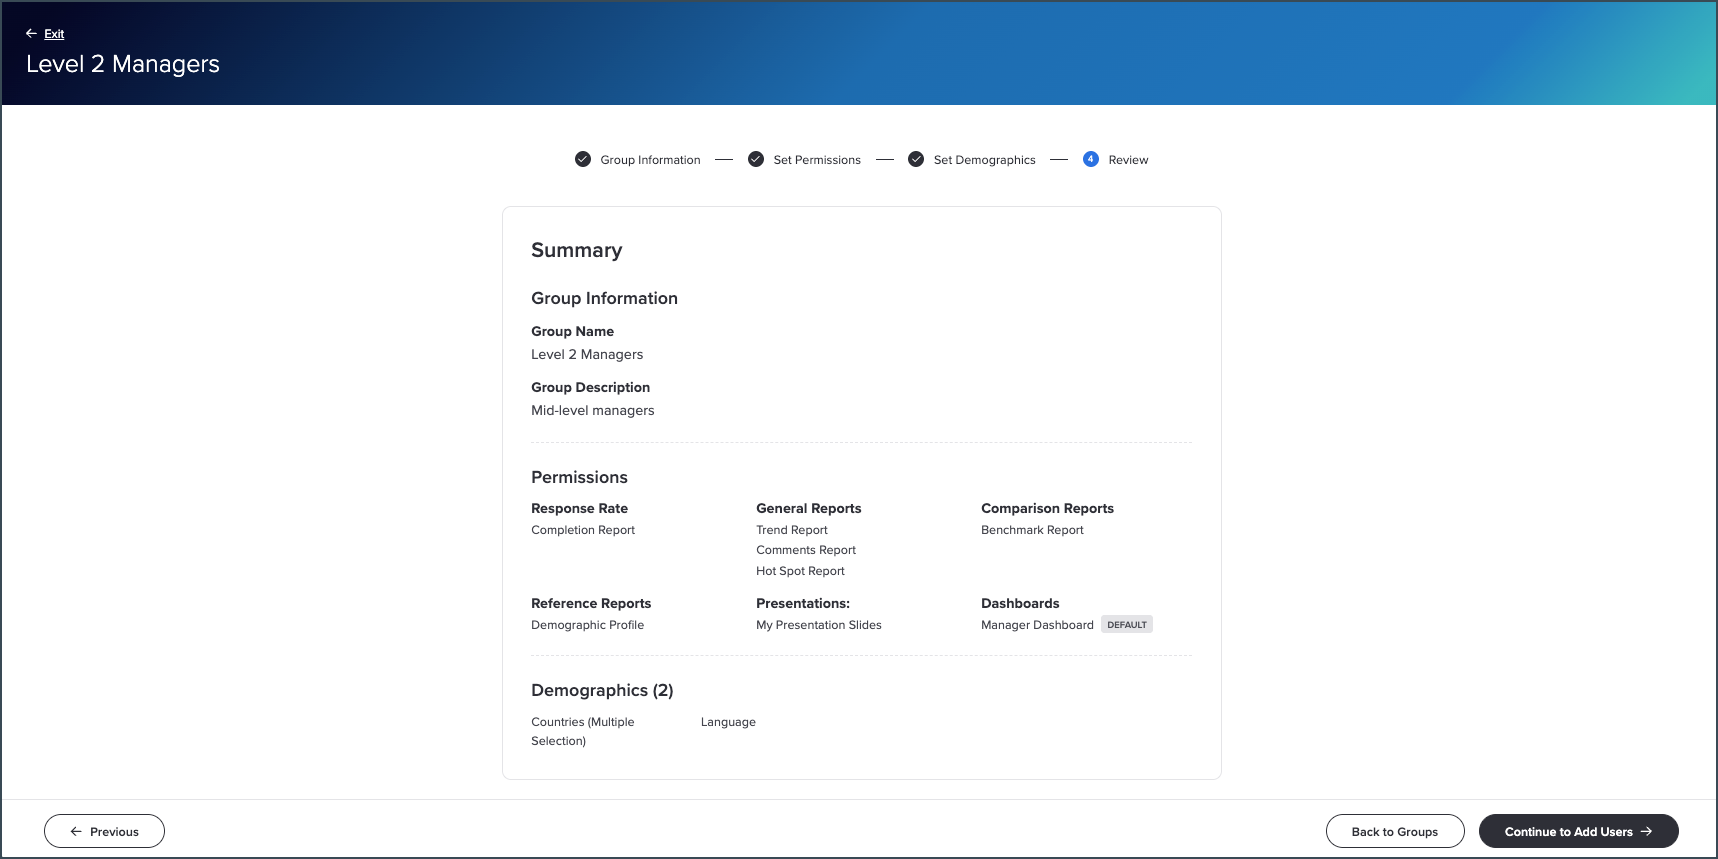
Review the summary.
To make changes, click Previous to return to the appropriate workflow step, make your changes, then navigate forward and review the updated summary.
When satisfied, click Continue to Add Users to complete the setup workflow.
Clicking Continue to Add Users takes you directly to the user assignment screen. See Add Users to a Reporting Group to complete the setup.
Note: If you stop the setup workflow before completing all four steps, the group is saved in Draft mode. To complete setup later, find the group in the Permissions tab and click Complete Setup.

What’s Next
Was this article helpful?
That’s Great!
Thank you for your feedback
Sorry! We couldn't be helpful
Thank you for your feedback
Feedback sent
We appreciate your effort and will try to fix the article