If you just completed the reporting group setup workflow, you landed on the Add Users screen after selecting Continue to Add Users in Step 4 of the workflow.
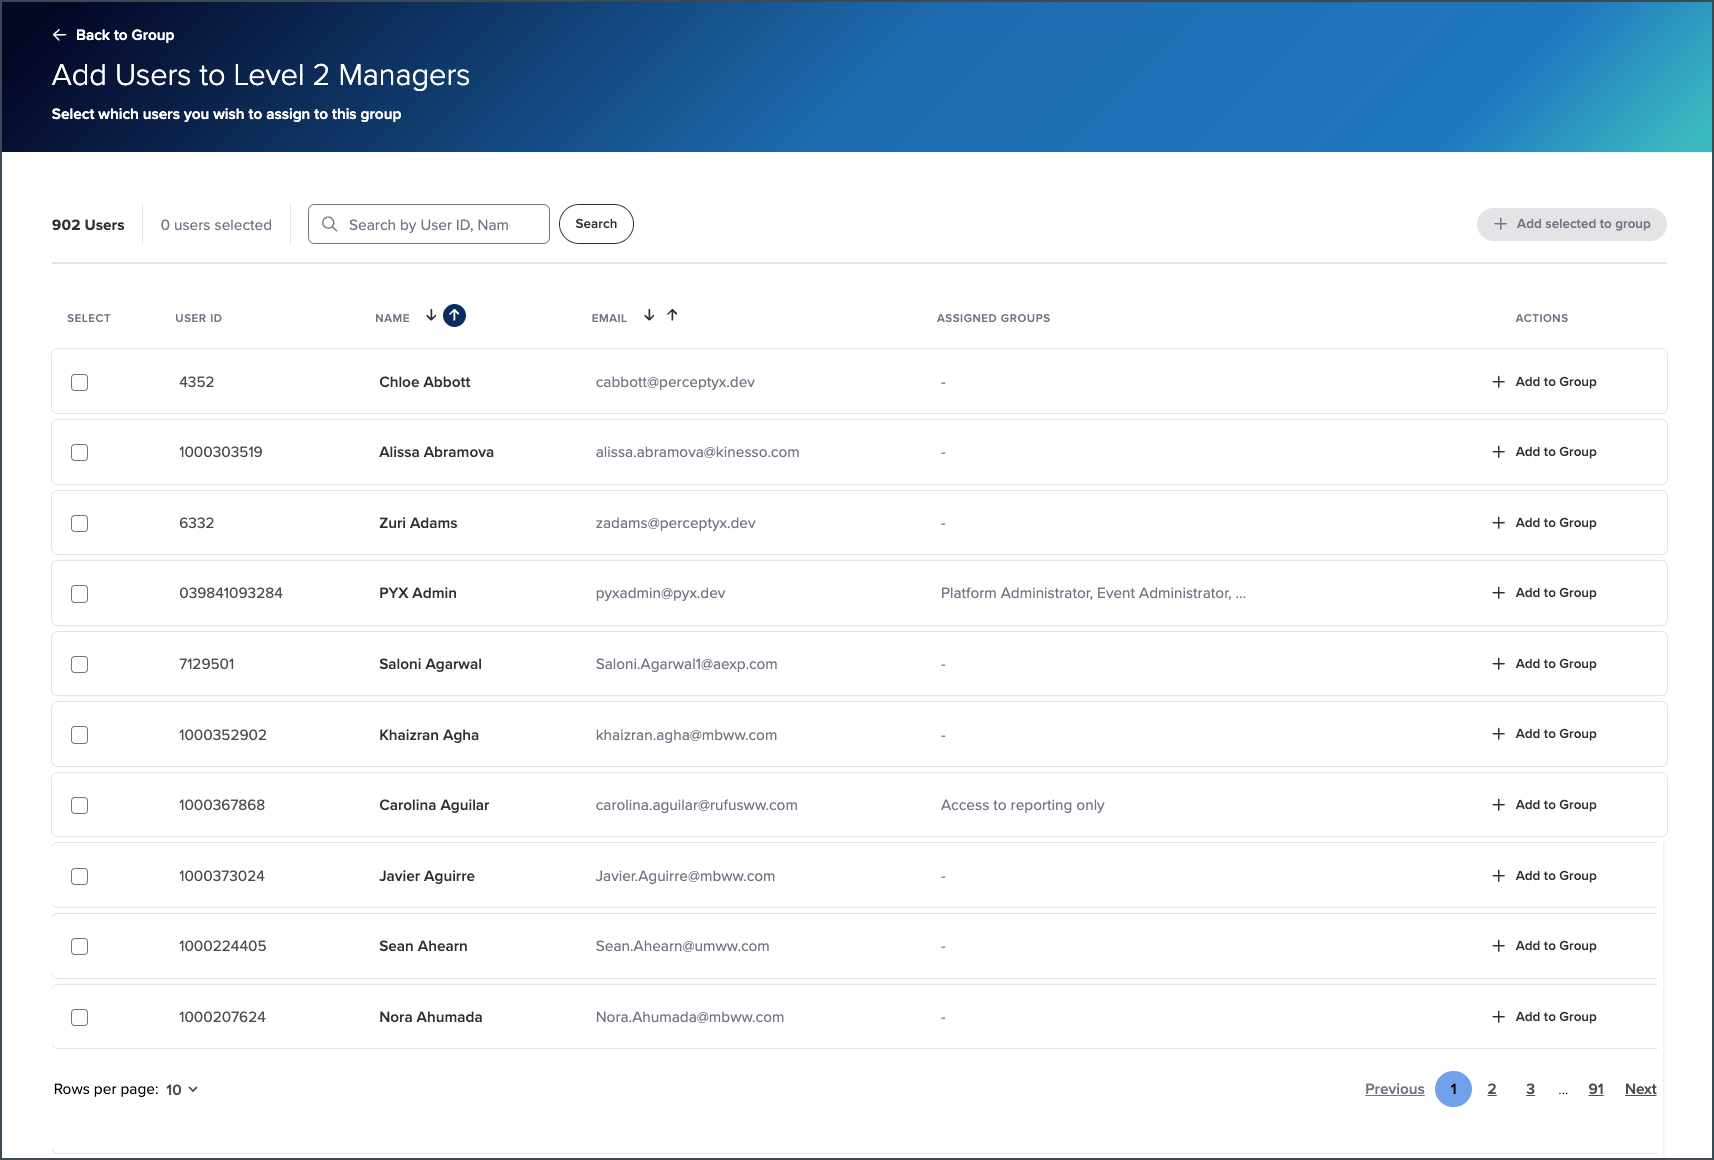
If you are adding users to an existing group, access the Report Editor, display the Permissions tab, find the group, and click Manage Group. The Assigned Users tab displays by default. Click + Add Users to Group to get started.
After adding users, you need to activate them before they can access reports. See Activate Reporting Group Access.
Note: Users do not need to have participated in the event to receive reporting access. User assignment is based on the latest platform data feed, not the event snapshot.

Population Access Options
When adding users, you configure population access for each user. Population access determines which response data the user can view within reports. Available options may include:
Overall access: The user can view all response data in the event.
Demographic-based access: The user can view response data for specific demographic groups.
Hierarchy-based access (COMING SOON): The user can view response data for specific positions in the manager hierarchy.
Note: When adding users to the Administrator group, they will receive Overall access automatically

Add an Individual User
Find the user you want to add. You can search by user ID, name, or email address.
Click + Add to Group.
The Population Access dialog box appears.
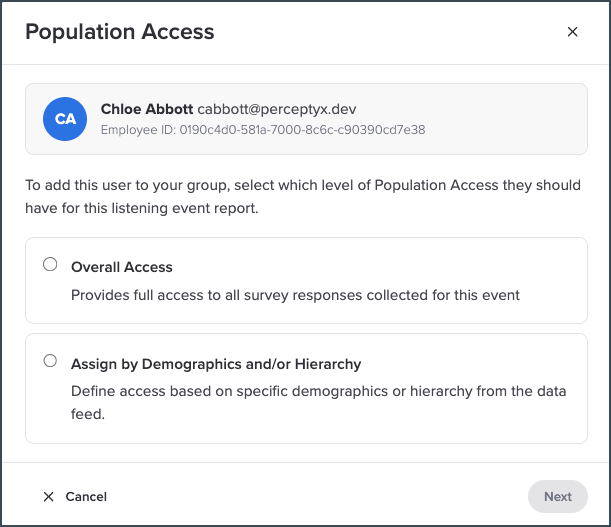
Configure population access for the user:
To assign overall access:
Select Overall Access.
Click Next.
To assign demographic-based access:
Select Assign by Demographics and/or Hierarchy, then click Next.
In the Select a Field section, select a demographic category to display its options.
Select the checkbox for each option to assign.
Select additional categories and options as needed.
Click Next.
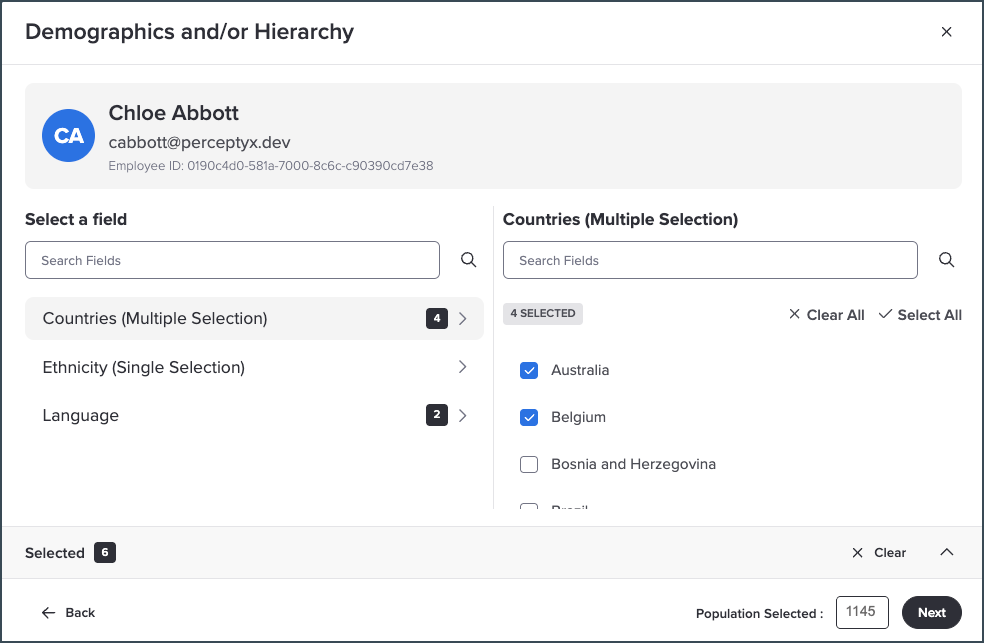
Note: The bottom of the dialog box indicates whether your selection(s) meets the minimum required threshold.

Add Multiple Users
You can add multiple users at once and choose between assigning individual population access per user or shared population access for all selected users.
Select the checkbox for each user you want to add.
Click + Add Selected to Group (top right).
The Population Access dialog box appears.
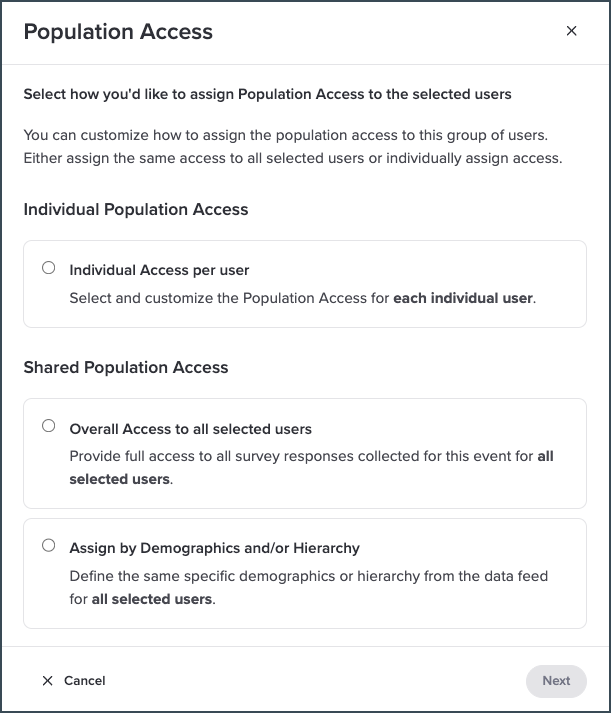
Configure population access:
To assign individual access per user:
Select Individual Access Per User, then click Next.
Configure population access for the first user.
Click Next to move to the next user.
The dialog box indicates which user you are currently configuring.
Repeat until all selected users are assigned population access.
Note: Users do not need to have the same type of population access.
To assign shared population access:
Select Overall Access to All Selected Users or Assign by Demographics and/or Hierarchy.
Click Next.
Configure the shared population access settings.
Click Next.
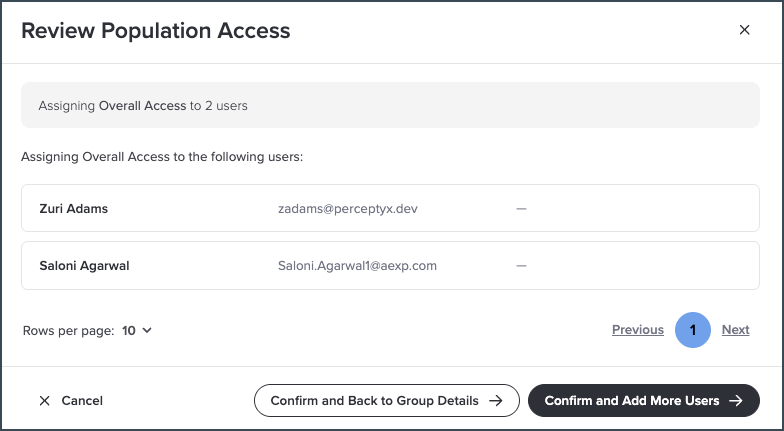
The Review Population Access dialog box appears.
Overall Access
Demographic Access
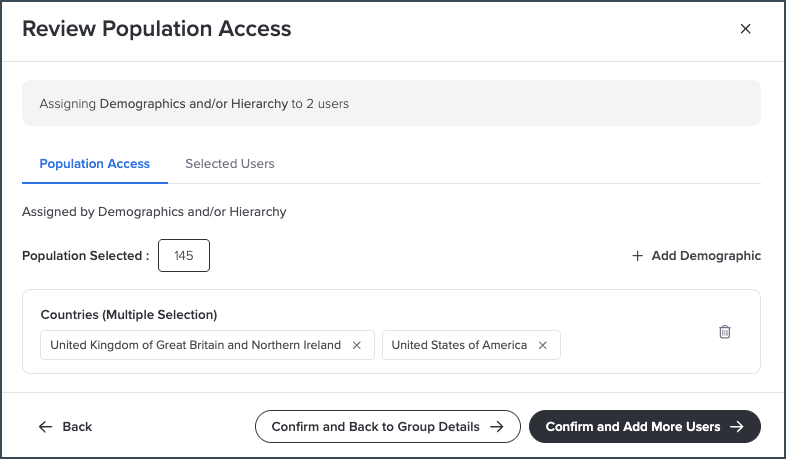
Tip: If assigning access by demographics, you can click the Selected Users tab in the dialog box to view the users who will be given access. You can also click + Add Demographic in the dialog box if you want to add other demographics.
If you want to add other users to the group, click Confirm and Add More Users.
When you have finished adding users, click Confirm and Back to Group Details to view your group with the added users.
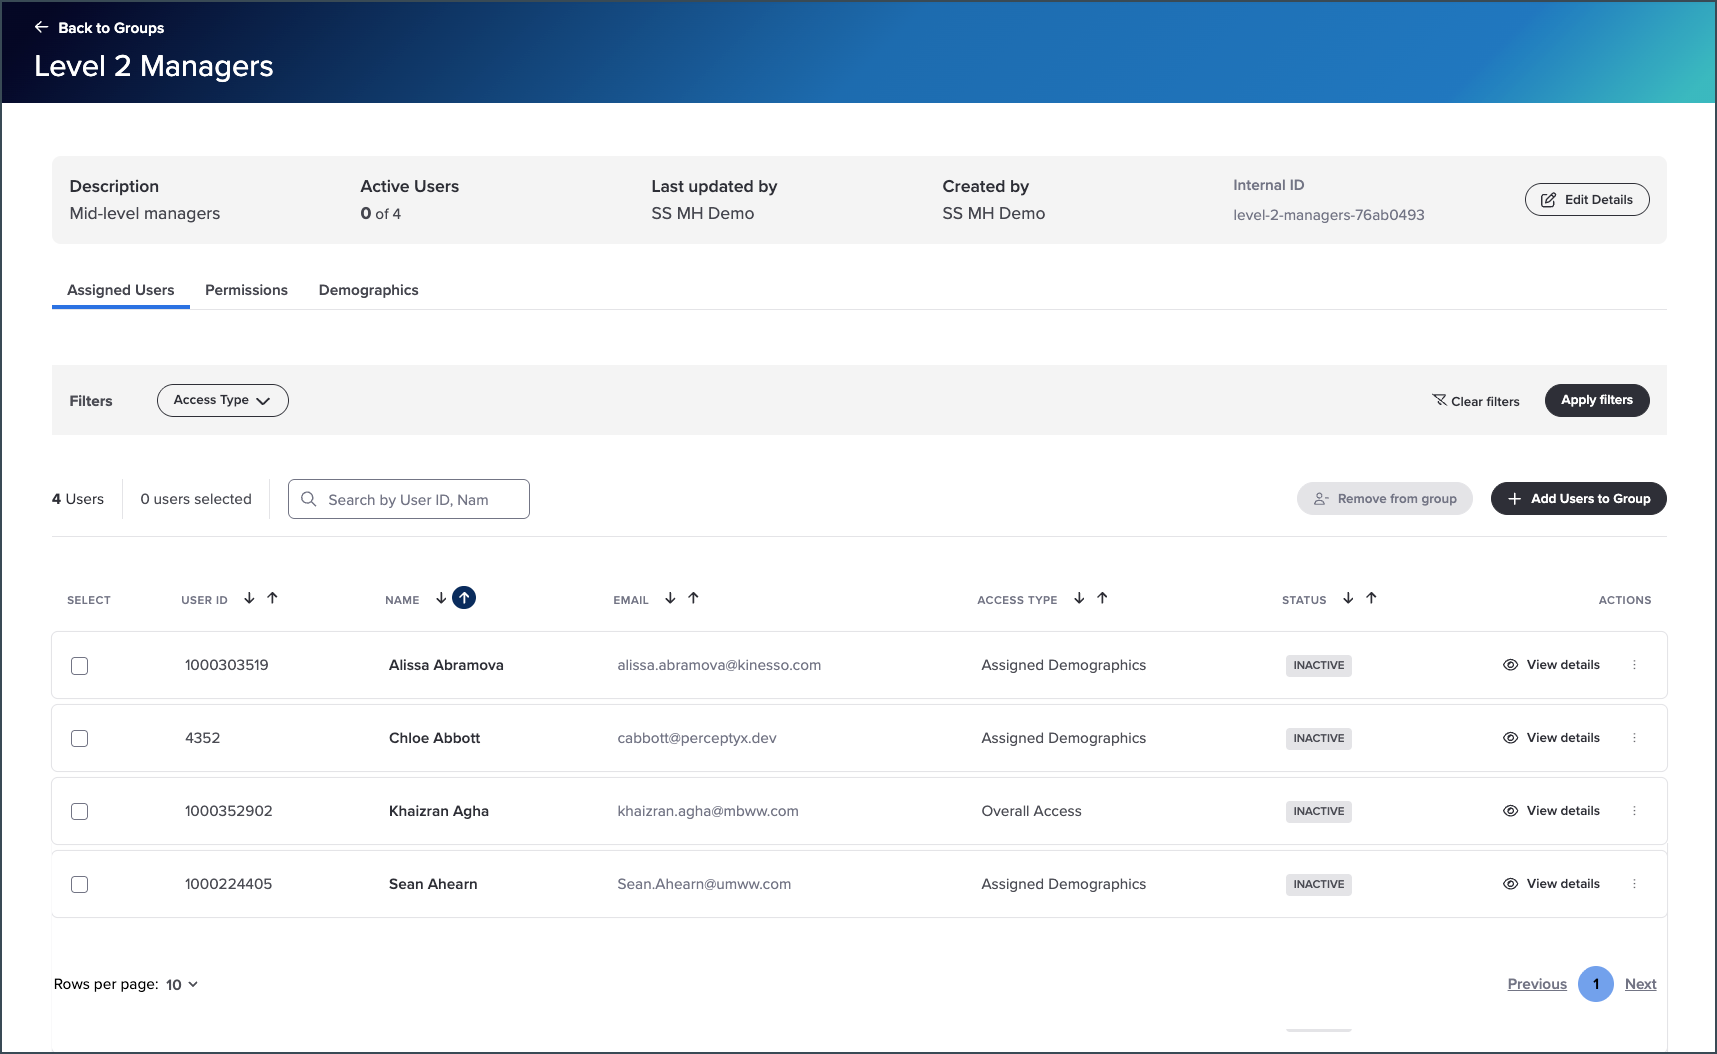
You can display the Permissions and Demographics tabs to view or edit the specified options.

What’s Next
Was this article helpful?
That’s Great!
Thank you for your feedback
Sorry! We couldn't be helpful
Thank you for your feedback
Feedback sent
We appreciate your effort and will try to fix the article