After creating a reporting group and adding users, you can return at any time to make changes. You can add or remove users, modify permissions, and update demographic settings. You can also edit group details (name and description).

Access the Group Management Screen
Access the Report Editor, then click the Permissions tab.
Find the group you want to manage. Use the search feature at the top of the tab if needed.
Click Manage Group to display the group management screen.
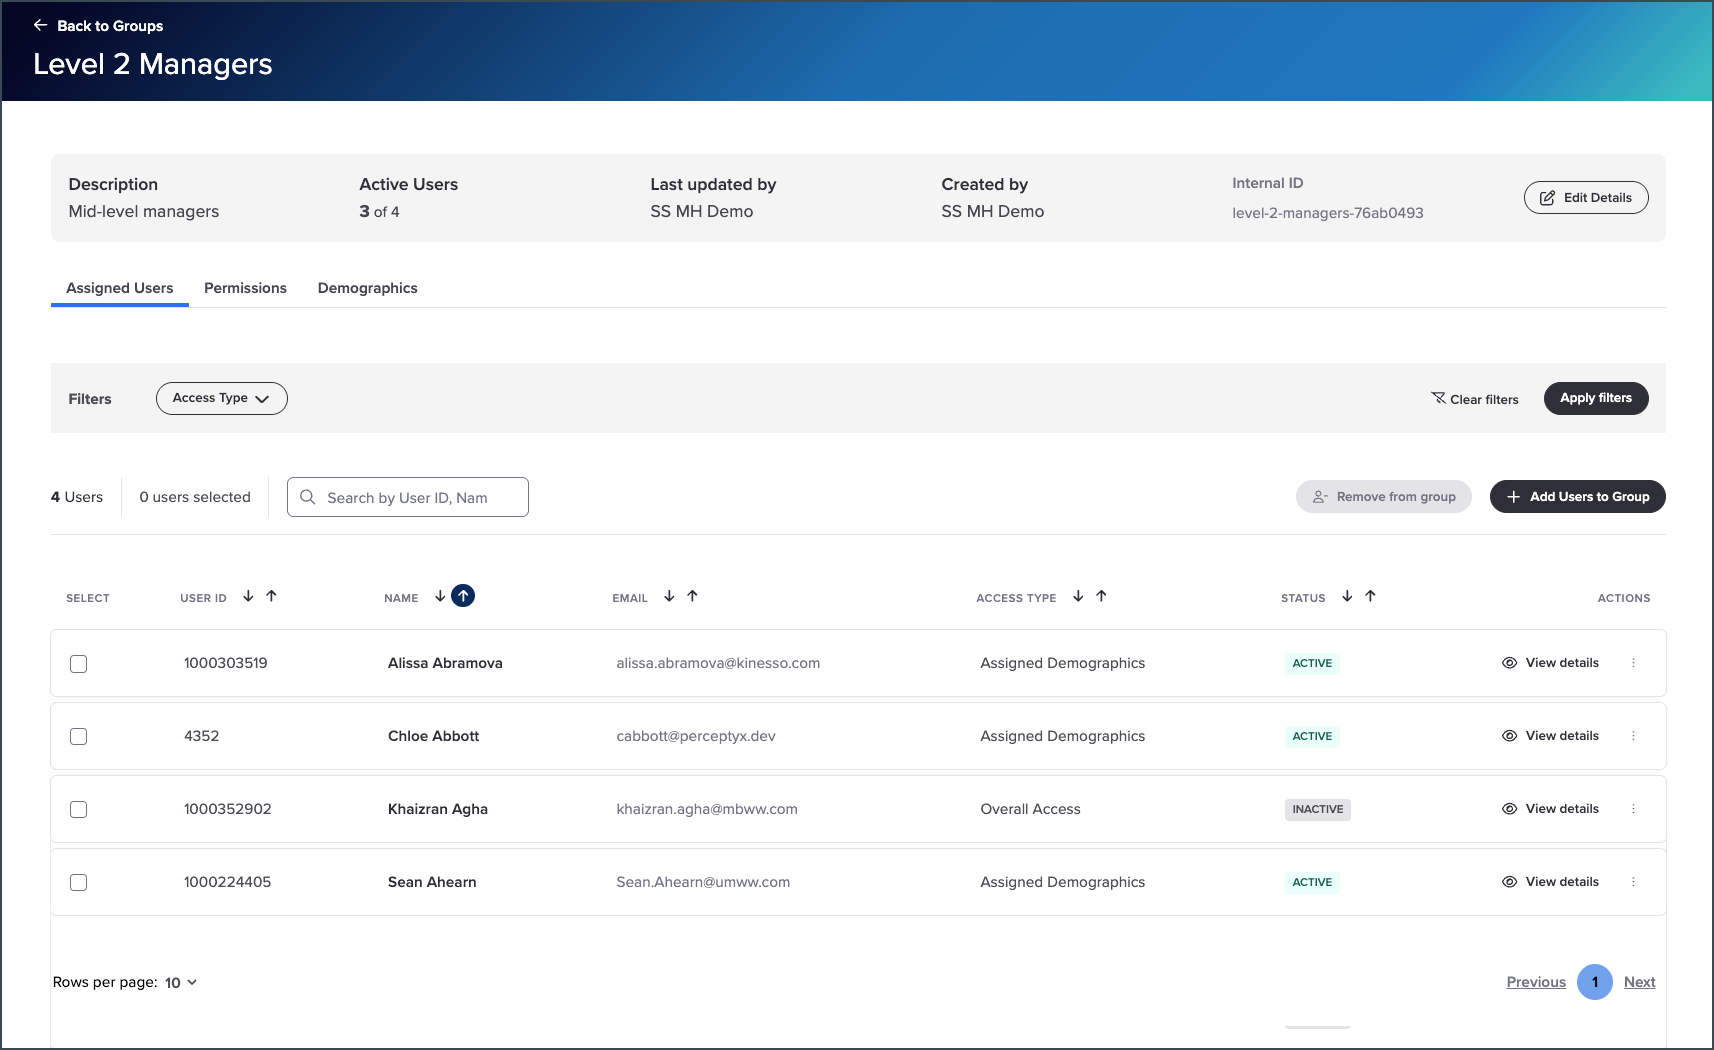
The screen has three tabs:
Assigned Users: View user details, add or remove users, and activate or deactivate users in the group.
Permissions: Edit reporting permissions for the entire group.
Demographics: Edit demographic settings for the entire group.

Manage Assigned Users
The Assigned Users tab lists all users currently assigned to the group. You can filter the list by access type (overall access or assigned demographics) or use the search feature to narrow down the list.
View User Details
Find the user for which you want to view user details.
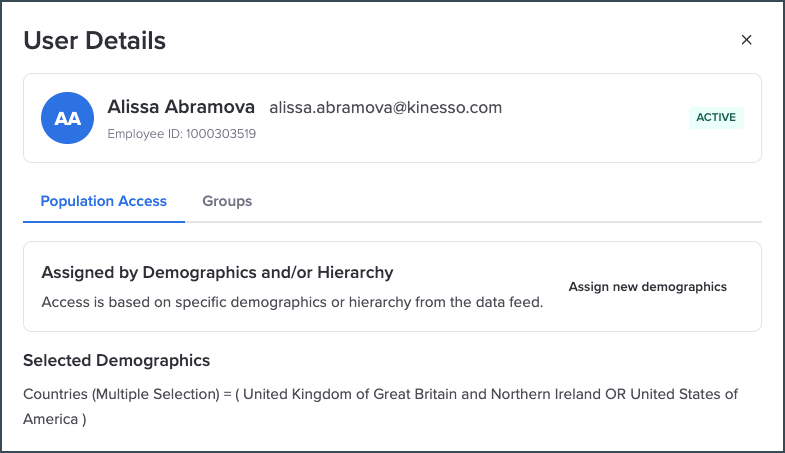
Click View Details to open the User Details dialog box.
Click the Population Access tab to view the user's access type and selected demographics, or the Groups tab to see any other reporting groups the user belongs to.
Activate or Deactivate a User
Find the user you want to activate or deactivate.
Click the three dots icon under Actions, then select Activate or Deactivate.
Add Users
Click + Add Users to Group (top right) to display the Add Users screen.
To add an individual user, find the user, click + Add to Group, then configure population access in the dialog box that appears.
To add multiple users, select the checkbox for each user, click + Add Selected to Group, then configure population access in the dialog box that appears.
Review your selections in the Review Population Access dialog box.
Select Confirm and Back to Group Details or Confirm and Add More Users, as appropriate.
For detailed instructions on configuring population access, see Add Users to a Reporting Group.
Remove Users
To remove an individual user:
Find the user you want to remove from the group.
Click the three dots icon, then select Remove from Group.
In the confirmation dialog box, click Remove User.
To remove multiple users:
Select the checkbox for each user you want to remove.
Click Remove from Group (top right).
In the confirmation dialog box, click Remove Users.

Edit Group Permissions
Use the Permissions tab to edit reporting permissions for all users in the group.
Click the Permissions tab to display the current group permissions.
Click Edit (top right) to open the permissions for editing.
Make your changes, then click Save Changes.

Edit Group Demographics
Use the Demographics tab to edit the demographic options that are available for all users in the group.
Click the Demographics tab to display the demographics currently available for the group.
Click Edit (top right) to open the demographics for editing.
Make your changes, then click Save Changes.

Edit Group Details
You can update the group name/description at any time.
Click Edit Details at the top right of the management screen to display the Edit Details dialog box.
Make your changes, then click Save Changes.
Was this article helpful?
That’s Great!
Thank you for your feedback
Sorry! We couldn't be helpful
Thank you for your feedback
Feedback sent
We appreciate your effort and will try to fix the article