After completing the Invite phase (choosing the invitation delivery method and adding participants), you can move to the Communications phase, where you create and test your event invitation and reminder emails. If your listening event won’t use email communications (e.g., you will use a QR code or an anonymous link you distribute yourself), you can skip this phase.
This article walks through:

Create an Email Communication
Email templates offer a fast and convenient way to create invitation and reminder messages. The Event Builder includes two default templates: Invitation and Reminder. You can use these templates as-is, customize them for a specific email, or use them as the basis for creating your own reusable templates. Simply select a template, edit and format the content as needed, and save your email. You’ll schedule it for delivery during the Launch phase. After saving, you also have the option to send a test email.
Note: The Distribute Yourself Create PIN Page Link and Distribute Yourself Create Anonymous Link delivery methods (selected in the Invite phase) do not support email templates.
Navigate to the Communications phase for your event.
From within the Event Builder:
Click Communications in the left panel.
From Listen:
In the Live Events section or the All Events section, click Manage Event for the event you want to work with.
The Event Builder opens, displaying the Overview page.
In the left panel, click Communications.
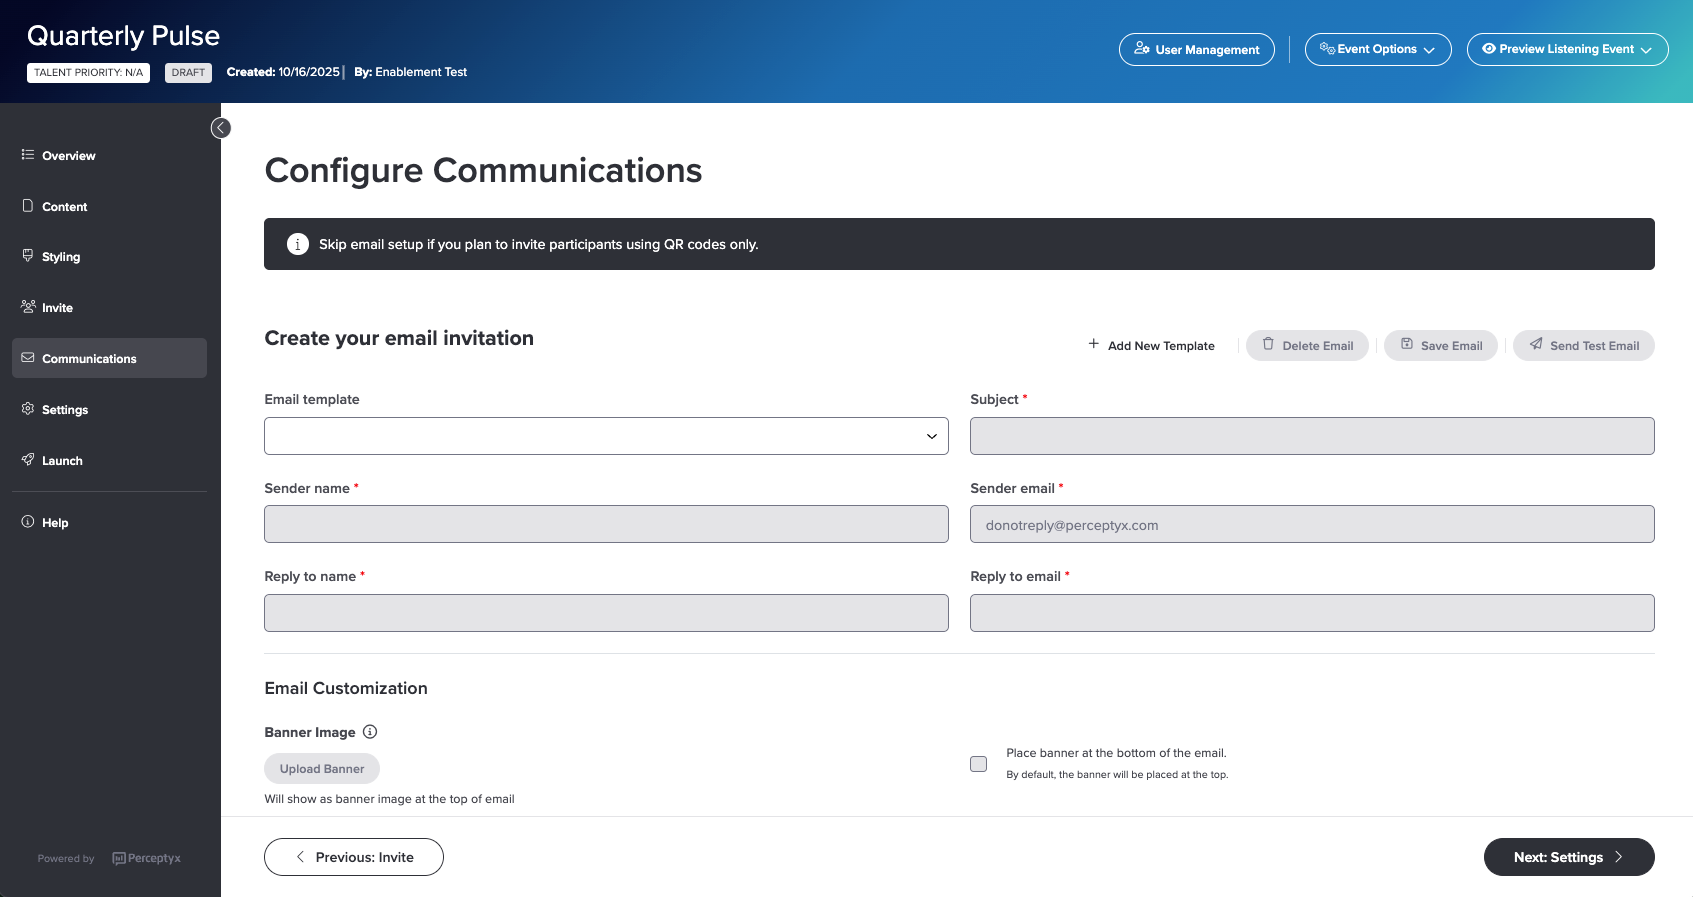
Click + Add New Template.
The Add New Template dialog box appears with the default Invitation and Reminder templates available for selection.
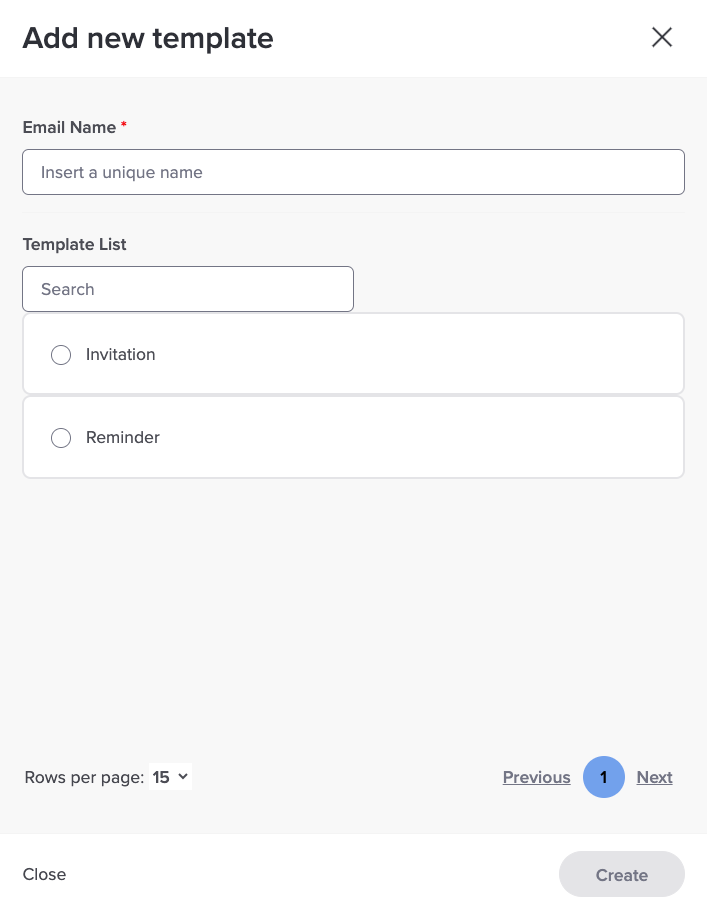
Click the Email Name box and type a unique name for the email.
Optionally select one of the default templates to edit.
Click Create.
The new template is created. If you selected one of the default templates, some content is pre-populated.
Populate/edit all required (*) fields.
Note: The Sender Name field is not pre-populated. The Sender Name is typically the person or group championing the event (e.g., the CEO, the HR team, etc.).
In the Email Content section of the screen, click the Placeholder dropdown to add in pre-populated fields if needed, including first and last name, email, survey URL, and language selections.
Note: If you use a default template, the placeholders may already be added to the email body. They are denoted by brackets (e.g., [First Name]). Your data file is the source for available placeholders.
Note: If your company has set up SSO for your listening events, choose the SSO Survey URL placeholder option. Your company must set up an automated data feed from your HRIS system to Perceptyx in order to use the SSO Survey URL functionality.
Before using the SSO Survey URL, verify that all employees have access to take the survey using an SSO link. Workers in the field, or in distribution or manufacturing centers often do not have this capability. In these cases, consider using a unique link or PIN page.
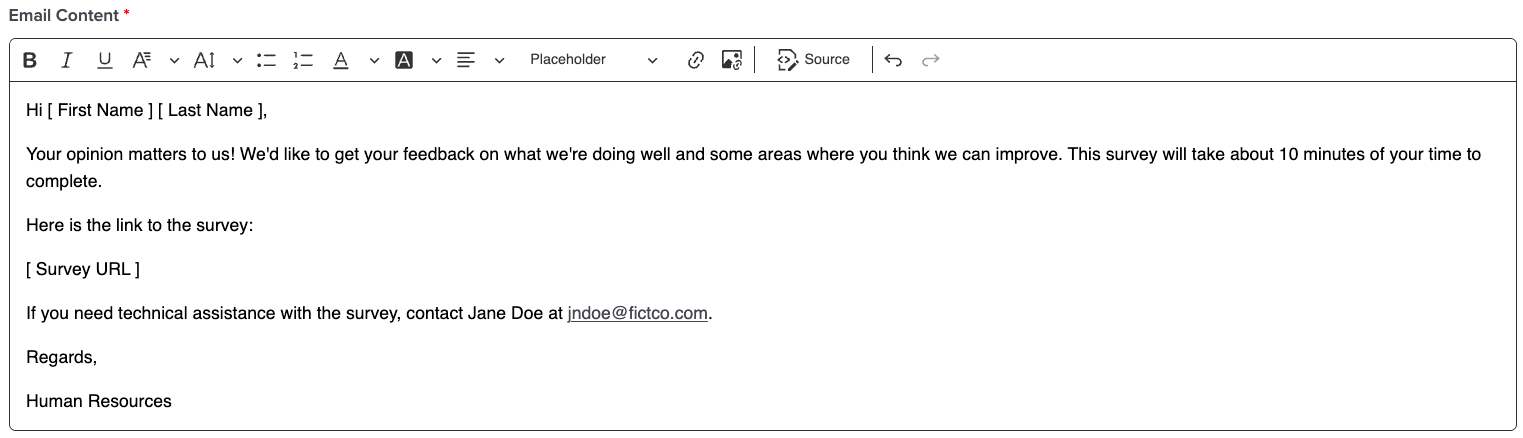
Scroll to the top of the screen, then click Save Email.
If Your Event Uses Multiple Languages
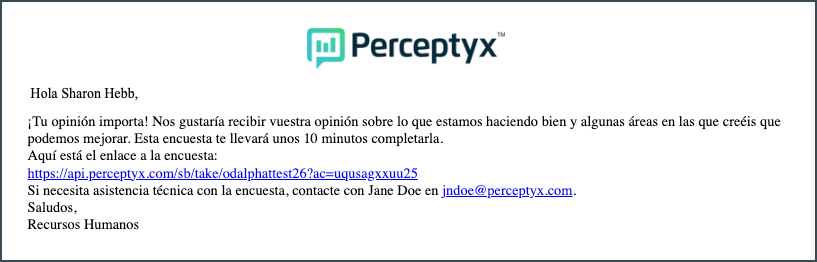
By default, recipients receive emails in English. Email language is not automatically determined by demographic values in your data file. If you want recipients to choose their preferred language, include the Language Selections placeholder in the email. This adds language-selection links that recipients can use to view the email in a different language.
For example:
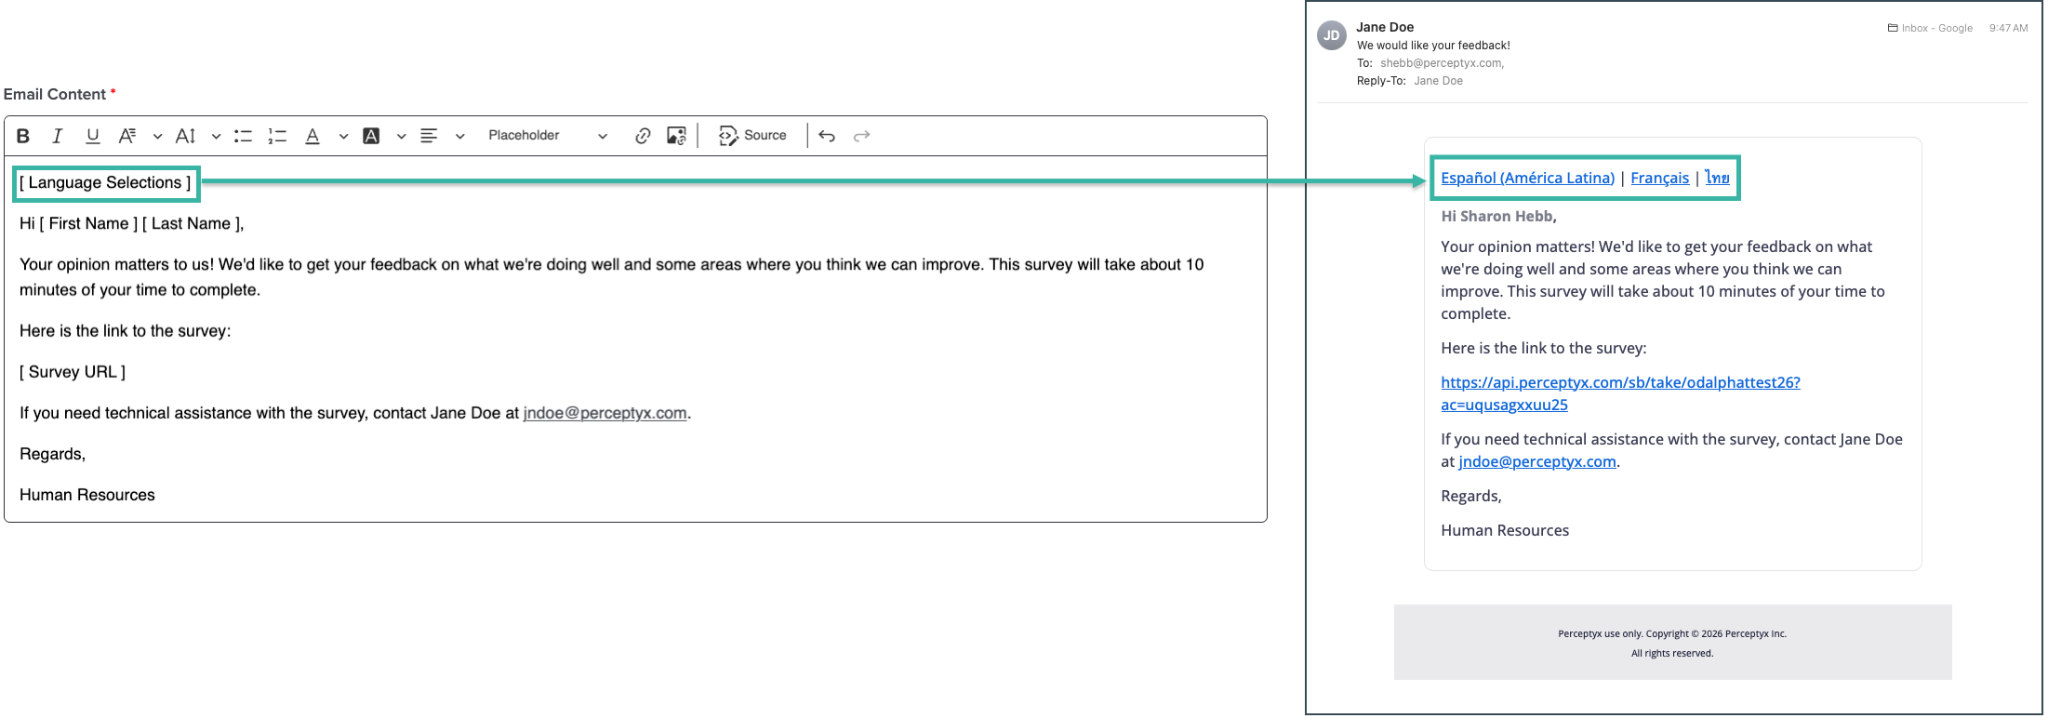
The placeholder creates links only for the languages you specify in the Overview phase. Clicking a language link displays the notification in the associated language:
Important: You will still need to translate your emails when you reach the Launch phase for your event. For details, see the Translate Your Event | Point-In-Time & Lifecycle article.

Customize Your Email Communication
Customization options for your email include adding a banner image, setting a background color, formatting text, and inserting images into the email body.
Add a Banner
You can add a banner image that appears at the top or bottom of your email.
File requirements:
JPEG or PNG format
Maximum size: 200 KB
Recommended dimensions: 600 px wide x 150 px high
In the Email Customization section of the screen, click Choose File under Banner Image.
Navigate to and double-click the image you want to use.
The image uploads and appears in the Banner Image preview area.
Note: If your image does not meet the file requirements, an error message will appear.
To display the banner at the bottom of the email instead of the top, select the Place Banner at the Bottom of the Email checkbox.
Click Save Email.
Note: To remove a banner image, click Remove in the Banner Image preview area.
Specify a Background Color
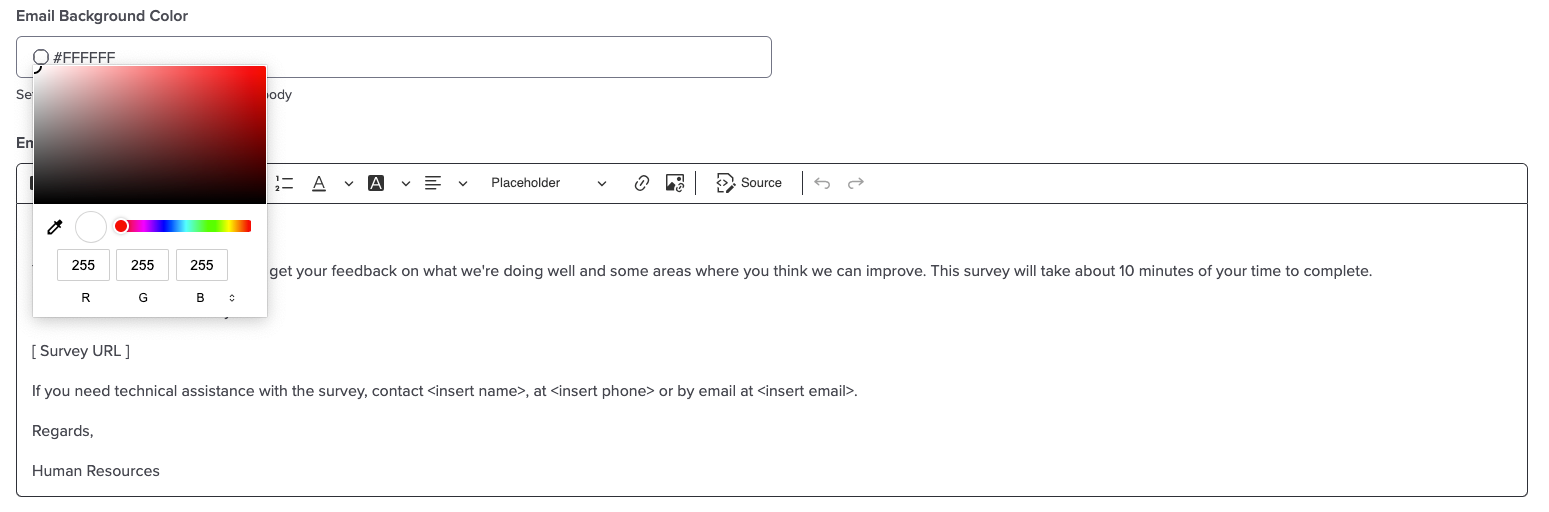
You can specify a custom color for the email background. By default, the HEX code for the current background color displays in the Email Background Color box.
Click the Email Background Color box and type or paste a HEX code, or click the color circle to open the color picker and choose a color visually. The color picker also accepts RGB and HSL values.
Click Save Email.
Format Email Content
The Email Content section includes a formatting toolbar for enhancing your email. It supports standard options such as bold, italic, underline, font family, size, color, highlight, and alignment, as well as a hyperlink option.

Two additional options are particularly useful:
Insert Image: Inserts an image anywhere in the email body (see Insert an Image into the Email Body below)
Source: Lets you view and edit the raw HTML for the email content; useful for applying custom colors or other formatting not available in the toolbar
To modify HTML directly:
Click Source in the toolbar.
The HTML code for the email appears.
Make your changes.
Click Source again to return to the standard text view.
Click Save Email.
Insert an Image into the Email Body
You can insert images anywhere in the body of your email. There are two ways to do this:
Embed the image directly in the email using a CID (inline attachment), or
Link to an image hosted on an external website using a URL
CID is recommended, as embedded images tend to display more reliably across email clients.
To insert an image using CID:
The CID method requires two steps: first upload the image as an inline attachment, then reference it in the email body.
After saving your email, the Inline Attachments section appears above the Email Content section.
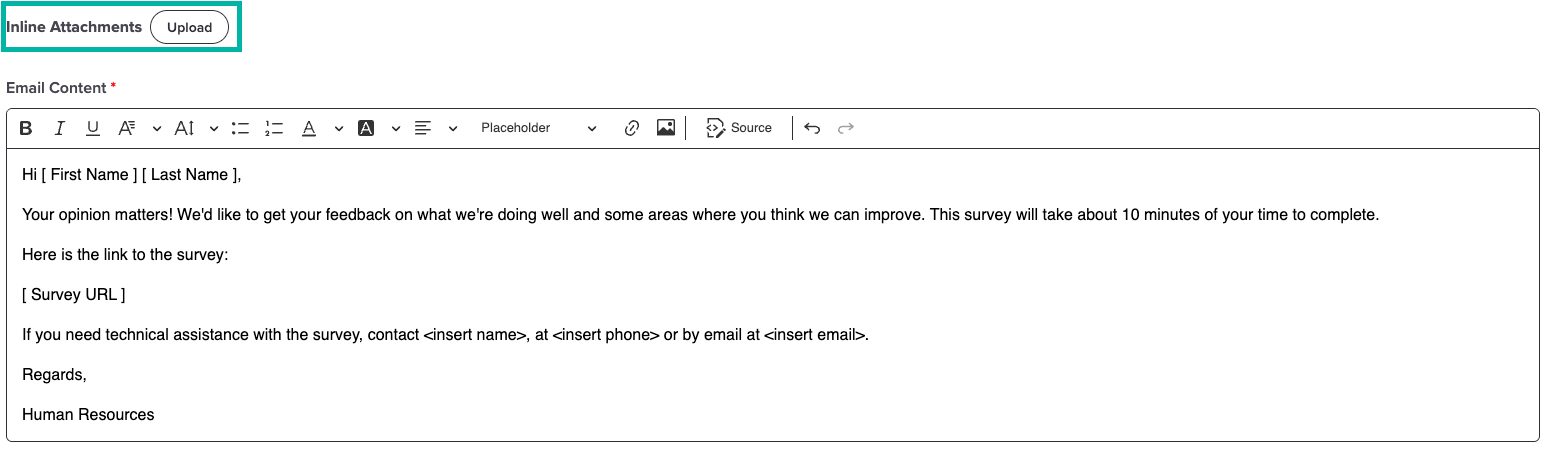
Click Upload next to Inline Attachments.
The Add Inline Image Attachment dialog box appears.
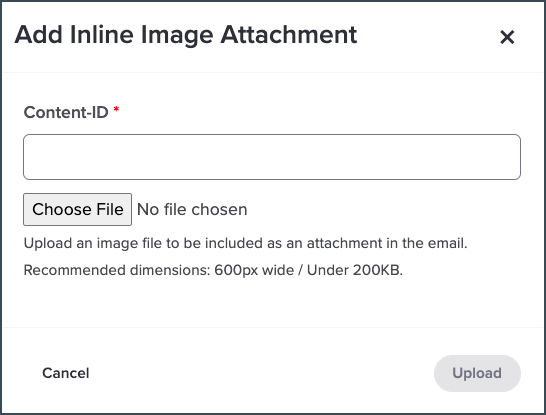
In the Content-ID field, type a name for the image (for example, logo).
Click Choose File, then navigate to and double-click your image file.
Note: Recommended dimensions: 600 px wide, under 200 KB.
Click Upload.
Next, insert the image into the email body:
In the Email Content section, click where you want to insert the image.
Click the Insert Image icon in the toolbar.
The Image Info dialog box appears.
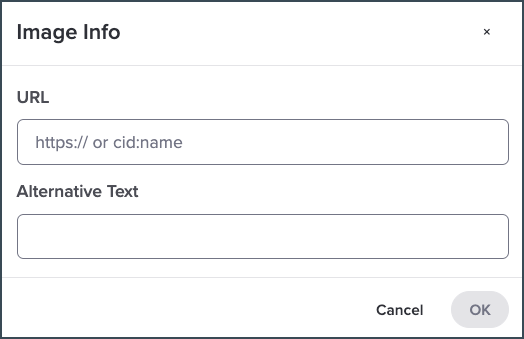
In the URL field, type cid: followed by the Content-ID you entered above (for example, cid:logo).
Optionally, type a description in the Alternative Text field.
Click OK.
Scroll to the top of the screen, then click Save Email.
To insert an image using a URL:
In the Email Content section, click where you want to insert the image.
Click the Insert Image icon in the toolbar.
The Image Info dialog appears.
In the URL field, type or paste the full URL of the image.
Optionally, type a description in the Alternative Text field.
Click OK.
Scroll to the top of the screen, then click Save Email.

Test Your Email Communication
After you create and customize an email communication, you can send a test email to see what it will look like for recipients. If needed, you can continue to modify and test the email.
Make sure you have saved your customizations.
Click Send Test Email.
A test email is sent to the email address associated with your login credentials.
Note: The Placeholder fields do not populate in the test email.
Was this article helpful?
That’s Great!
Thank you for your feedback
Sorry! We couldn't be helpful
Thank you for your feedback
Feedback sent
We appreciate your effort and will try to fix the article