Listen
Your invitation email is usually the first thing people hear about your event. The Communications phase is where you write your invitation and reminder emails, make them look like they came from your organization, and send yourself a test before anyone else sees them.
This article covers Point-In-Time and Lifecycle events. Communications comes right after the Invite phase, where you picked how people get their invitation and who is getting it. Here you build the emails themselves. You will not pick send dates here: scheduling your emails and translating them both happen later, in the Launch phase.
Note
Communications opens up once you finish the Invite phase, as long as you picked one of the two Email Distribution options there. It does not appear if you picked Distribute Yourself, which gives you a link to share on your own, or if your event uses a PIN page. In either case the Event Builder goes straight from Invite to Settings once you finish setting up Invite.
This article walks through
Create an Email Communication
You get two ready-made templates to start from: Invitation and Reminder. You can send one as it is, edit it to fit your event, or start from a blank email. Build as many emails as you need, like an invitation plus a couple of reminders.
Sending different emails to different groups?
Build one version of the email for each group, and name each one so you can tell them apart later, like Pulse invitation, United Kingdom and Pulse invitation, United States. You decide which group gets which version in the Launch phase. Send to specific groups of people shows how.
For Lifecycle events, each reminder can use its own email, so build your reminders here as separate emails rather than reusing the invitation. Send Invitations and Reminders | Lifecycle covers setting them up.
- Open the Communications phase. If you are already in the Event Builder, click Communications in the left panel. Otherwise, go to the Listen page, find your event, click Manage Event, and then click Communications.
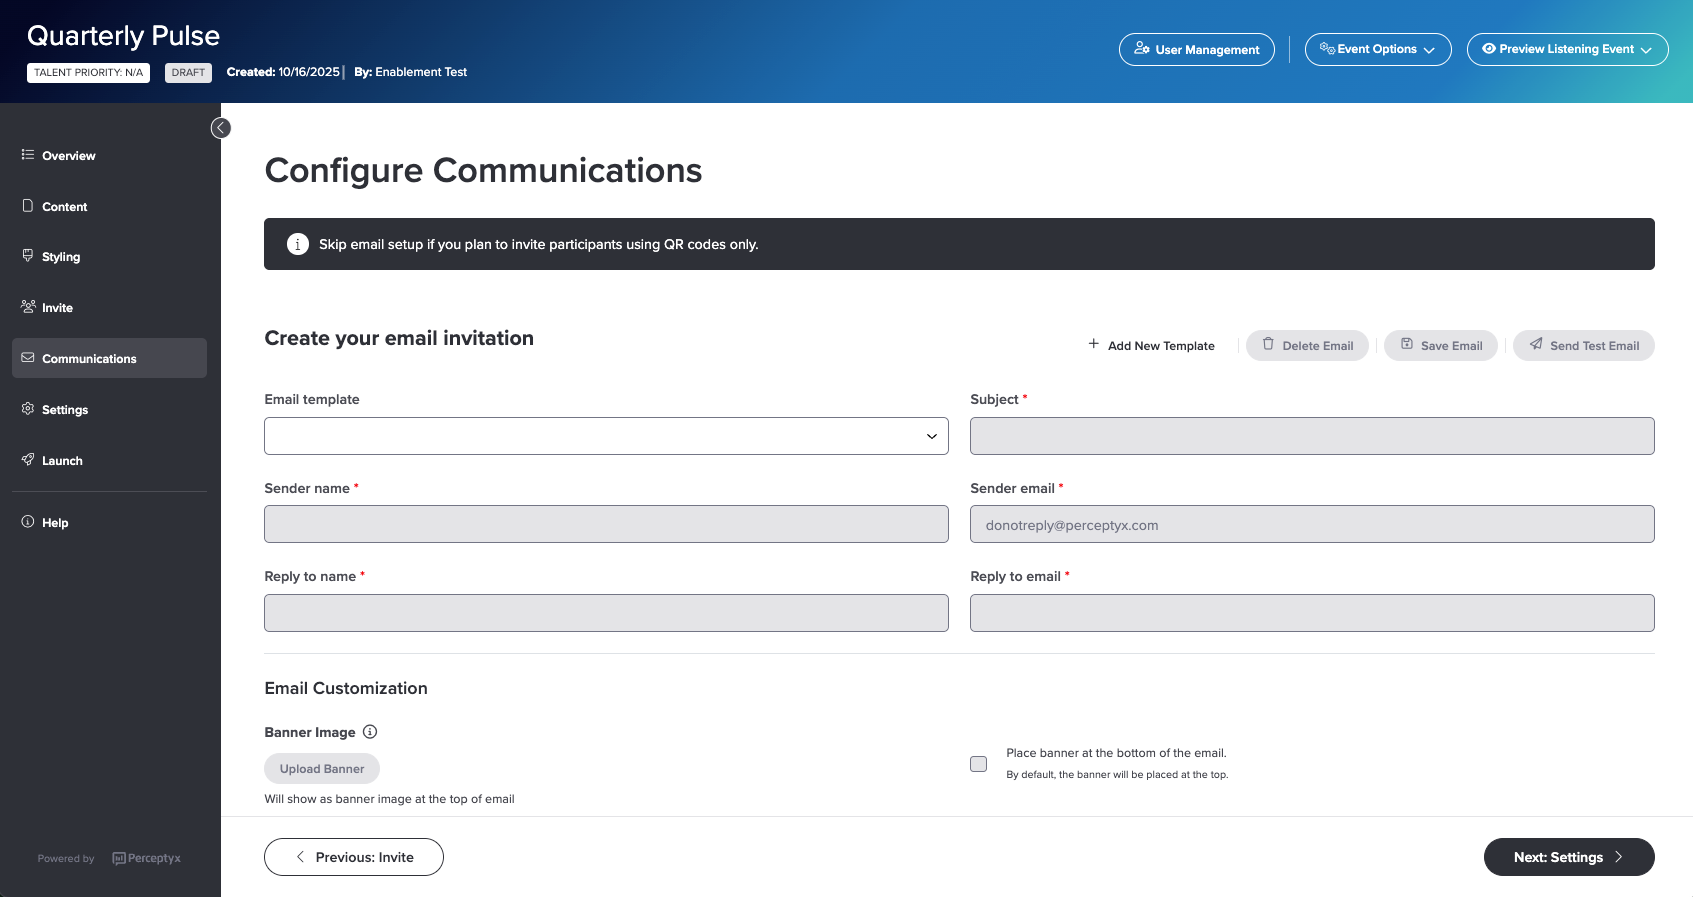
- Click + Add New Template. The Add new template dialog opens.
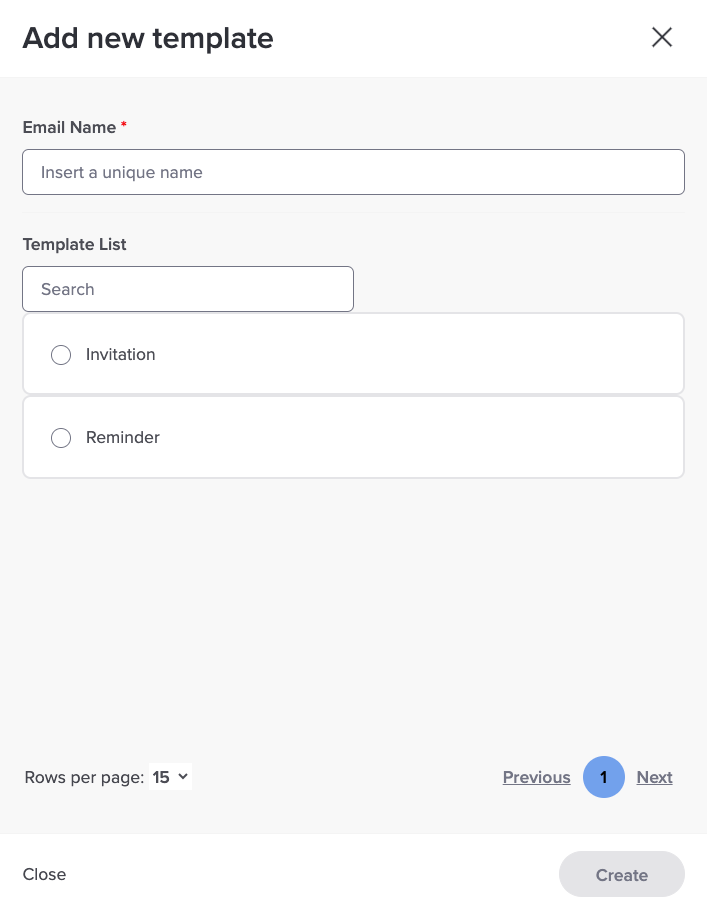
- In Email Name, type a name for this email, like Pulse invitation or First reminder. This is how you will find it later, and it is separate from the subject line participants see.
- Under Template List, pick Invitation or Reminder if you want to start with some content already written. Skip this to start from scratch.
- Click Create.
- Fill in every field with a red asterisk: Subject, Sender name, Reply to name, and Reply to email. Sender email is already filled in for you.
Note
Sender name starts out empty, even when you use a template. Use whoever is championing the event, like your chief executive or your people team, so people recognize the email when it lands.
- Write your email in the Email Content box. To add something personal, like each person's first name or the survey link, click where you want it, open the Placeholder menu, and pick an option. It shows up as a tag in brackets, like [ First Name ], and gets swapped for each person's details when the email goes out.
- Scroll back to the top and click Save Email.

Heads up
Always click Save Email before you leave the page. Clicking Next: Settings at the bottom does not save your email for you.
Pick the right placeholders
The templates already include a few placeholders. Here is what each option in the Placeholder menu does:
- First Name, Last Name, and Email fill in each person's details from your participant list.
- Survey URL adds the link to your event. If you picked Unique Links for Each Respondent in the Invite phase, everyone gets their own personal link. If you picked Anonymous Link, everyone gets the same one. Every invitation and reminder needs a survey link, so make sure it is in there.
- Language Selections adds links people can click to read the email in another language. More on that below.
If your event uses more than one language
Emails go out in English unless you do something about it. The platform does not pick a language for each person based on your participant list. To let people choose, add the Language Selections placeholder to your email. It adds a row of links, one for each language you added to your event in the Overview phase, and clicking one shows the email in that language.
Note
Adding the placeholder does not translate anything. You translate the email itself later, in the Launch phase. If a language has not been translated yet, its link shows the English version. Translate Your Event | Point-In-Time & Lifecycle walks you through it.
Customize Your Email Communication
Once your email is saved, you can give it your organization's look. You can add a banner, change the background color, format your text, and add images to the body.
Add a banner
A banner is an image that runs across the top of your email, or the bottom if you prefer. Use a PNG or JPEG file. The recommended size is 600 pixels wide and under 200 KB.
- In the Email Customization section, click Upload Banner.
- Find your image and open it. It shows up in the Banner Preview area.
- Want it at the bottom instead? Select Place banner at the bottom of the email.
- Click Save Email.
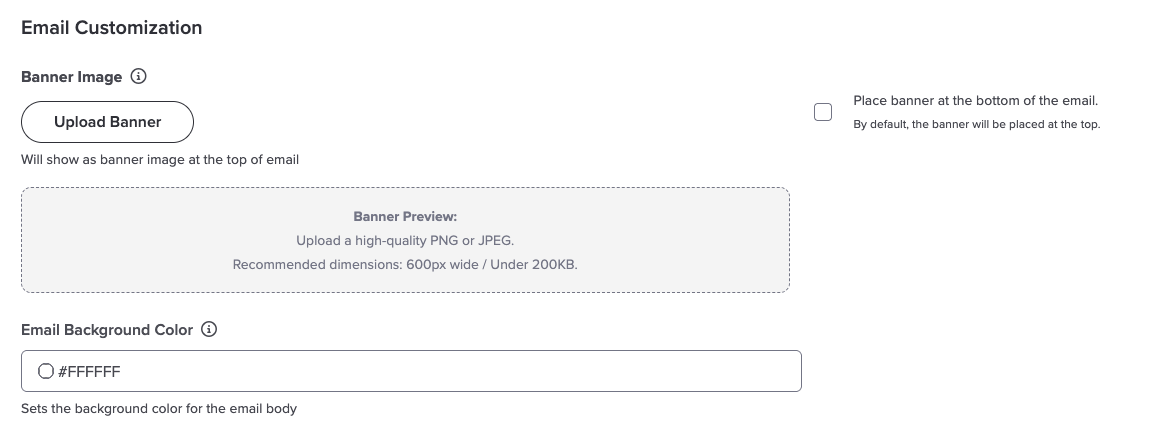
Changed your mind? Click Remove (the trash can icon) next to the banner in the preview area, then click Save Email.
Change the background color
The Email Background Color box shows the current color as a hex code, like #FFFFFF for white.
- Type or paste a new hex code into Email Background Color, or click the color circle to pick a color from the color picker.
- Click Save Email.

Format your text
The toolbar above Email Content has the usual options: bold, italic, underline, font, text size, bulleted and numbered lists, text color, highlight, alignment, links, and undo and redo.

Two buttons are worth knowing about:
- Insert Image (the picture icon) adds an image anywhere in the body of your email. See the next section.
- Source shows the code behind your email so you can edit it directly. It is handy for colors or layouts the toolbar does not offer.
To edit the code, click Source, make your changes, and click Source again to go back to the normal view. Then click Save Email.
Add an image to the body of your email
There are two ways to add an image:
- Upload it with the email (recommended). The image travels inside the email as an inline attachment, so it shows up on its own, even in older or stricter email programs.
- Link to an image that is already online. This works too, but some email programs hide linked images until the reader chooses to download them.
To upload an image with the email, you first upload it, then place it.
- Make sure you have saved your email at least once. The Inline Attachments section appears above Email Content after the first save.

- Click Upload next to Inline Attachments. The Add Inline Image Attachment dialog opens.

- In Content-ID, type a short name for the image, like logo. You will use it in a minute.
- Click Choose File and pick your image. Aim for 600 pixels wide and under 200 KB.
- Click Upload.
- In Email Content, click where you want the image to go.
- Click Insert Image in the toolbar. The Image Info dialog opens.

- In URL, type cid: followed by the Content-ID you picked, with no space. For our example, that is cid:logo.
- In Alternative Text, add a short description of the image. It helps people who use screen readers, and anyone whose email program does not show images.
- Click OK, then scroll to the top and click Save Email.
To link to an image that is already online:
- In Email Content, click where you want the image to go.
- Click Insert Image in the toolbar.
- In URL, paste the full web address of the image, starting with https://.
- Add a short description in Alternative Text.
- Click OK, then scroll to the top and click Save Email.
Test Your Email Communication
Before your email goes to anyone else, send it to yourself and see how it looks in a real inbox.
- Make sure your latest changes are saved.
- Click Send Test Email at the top of the page. The test goes to the email address you use to log in.
Note
Placeholders do not fill in on test emails, so names and survey links will not look the way they will for participants. That is expected.
Keep editing and sending tests until you are happy with it. When you are done, click Next: Settings to keep building your event.
What's next
Your emails are ready, but they will not go anywhere until you schedule them. That happens when you launch. Launch Your Listening Event | Point-In-Time walks you through scheduling them for a Point-In-Time event, and Send Invitations and Reminders | Lifecycle covers Lifecycle events.
Was this article helpful?
That’s Great!
Thank you for your feedback
Sorry! We couldn't be helpful
Thank you for your feedback
Feedback sent
We appreciate your effort and will try to fix the article