Analyze
A four step workflow that takes you from an empty group to a finished one, ready for people to be added.
Building a reporting group is a guided workflow. You name it, choose the reports, choose the demographics, then look over what you built. Four screens, and the workflow keeps you moving forward through them.
Adding people comes after the group exists, and activating them comes after that. Neither is part of this workflow.
New to this
If you have not set up a reporting group before, start with Create & Manage Reporting Groups for an Event. It explains what these settings actually control before you start clicking them.
Getting to the right screen
Reporting groups live inside the reporting for your event, not in a separate admin area.
- Log in to the Perceptyx Platform.
- Open Advanced Reporting for your listening event.
- In the left navigation panel, click Report Editor, then click the Permissions tab.
Step 1: Name the group
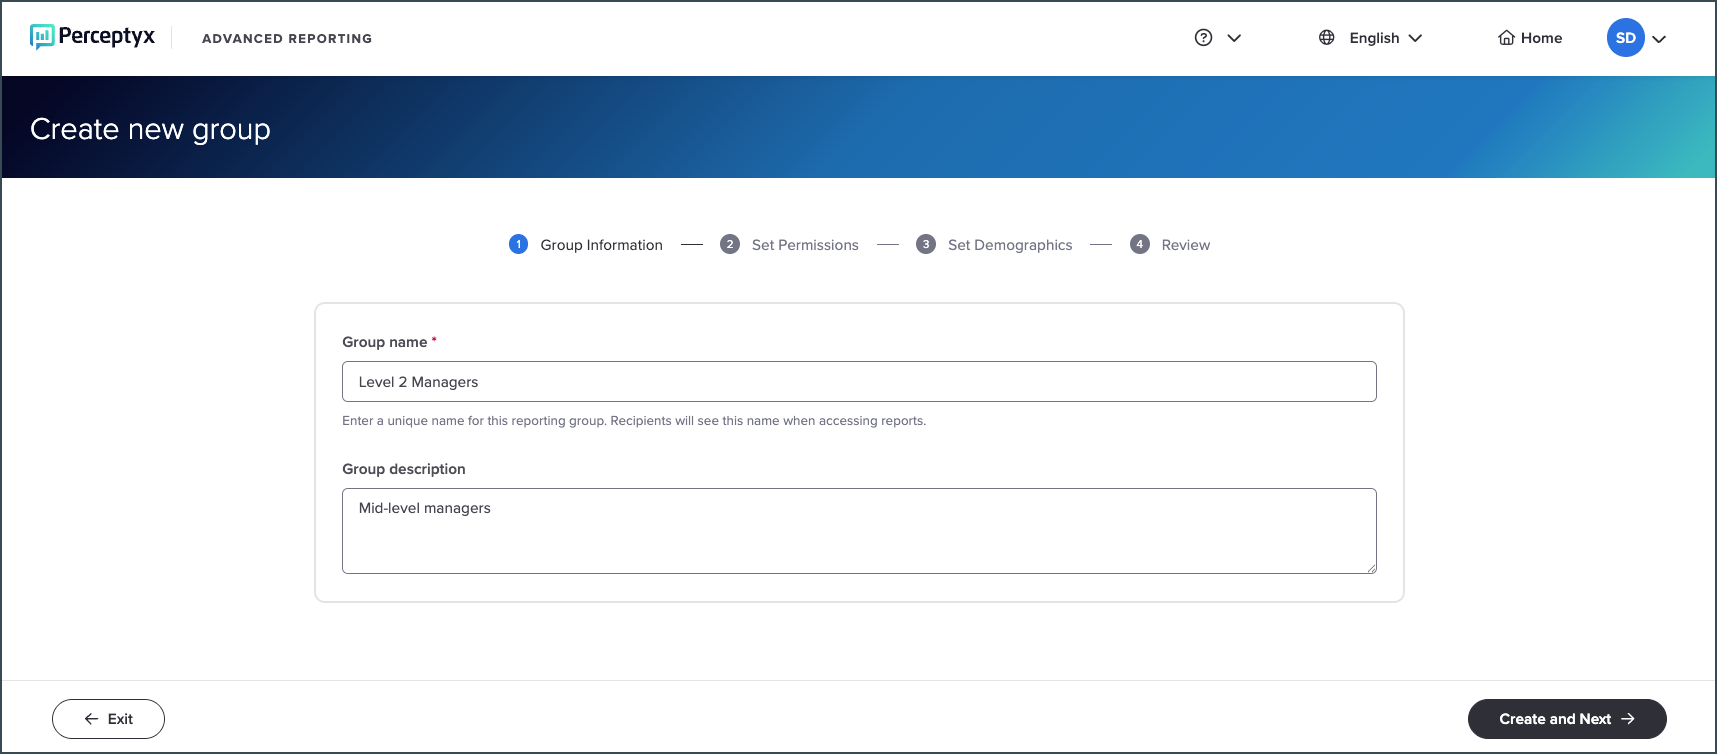
Pick something clear, because the people you add will see this group name when they open their reports. The workflow itself is titled Create new group, and the four screens are named Group Information, Set Permissions, Set Demographics, and Review.
- Click + Add New Group at the top right. The setup workflow opens.
- Type a name in Group name. It has to be different from your other group names for this event, and Create and Next stays greyed out until you enter one.
- Add something in Group description if you want. This one is optional.
- Click Create and Next.
Step 2: Choose the reports
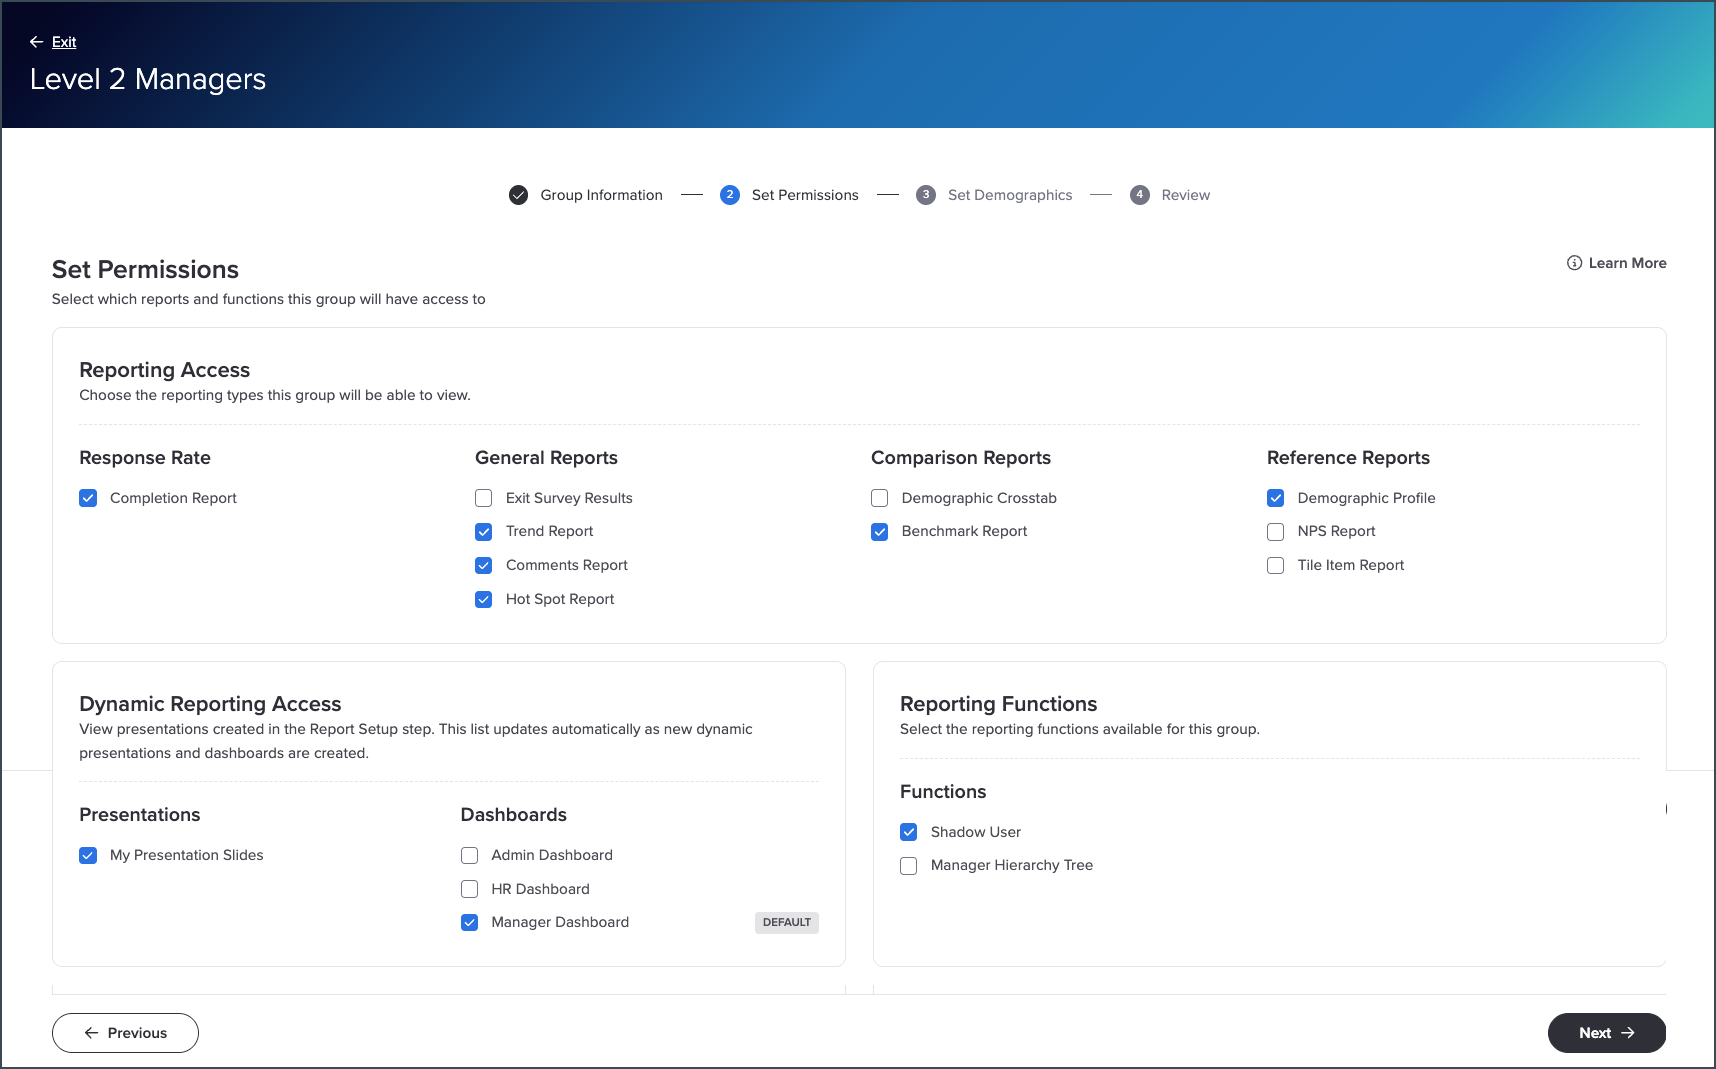
This screen decides which doors the group can open. Alongside reports, there are two reporting features you can hand out:
- Manager Hierarchy Tree
- Shadow User, which lets somebody see reporting the way another person sees it
You can also give the group dashboards and presentations built with the Dashboard Builder or the Presentation Builder. A report dashboard is included without you doing anything.
Note
Everything on this screen is about which reports open, not whose data is inside them. Whose data comes later, when you add people and set their population access.
- Under Reporting Access, tick each report the group should be able to open. The reports are laid out in four columns: Response Rate, General Reports, Comparison Reports, and Reference Reports.
- Check Dynamic Reporting Access. Some items here come already ticked, so untick anything this group should not have.
- Click Set as default beside the dashboard you want people to land on when they open reporting. Anything else you left ticked shows up as an option in their left navigation panel.
- Under Reporting Functions, tick the features you want the group to have.
- Click Next.
Step 3: Choose the filters
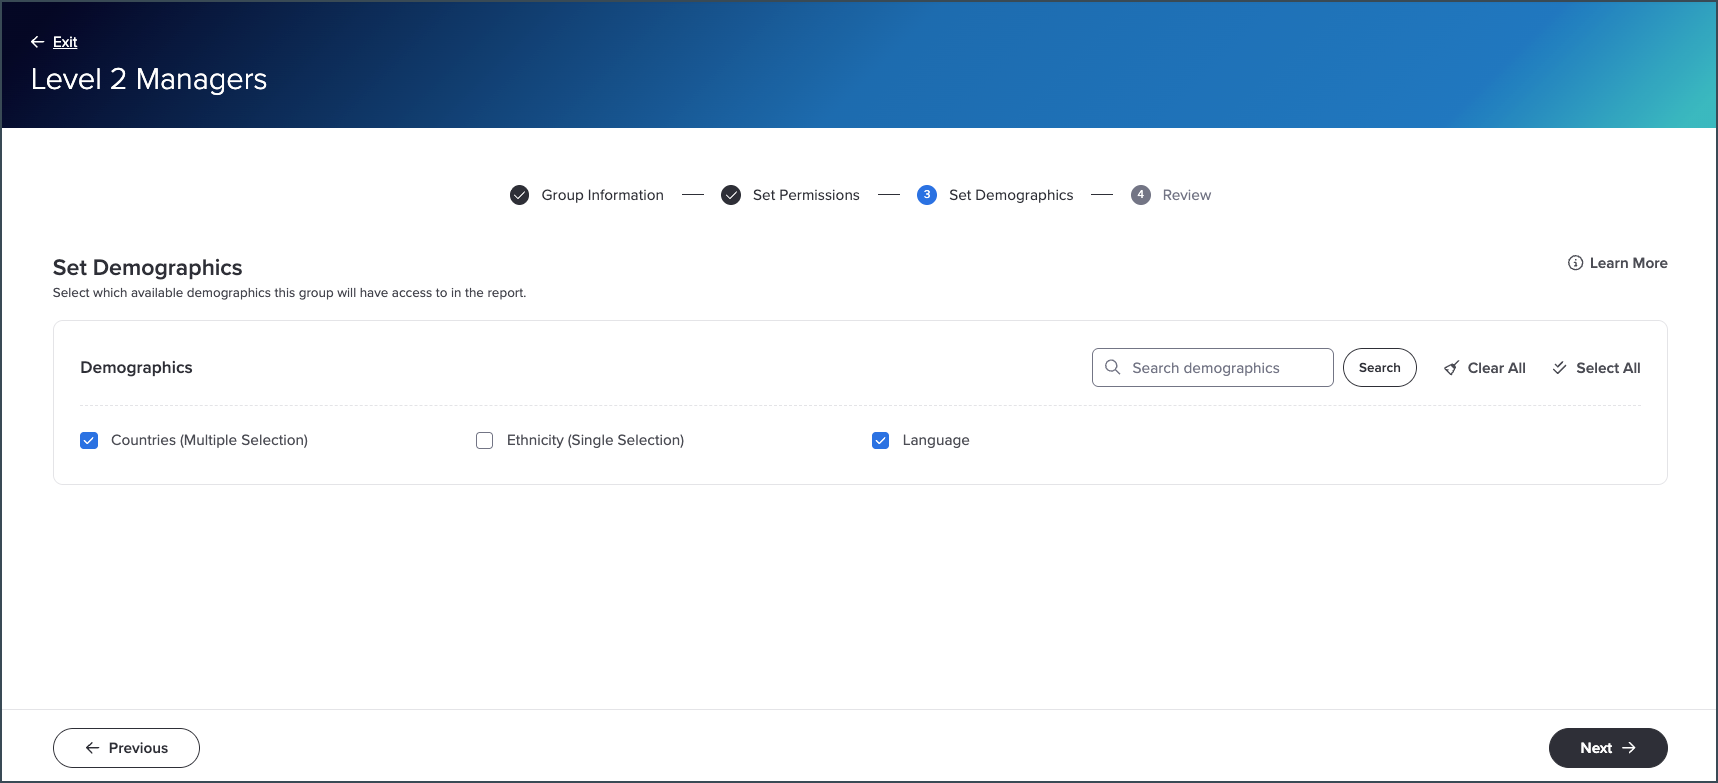
Demographics are the ways a person can slice the data once they are inside a report. Tick the ones this group should be able to use.
Note
Ticking a demographic here only adds a filter. It never gives anyone responses they did not already have access to.
- Under Demographics, tick each demographic the group can filter by.
- Click Next.
Tip
If the list is long, click Select All and then untick the few you do not want. There is also Clear All, and a search box with its own Search button for finding one demographic quickly.
Step 4: Look it over
The last screen lays out everything you just picked. Read it properly. It is much easier to fix here than after people are in the group.
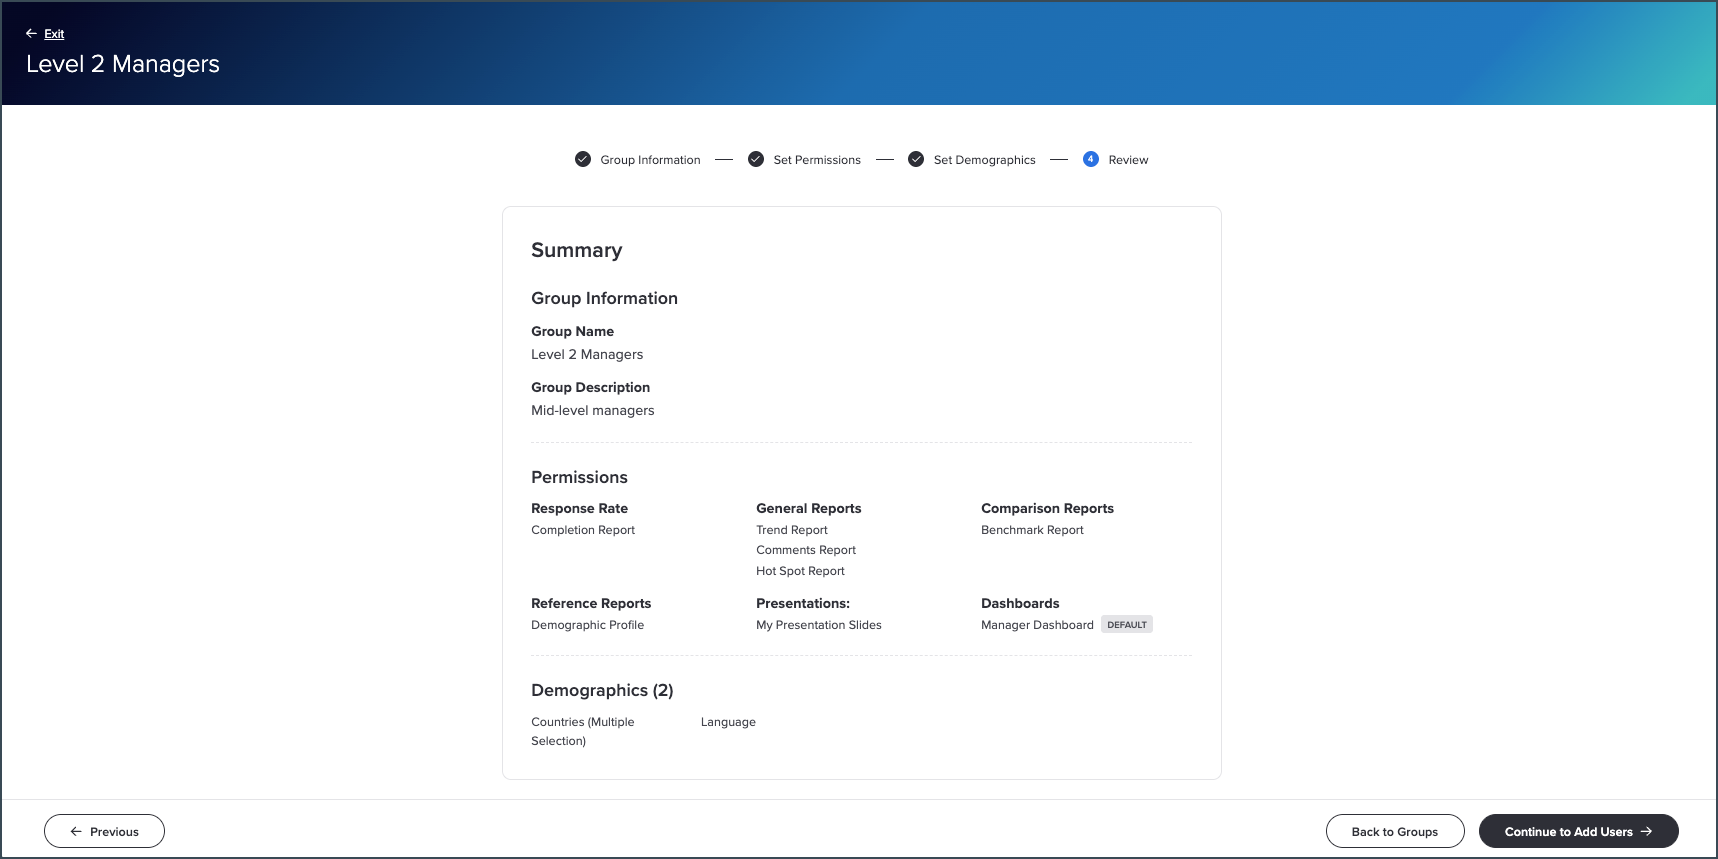
- Read through the summary.
- To change something, click Previous until you reach the screen you need, make the change, then come forward again and check the summary once more.
- When it looks right, click Continue to Add Users.
That button drops you straight onto the user assignment screen. Pick up from there in Add Users to a Reporting Group.
If you stop partway
Leave before finishing all four steps, using Exit at the bottom left, and the group saves as a draft. Nothing is lost. Find it on the Permissions tab and click Complete Setup to carry on.
What comes next
Was this article helpful?
That’s Great!
Thank you for your feedback
Sorry! We couldn't be helpful
Thank you for your feedback
Feedback sent
We appreciate your effort and will try to fix the article