Listen
Before anyone takes your event, take it yourself. Preview shows you your event exactly the way participants will see it, and lets you share a look with people who never log in to the platform.
This article covers Point-In-Time and Lifecycle events. Once you are in the Content phase, a Preview Listening Event button sits at the top of the page. Click it and your event opens in a new browser tab, start to finish, so you can click through it like a participant would. It is the best way to catch a typo, a missing question, or logic that is not doing what you expected before you launch.
Note
Building your event from scratch? Preview becomes available once you have added at least one question.
This article walks through
Two Ways to Preview
When you click Preview Listening Event, you pick one of two views:
- Default View shows the whole event. Any skip or display logic you set up on your pages and questions still works, so answering a question one way can send you somewhere different than answering it another way.
- Demographic View shows the event as a specific group of participants will see it, like everyone in Europe or everyone in Sales. Use it when some of your content only shows up for certain groups, based on the demographics in your participant file.
Both views let you share what you are looking at with other people, even if they do not have access to the platform. That makes preview a handy way to get feedback or a sign-off before launch.
Preview an Event in Default View
If your event does not show different content to different groups, Default View is all you need.
- Open the Content phase of your event. From the Listen page, find your event and click Manage Event, then click Content in the left panel. If you are already in the Event Builder, just click Content.
- At the top of the page, click Preview Listening Event, then click Default View.
- Your event opens in a new browser tab with a message letting you know you are in preview mode and nothing you answer will be saved. Click Continue.
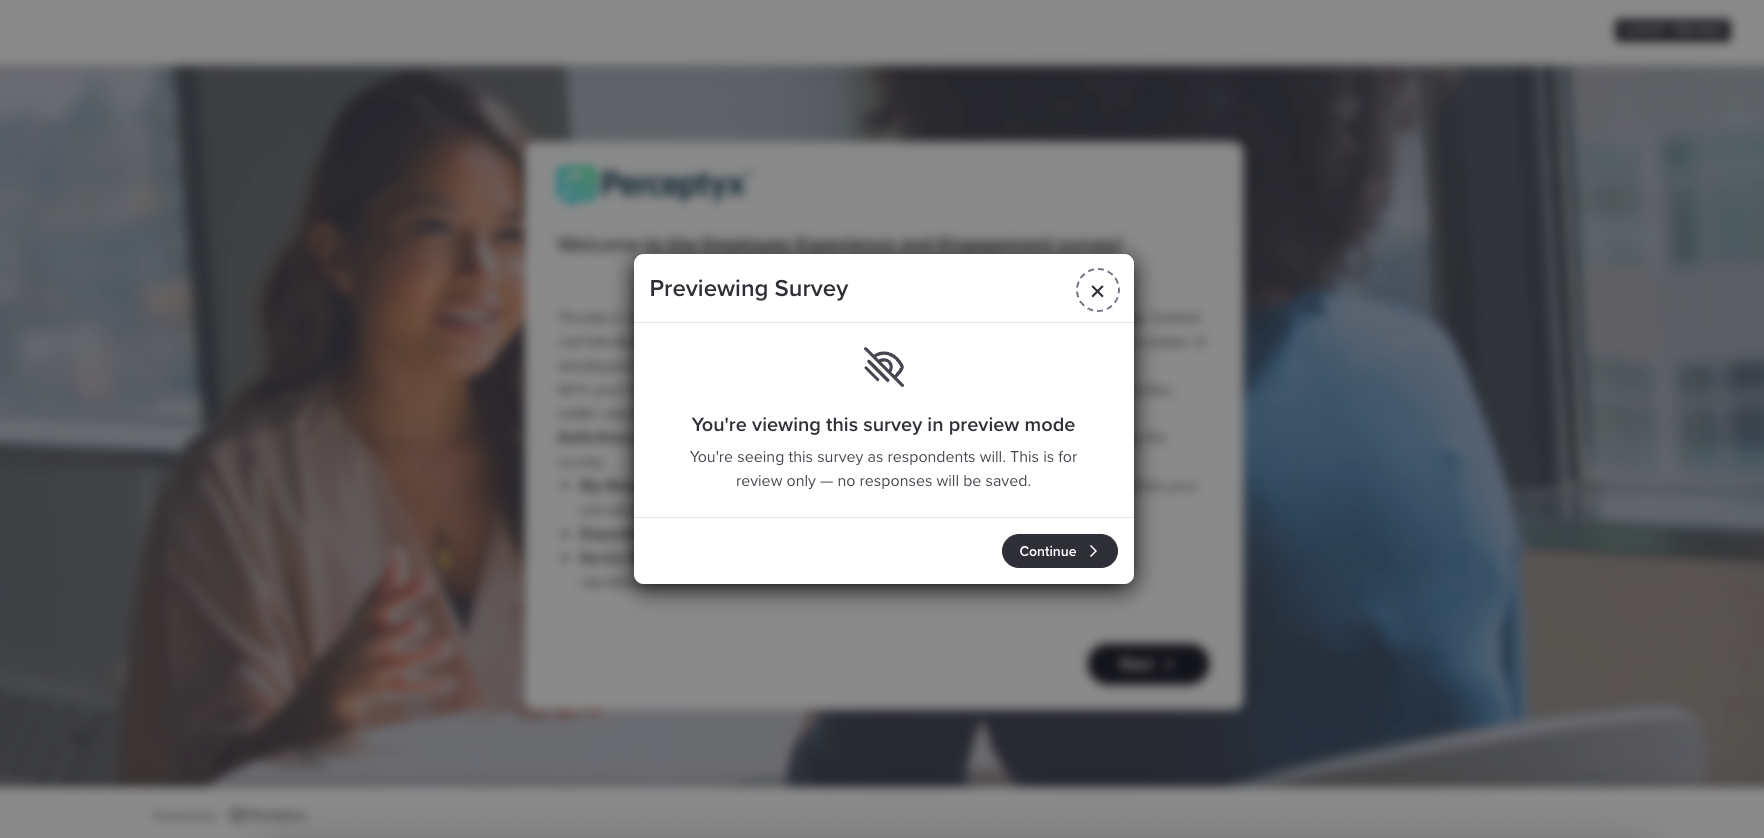
- Click through the event and answer the questions. If you want to see the Thank You page, go ahead and submit.
- When you are done, close the browser tab.
Tip
Want someone else to take a look? Copy the address from the preview tab and send it to them. They can click through the whole event without logging in to the platform.
Preview an Event in Demographic View
If you have set up logic that shows or hides content based on the demographics in your participant file, Demographic View lets you check that each group gets the right experience. You do this by applying a filter, like Region: Europe, and previewing the event through that group's eyes. Apply Conditional Logic to Event Content | Point-In-Time & Lifecycle covers how to set up that logic.
Here is the example we will use: an event with two extra questions that only European participants see. Participants in North America should not see them at all.
There are two ways to go about it:
- Just checking it yourself? Build a filter, preview, and move on. Nothing needs to be saved.
- Need other people to review it? Save a filter for each group. Every saved filter gets its own link you can share.
Preview a group yourself
- Open the Content phase of your event. From the Listen page, find your event and click Manage Event, then click Content in the left panel. If you are already in the Event Builder, just click Content.
- At the top of the page, click Preview Listening Event, then click Demographic View. A new tab opens with a quick rundown of how Demographic View works.
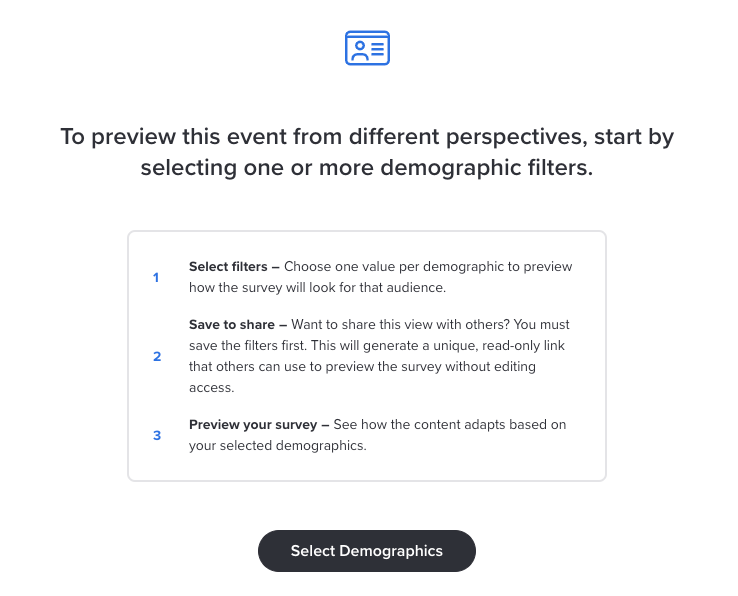
- Click Select Demographics. The Filters dialog opens with the demographics from your participant file.
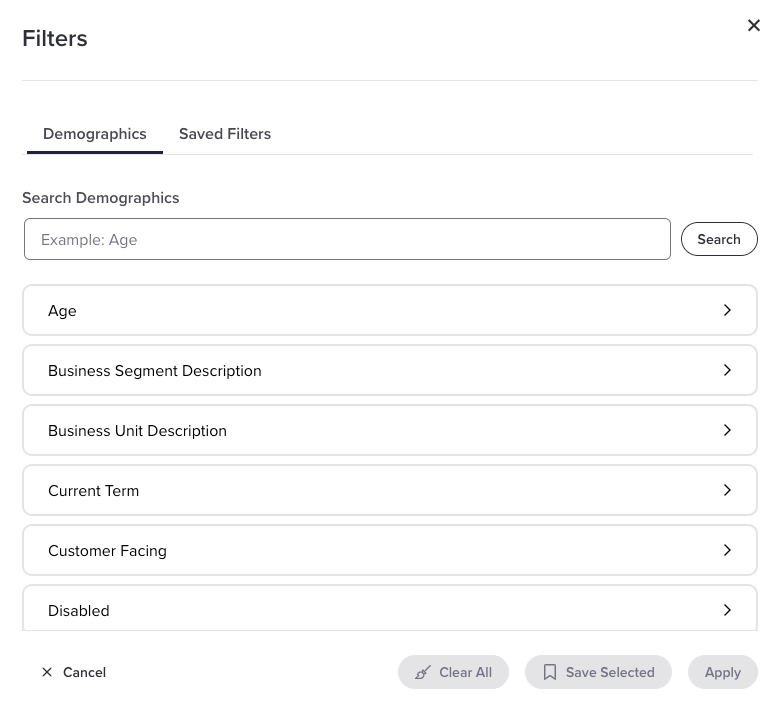
- Click a demographic to see its values. You can use the search box to find one quickly. In our example, that is Region.
- Select one value for that demographic. In our example, pick North America.
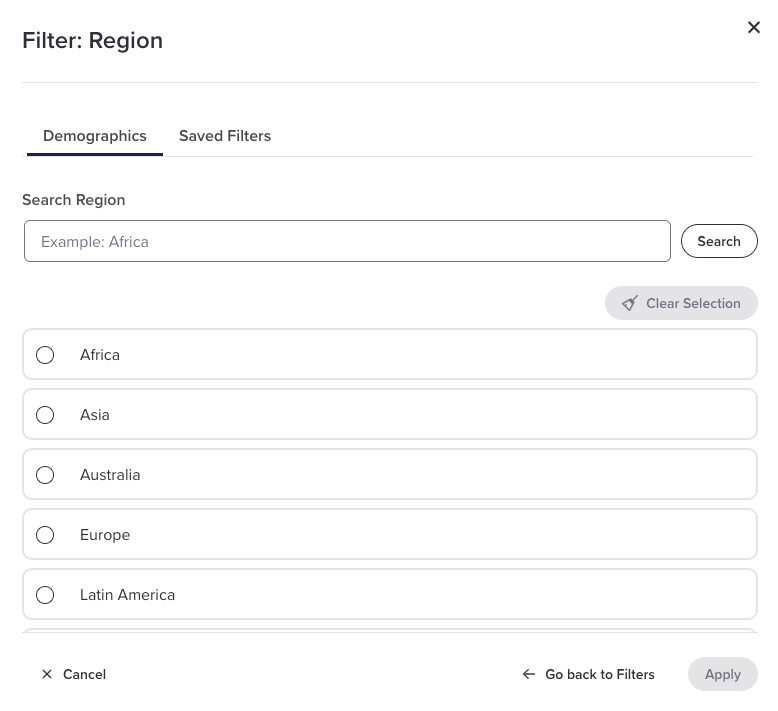
- Click Apply. The Event Summary screen shows the filter you applied, how many questions that group will see, and which question types are included. In our example, 22 of 24 questions are visible, because the two Europe-only questions are hidden.
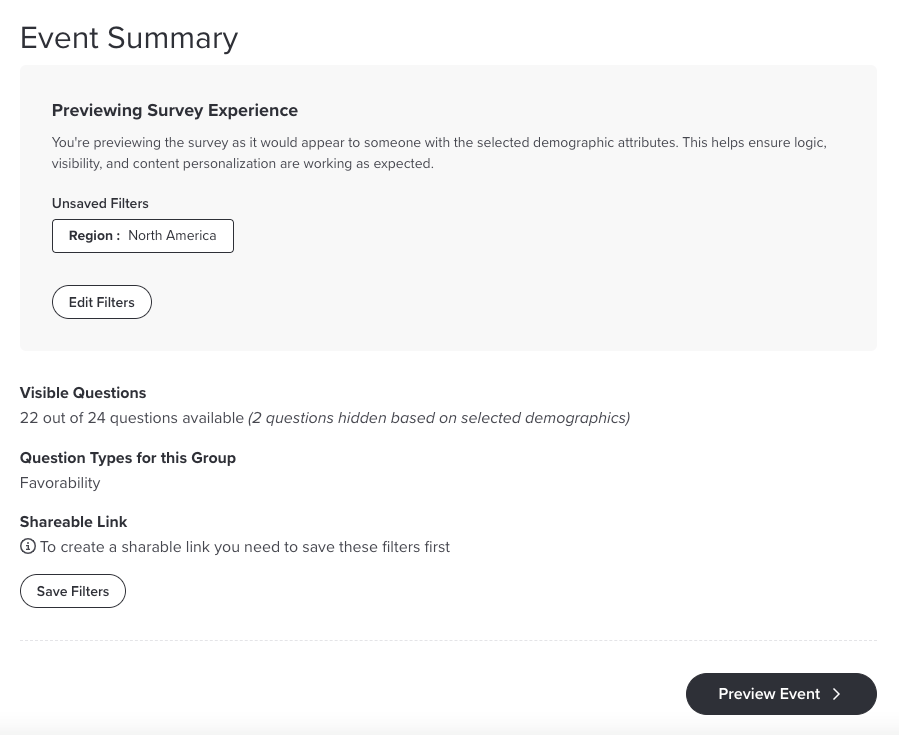
- Click Preview Event. The event opens in another tab, showing only what that group will see. Click through to make sure it looks right.
- Close the preview tab to get back to the Event Summary screen.
To check another group, click Edit Filters, select a different value (in our example, Europe), click Apply, and then Preview Event. For the Europe filter, the Event Summary shows all 24 questions with none hidden.

When you are finished, close the Event Summary tab to return to your event.
Create shareable links for each group
To send a group's view to someone else, save a filter for that group. Each saved filter gets its own link. In our example, you would save one filter for North America and one for Europe, then share each link with the right reviewers. Anyone who opens a link sees the Event Summary for that group and can preview the event, but they cannot make any changes.
- Build and apply your first filter. Steps 1 through 6 in the section above walk through it.
- On the Event Summary screen, click Save Filters. Type a name in the Filter Name box, then click Save Filter. The Filters dialog opens on the Saved Filters tab.
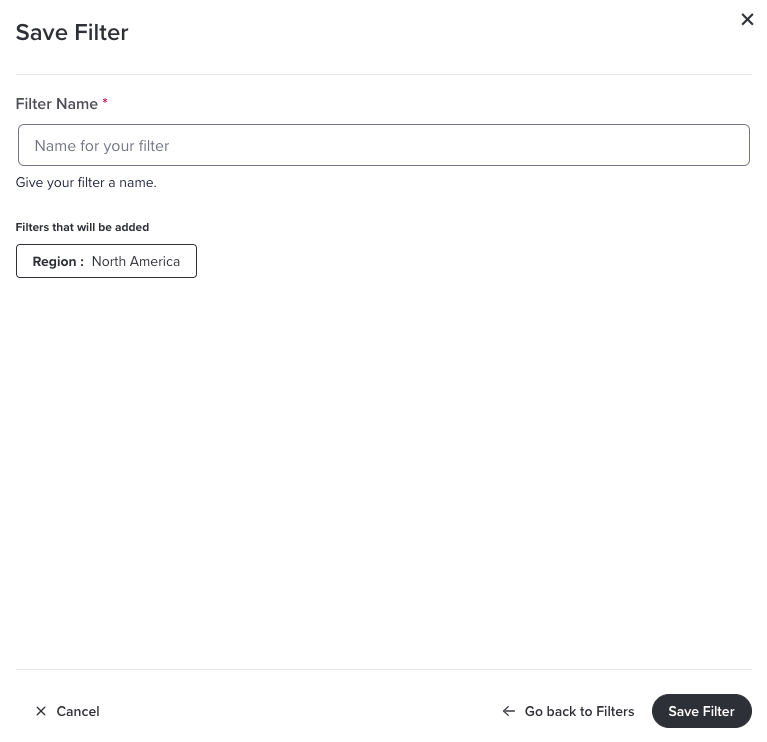
- Need a filter for another group? Click Clear Selection, then Go back to Filters. Select the next value, click Apply, and save it the same way you did in step 2.
- On the Saved Filters tab, select the filter you want a link for and click Apply and Save.
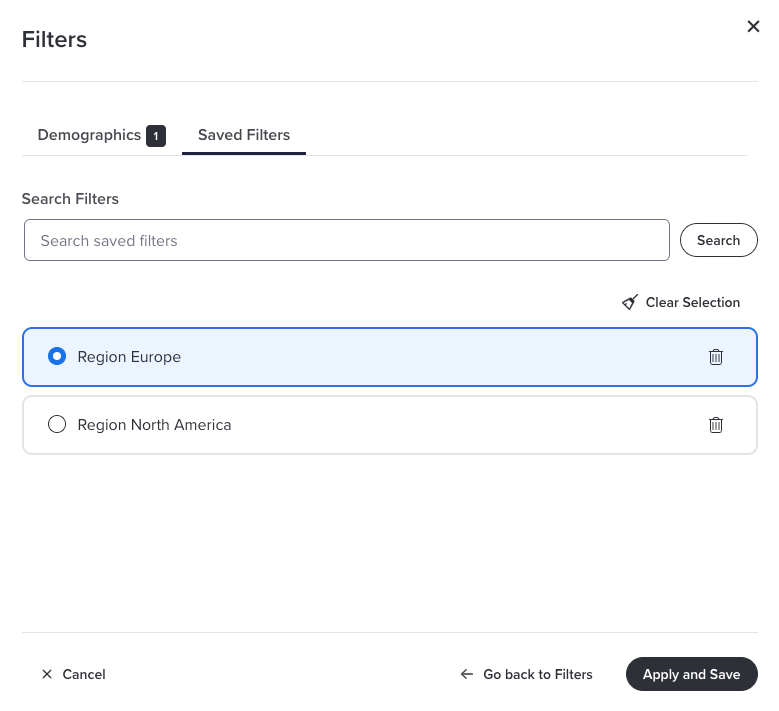
- The Event Summary screen now shows a Shareable Link for that group. Click Copy Link and paste it wherever you need it, like an email or a chat message.
Screenshot placeholder
The Event Summary screen after clicking Apply and Save on the Region Europe saved filter. It shows Saved Filters: Region Europe with the Region: Europe tag, 24 out of 24 questions available, the question types for the group, and a Shareable Link section with the link and the Copy Link button next to it, plus Preview Event at the bottom right. Capture this in a customer-facing environment so the link shows a production address, not a test one.
- To get the link for another group, click Edit Filters, select that group's saved filter, click Apply and Save, and then Copy Link.
- When you are done, close the Event Summary tab to return to your event.
Note
Each link is tied to its saved filter. If you delete a saved filter, the link for it stops working, so hang on to your filters until everyone has finished reviewing.
What's next
Happy with how your content works? Now make it look like it came from your organization. Style Your Event | Point-In-Time & Lifecycle walks you through colors, fonts, layout, and images.
Was this article helpful?
That’s Great!
Thank you for your feedback
Sorry! We couldn't be helpful
Thank you for your feedback
Feedback sent
We appreciate your effort and will try to fix the article